Filling Engraving

Signed-In Members Don't See This Ad

Kenny Durrant

Member
Joined
Sep 11, 2012
Messages
2,658
Location
Sachse Tx. 75048
Not sure where to post this so I figured I'd put it here. One of the best investments I've made as far as tools go is a laser engraver. I've really enjoyed playing with it. My question to those that do the same is how do you fill the engraving? I like the smooth finish so I feel I need to fill it. As of now I use a plastic drinking straw with a sharp angle cut at one end. I dip the point in CA and dab the glue in the engraved area. Like the feather quill and ink well. So far this works ok but I thought I check to see if someone has come up with a better way. Any tips and comments are welcome. Thanks
 
Signed-In Members Don't See This Ad
I've been working on filling engravings since spring this year. In my case, I wasn't looking for just clear CA fill...I was looking to fill my engravings (which are often very fine, thin channels) with colored inlay of some kind.

This hasn't been easy. The problem I have had, including with CA, is that whatever I use to fill the engraving usually tends to wick into the wood grains.

I recently picked up GluBoost Fill 'n Finish Ultra Thin. My hope is that the ultra thin will penetrate the grain within and around the engraving, fully seal it, allowing me to use GluBoost with their Master Tint to color the glue for filling. I haven't actually tried this yet (ultra thin is brand new and I just received my bottle last night).

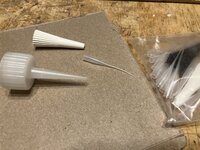
I was actually wondering how I'd fill the engraving, and the straw idea sounds like a nice option. I've also used cheap needles/pins to pick up the CA and push it into the engraving.

Another big challenge I've had is the fill not fully penetrating to the bottom of the engraved channels everywhere, then just getting pulled out during sanding or other later processing of the blank. Hoping that if I use GluBoost throughout, then I can just cover the CA filling the engraving with more coats of the same CA, and that will resolve the issue. I guess it depends on how smooth the infill comes out, and whether or not I feel it needs some leveling before I continue to add more coats. In any case, I've tried using epoxy, gel stains, milk paint, and CA direct on the wood, and none of that has worked so far. Always wicks into the grain, ruining the inlay.

I did try to seal the wood a few times, which works deeper in the engraving, but for any open grain wood, the infill would fill the open grain on the surface, which generally also ruins the inlay (I took a pin to try and clear the grains, that only goes so far). Hoping that some ultra thin GB to seal the grain throughout, then maybe a bit of careful work to seal any open surface grain, then fill the engraving, will work.

I would say, if your goal is simply to fill the engraving with clear CA, you can just do that with a thin CA while you are finishing normally. Just don't use accelerator on the first coat, let it soak in. On the second coat give it some time to sink into the engraving, then a light blast of accelerator. If you still need to fill, then either another coat of thin or medium should do. I just finished 15 pens with engravings using GluBoost. The thin (orange bottle) goes right into the engraving and I usually used two to three coats. Then the rest was blue, with a final coat or two of thin. Each engraving was filled just fine. ONE pen looked like it had just a tiny bit of air in a couple of the grains at the bottom of the engraving after I had polished the finish. I think that was the first pen I tried, and I don't think I waited long enough for the thin to really soak into the wood before I used accelerator.
 
Last edited:
Thanks Jon. You gave me several things to look into. I use Mercury Thin Flex CA. Nothing against Glue Boost just closer and cheaper for me to get locally. The color fill will be the next step for me. As far as sealing I put 2 coats of the thin Ca after sanding the pen. That will be the same brand I finish the pen. It seals the wood so after burning I take a rag with a little DNA to wipe off the over burn. No issues with staining the wood. I start on a wide part of the engraving and use the point of the straw to drag the CA into the finer areas. I have a couple of old plastic tubes with needles we used to oil fishing reels with. I thought about cleaning out the oil and putting CA in but not sure if it will clog the needle. Another tip I stumbled on is I was holding the tube with one hand and sanding with the other to level out the glue. I mounted the tube on the lathe and with the lathe off I took sand paper and buffed it like I would polish a pair of shoes. It was much easier to do plus cut back in making flat spots.
 
Well I'm kind of ashamed to admit this but maybe it will help others. I decided to You Tube this process to see what might be out there. I saw a guy using these. As soon as I saw it I remembered I had some from when I bought a bottle of Star Bond CA. I didn't know what they were for so I tossed them in a drawer and forgot about them. I just checked and the tops won't fit the Mercury or Glue Boost bottles. I don't know if they offer something similar or not.
 

Attachments

  • IMG_3770.jpeg
    IMG_3770.jpeg
    381.8 KB · Views: 78
Hand engravers traditionally use matte black enamel paint thinner a bit with lighter fluid to fill background areas. I am not sure how that translates to laser engravings or non-metal surfaces, but could be worth a try.
 
I'm not sure if this is what you are looking for or not but I use this on acrylics. I have also occasionally used it on wood but I don't usually fill wood. if I fill wood I usually put a couple of coats of CA on, then engrave, then finish the pen filling the engraving as I go.

 
Last edited:
Thanks for your input. My initial request was asking about an easy way to fill the engraving with CA. After researching a little more I think I've found a couple of options. As mentioned before color fill is my next step so the added information is well appreciated. Thanks to all that has added to the conversation.
 
In the distant past we used to restore certain business machine "engraved" (actually rotary stamped) scales with "Engravers Lacquer sticks".

I checked and they are still available. Amazon, $8.00. Hope this is helpful.
 
Well I'm kind of ashamed to admit this but maybe it will help others. I decided to You Tube this process to see what might be out there. I saw a guy using these. As soon as I saw it I remembered I had some from when I bought a bottle of Star Bond CA. I didn't know what they were for so I tossed them in a drawer and forgot about them. I just checked and the tops won't fit the Mercury or Glue Boost bottles. I don't know if they offer something similar or not.
Whiptail applicators. You can buy packages of 50 or 100 of them. I now use my CA bottles exclusively with whiptails, as otherwise I get too much CA out of the bottle...either for applying finish, or filling cracks, filling engravings, etc.

They are usually a tight fit. You need to clean/cut off any existing dried CA on your bottle nozzle first. Then you need to just work the end of the whiptail over the nozzle. It takes some force, but you need that to ensure that it stays on when you are applying the glue.
 
I really like gluboost it will get into the image as nd seal and have a smooth layer works great. The best way I have found is to turn your piece down to the shape you want. I then seal with gluboost or ca glue usually thin and sand through all micro mesh pads. Then engrave the image I want kinda deep. Then you can use Lacquer sticks to fill the engraving. Then I will use gluboost to seal it.
Here a a couple I did recently.they where gifts one was a logo the other for my brothers friend. Takes time to get it right these where actually on acrylic.
 

Attachments

  • IMG_4977.jpeg
    IMG_4977.jpeg
    242.6 KB · Views: 101
  • IMG_4954.jpeg
    IMG_4954.jpeg
    206 KB · Views: 96
Back
Top Bottom