I'm seeking guidance on the proper way to assemble Woodcraft pen kit 14562, which is a European style twist pen; specifically concerning the center band. I have no experience with this style and the assembly instructions only show a solid center band, whereas this kit's band is in three pieces. I sent the following questions to Woodcraft's support team and awaiting their response.
Decided that it wouldn't hurt to also reach out to the community for inputs - happy new year")
Decided that it wouldn't hurt to also reach out to the community for inputs - happy new year
- Do the loose rings go between the center band and the cap, or between the center band and the body?
- Does the order of the loose rings matter?
- Are the loose rings glued/fixed to the cap or body separately from the center band?
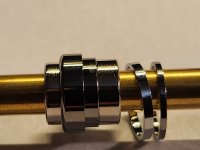
- Image 1: Full mandrel with loose rings between the center band and cap
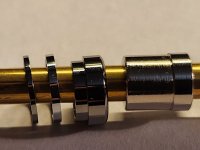
- Image 2: Close-up with loose rings between center band and body
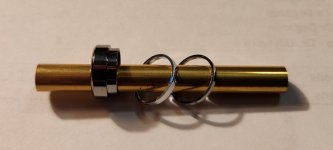
- Image 3: Close-up with loose rings between center band and cap