
You are using an out of date browser. It may not display this or other websites correctly.
You should upgrade or use an alternative browser.
You should upgrade or use an alternative browser.
Decals!
- Thread starter Madman1978
- Start date
Signed-In Members Don't See This Ad

Signed-In Members Don't See This Ad
Monty
Group Buy Coordinator
Looks good to me. 
BarrierBob
Member
It looks good to me also. Is the decal coated with CA?
Bats
Member
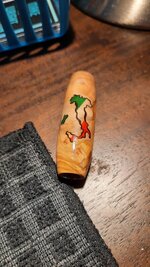
If you're talking about the lighter area surrounding the map (presumably the transparent area of the decal), I'd say the finish (you don't mention what you used) interacted with the wood to come out looking darker/amber-er, but the area under the decal was protected and stayed light. It might not happen if you put an even coat of finish on the whole blank, then applied the decal to that and finished over everything. Unless that's exactly what you did, in which case I'm out of ideas.
JohnU
Member
Sealing the wood with a CA finish always helps make the decal background more invisible, especially with water slide decals. Just be sure to finish the CA layer as you would for a finished pen. Any imperfections in the layer will be trapped and visible under the decal. If it's a sticker with adhesive you might have a harder time. They are thicker and their surface doesn't adhere as well to the pen as a waterslide decal.
Madman1978
Member
I use GluBoost so a CA
Water Slide Decal
3 coats after the decal.
Water Slide Decal
3 coats after the decal.
JohnU
Member
Could be a degas issue. Might have needed to cure over night before applying the water and decal.
Penultimate
Member
There are solutions used by modelers to hide the edges of waterslide decals. I've used them and they work. You can find them at Micromark.com.
JohnU
Member
A good finished CA finish under the decal will help hide the edges. Also, Instead of water you can use micro sol. It allows the decal to form to the surface better by softening it. Many model builders also use micro set to help the decal adhere but idk if its necessary since we apply CA over them. When I use it I allow the decal to dry for several hours to a day and on humid days I'll use a shop clamp light close to the blank to warm it but I would think blow dryer set on warm would also make sure it's dry before applying the CA. It might be overkill but I've had good luck with it.