mark james
IAP Collection, Curator
Spoiler alert - There is no finished pen, yet! This is a thread on methods.
Back in April "Skiprat" (Just Another Pen) suggested for folks to attempt a complete "360 degree Spiraling Chevron Pattern". I was really hoping someone else - anyone else… would step up so I could watch and learn. Alas, nobody has replied. "Hello, anyone out there???" (Would make a great song lyric!) Sigh, silence from my Segmenting Mentors.
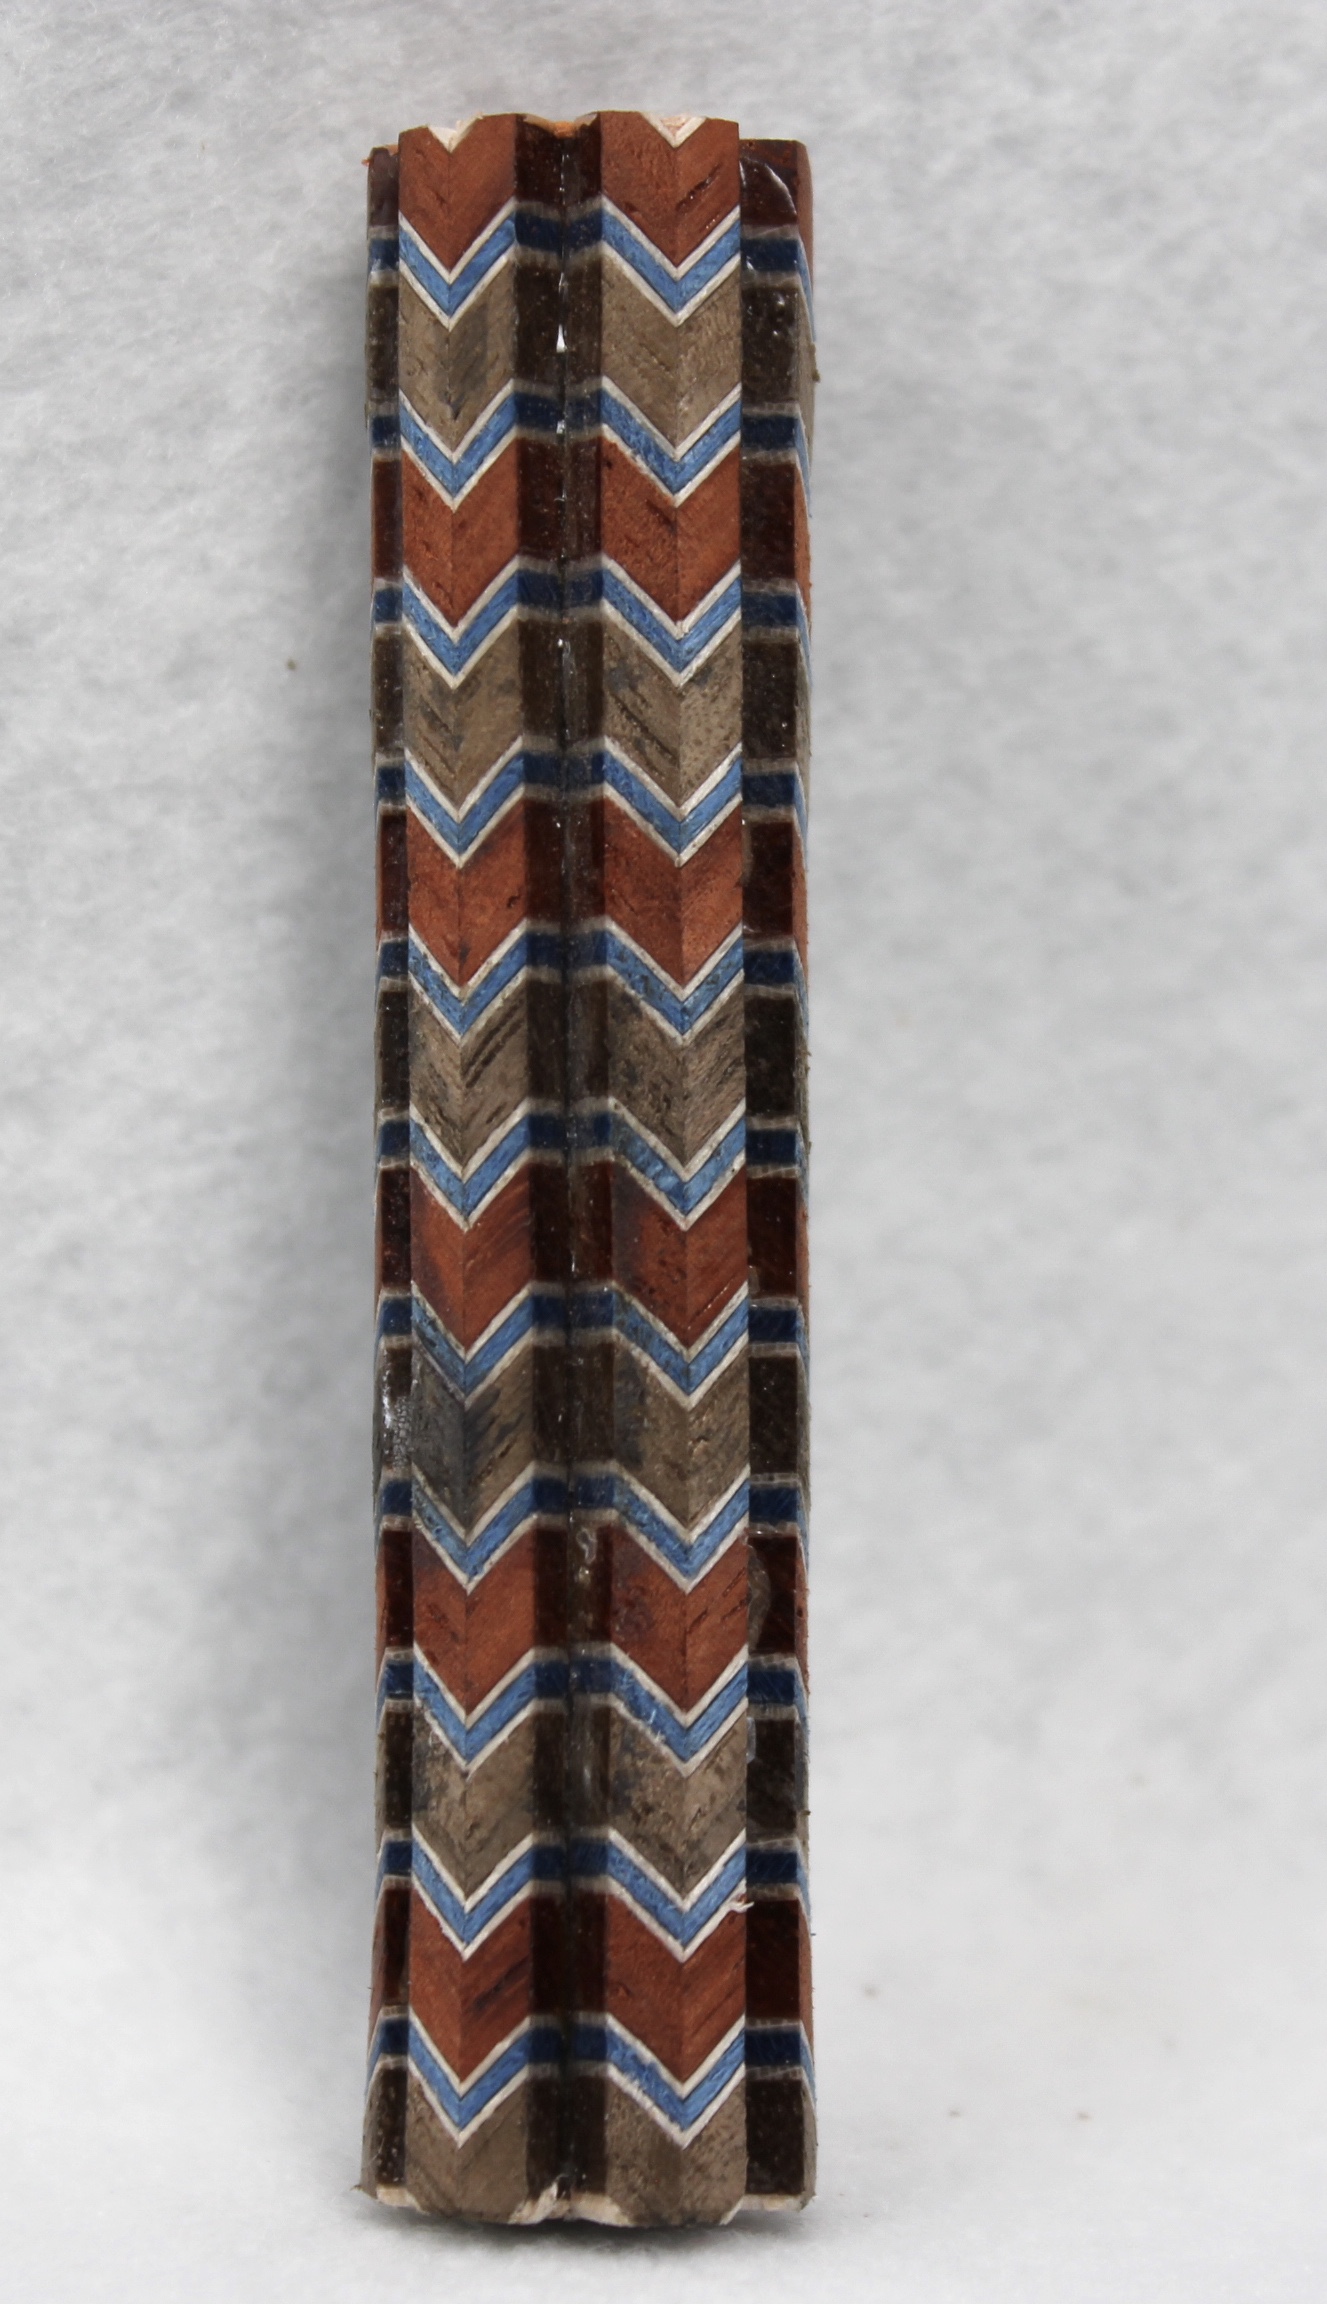
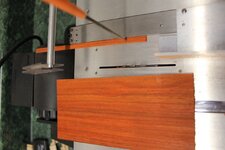
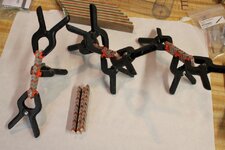
So, I contemplated several different methods, based on what I had done previously - Building a square blank with 4 Chevron inlays with spaced blocks on the corners. I could change the dimensions of the inlay thicknesses, but how to get rid of the small corner spacers?
View in Gallery
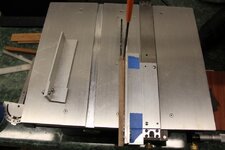
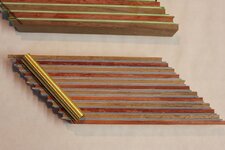
Or, construct Chevron inlays for slots cut into a round dowel (4, 5, 6, 7 slots).

View in Gallery
Same dilemma; on the finished pen there are the straight spacers.
I also thought of constructing 1/2 Chevrons cut from a basic block into even numbered pie shaped staves, flipping every other to give the 360 degree pattern. This method I had not tried before, and was skeptical of my skill set.
But, I believe each would work, with advantages and disadvantages for each method. Others may have better results than I anticipated.
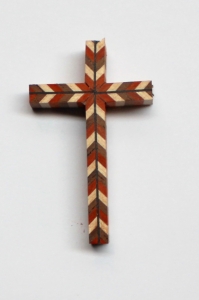
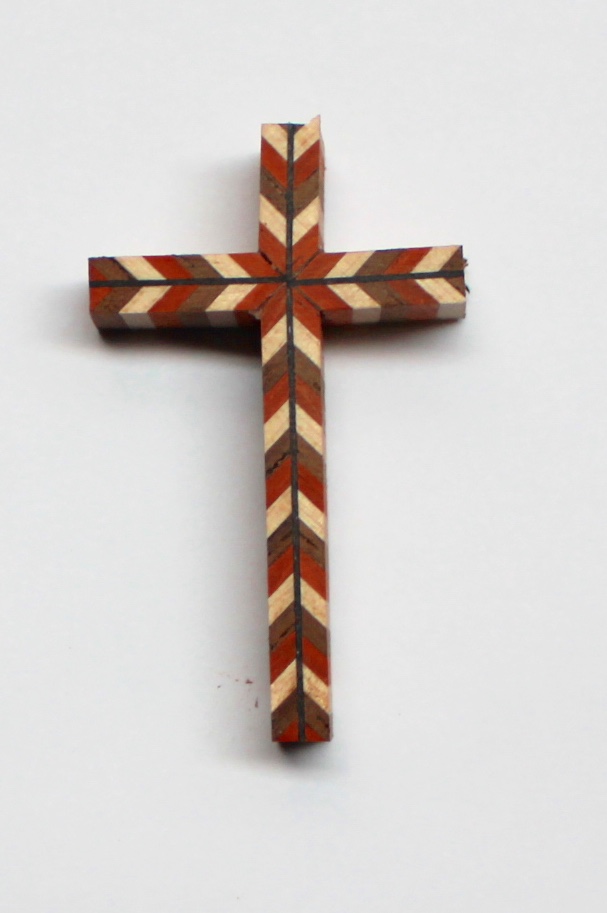
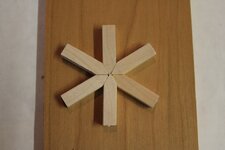
I then remembered that I actually had a similar method, which is how I constructed the Chevron Finials - sanding down points to meet in the middle.
View in Gallery
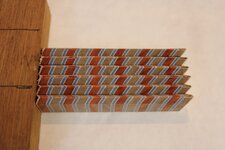
While the finial pattern was on the top, the same sanding technique should work on the side, I just needed to expand this from 1/4" long to 2 1/2" long, hopefully retaining the symmetry. I settled on constructing a basic Chevron inlay (anywhere from approximately .20"-.30" wide, 2 - 2/1/2" long. Then sanding each side to a measured point to assemble a polygon.
NOTE: I did poorly in High School Math, and remembered essentially none of this before diving into this project. Where was Don Ward when I was sleeping in Algebra II? And I readily acknowledge that my terminology and explanation may not be correct - Feel free to correct any of my mistakes! One reason for this thread is for others to take whatever you can and run with it.
I decided to try to construct this for the Knurl Kit with 8 Chevrons because of the approximate dimensions. My last effort had 7 Chevrons, and it was not a complete ring (although that was not the intent).
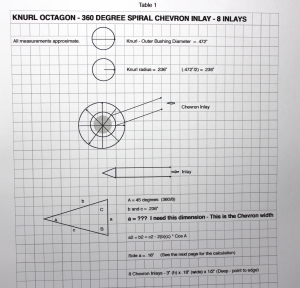
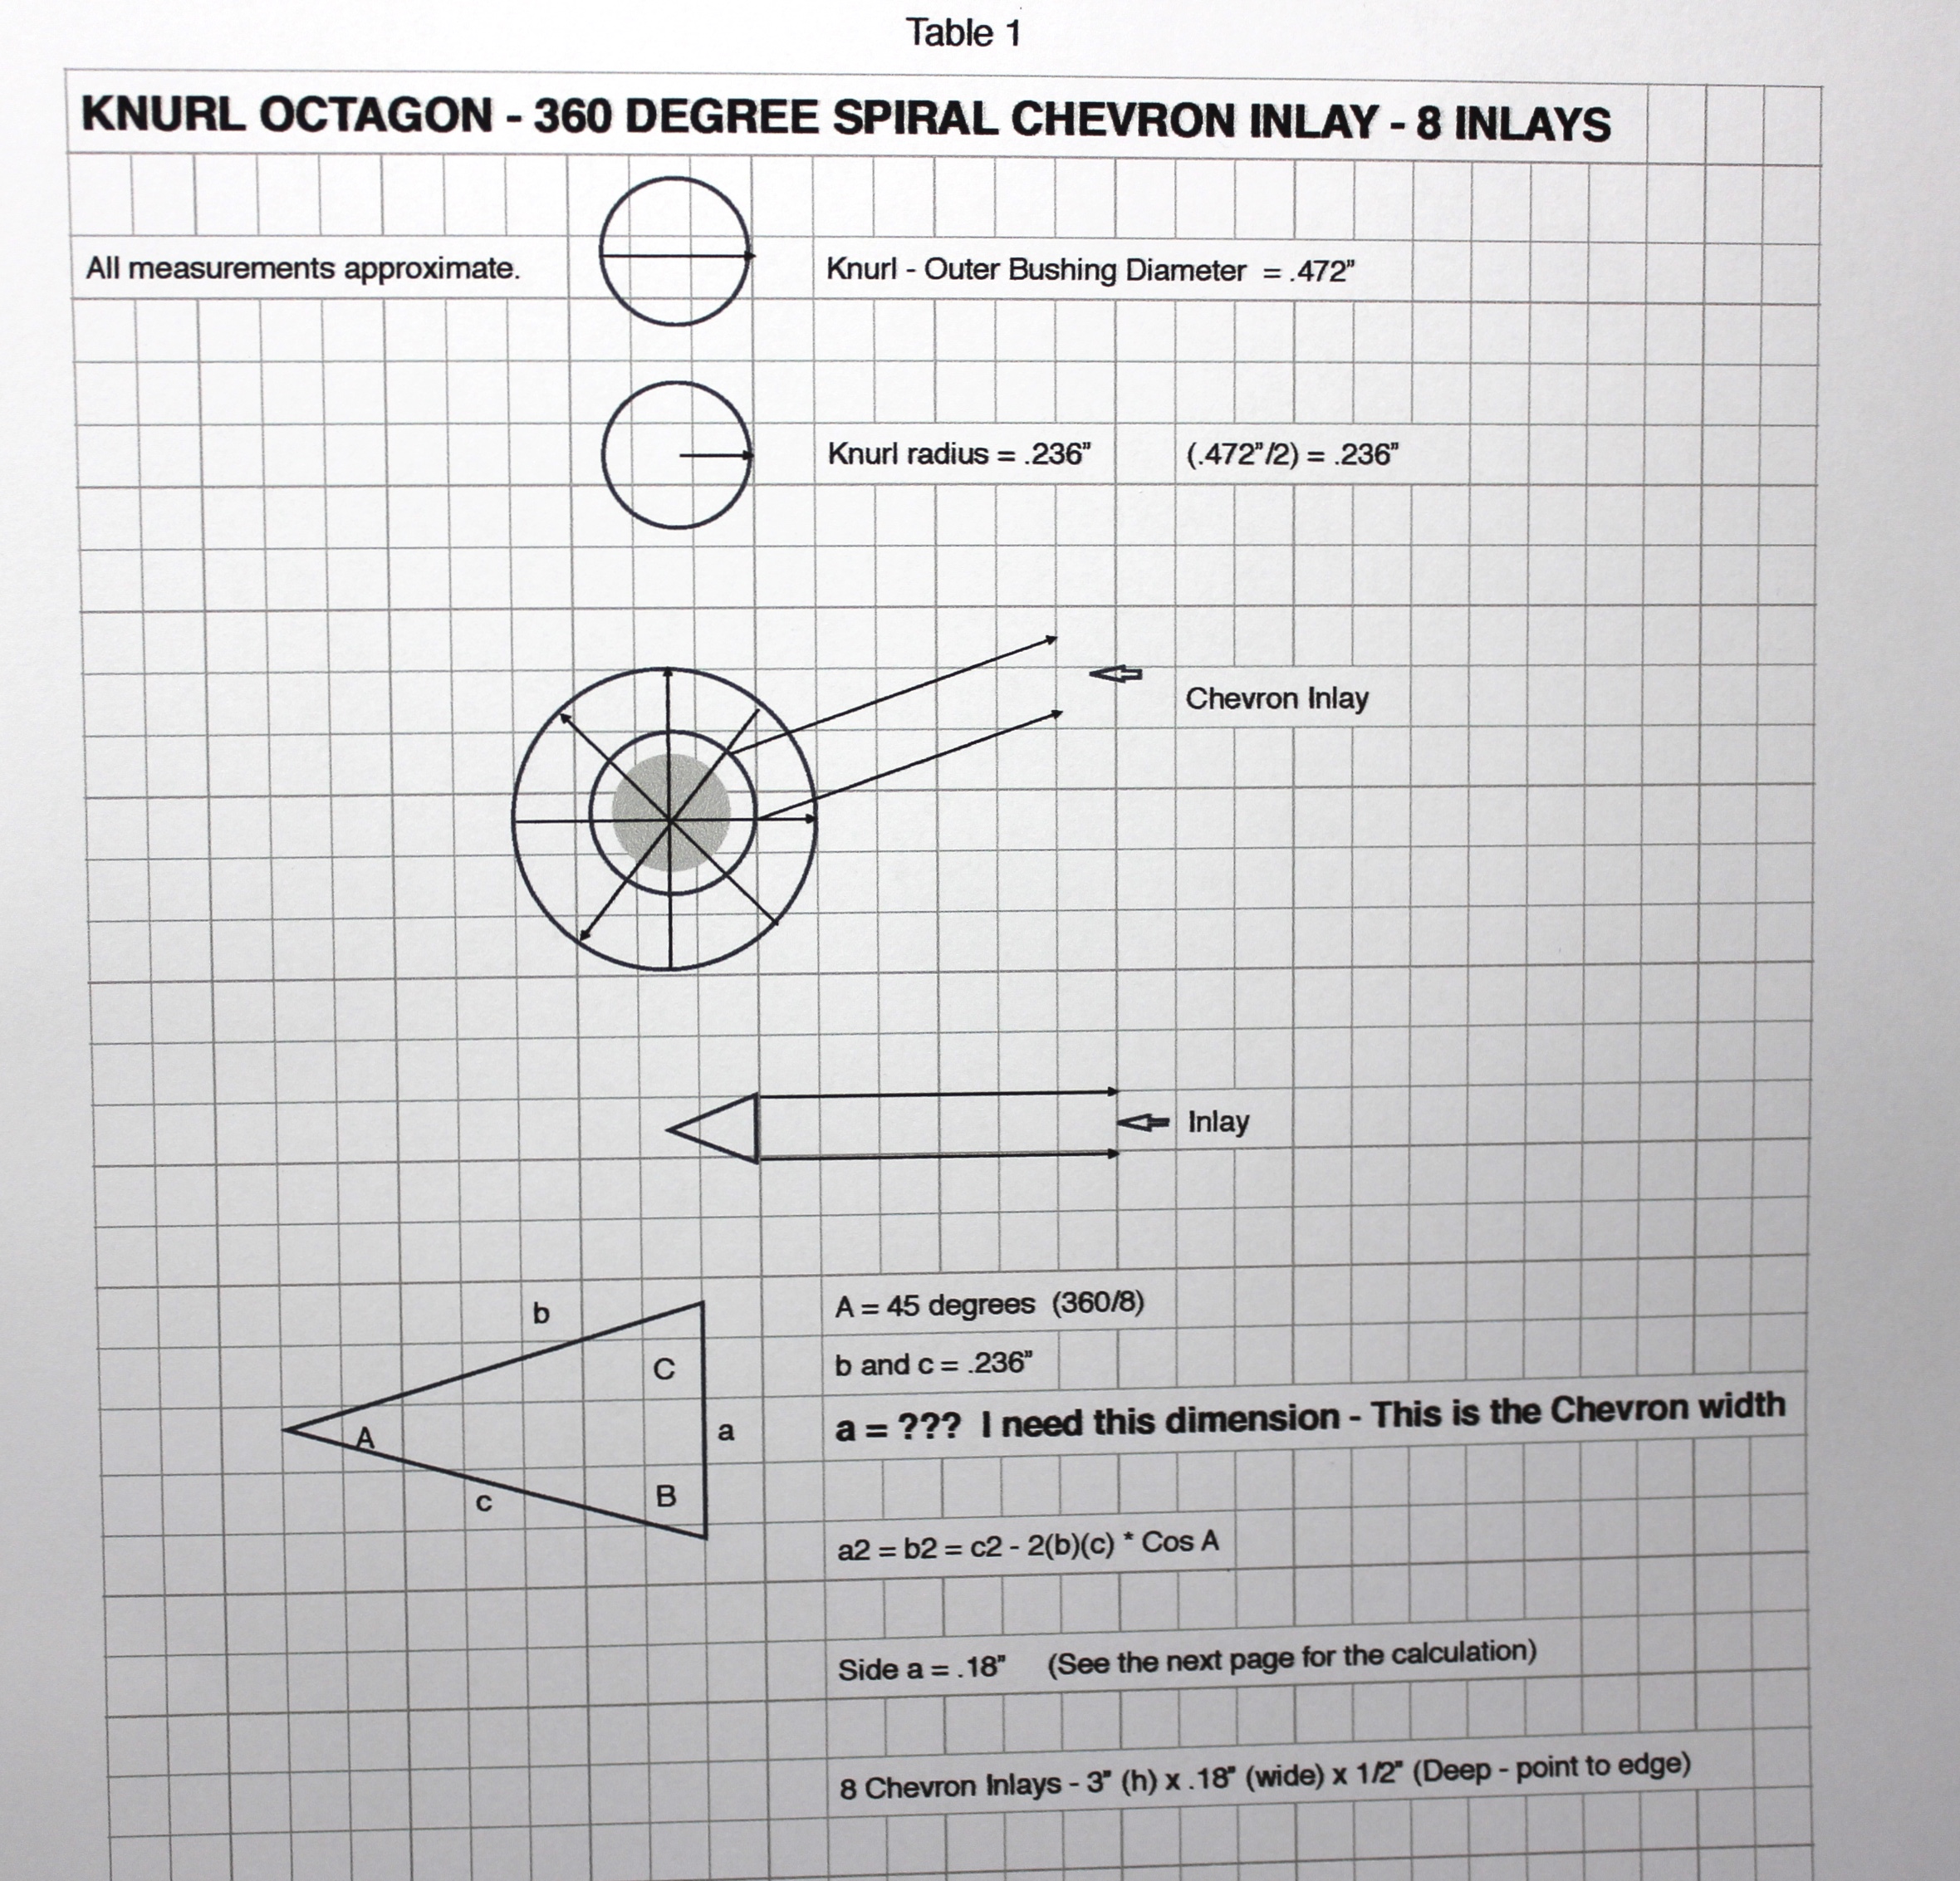
The desired pattern needed matching points for all 8 Chevrons around the circumference (Final outer diameter of the pen), with each Chevron the same outer width. After a rough sketch of the 8 Chevrons sanded to fit together, and drawing a ring for the final outer diameter, an Octagon appeared, and I suspected a way to get some dimensions.
The outer side of each Polygon (opposite the inner angle) - side "a" (lower case), needed to be very close to the radius of the final outer diameter of the pen (1/2 of the Diameter). These would be sides: "b" and "c" of the diagram below. (I told you it would get complicated… Keep reading, it gets worse if you are like me with a poor background in Math - but we can relearn.)
I needed to figure out the dimension of the side opposite to the inner angle because this is the width of each Chevron. In the equation, this side is "a" (a small a). This was my unknown.
The inner angle is "A" ( a capital A), which is 45 degrees (360 degrees/8).
The outer diameter of the finished Knurl Bushing is .472", so the Radius (1/2 of the diameter) is .236". This is the dimension of sides b and c.
So I had angle A and sides b and c. Time to learn what I should have learned in 10'th grade…
View in Gallery
Octagon - Knurl Chevron Calculation
a2 = b2 + c2 - (2bc) * cosine of angle A
b and c = .236"
A = 45 degrees
Cosine of A = .7071 (I cheated, Googled this! I remember hearing about cosines... Second cousin to a stop sign, no?)
a2 = .0557 + .0557 - 2(.236)(.236) * .7071
a2 = .1114 - .0788
a2 = .0326
a = .1805" Width of the Chevron = .18"
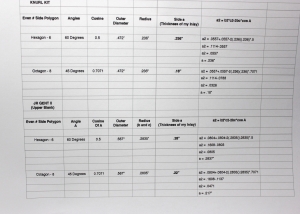
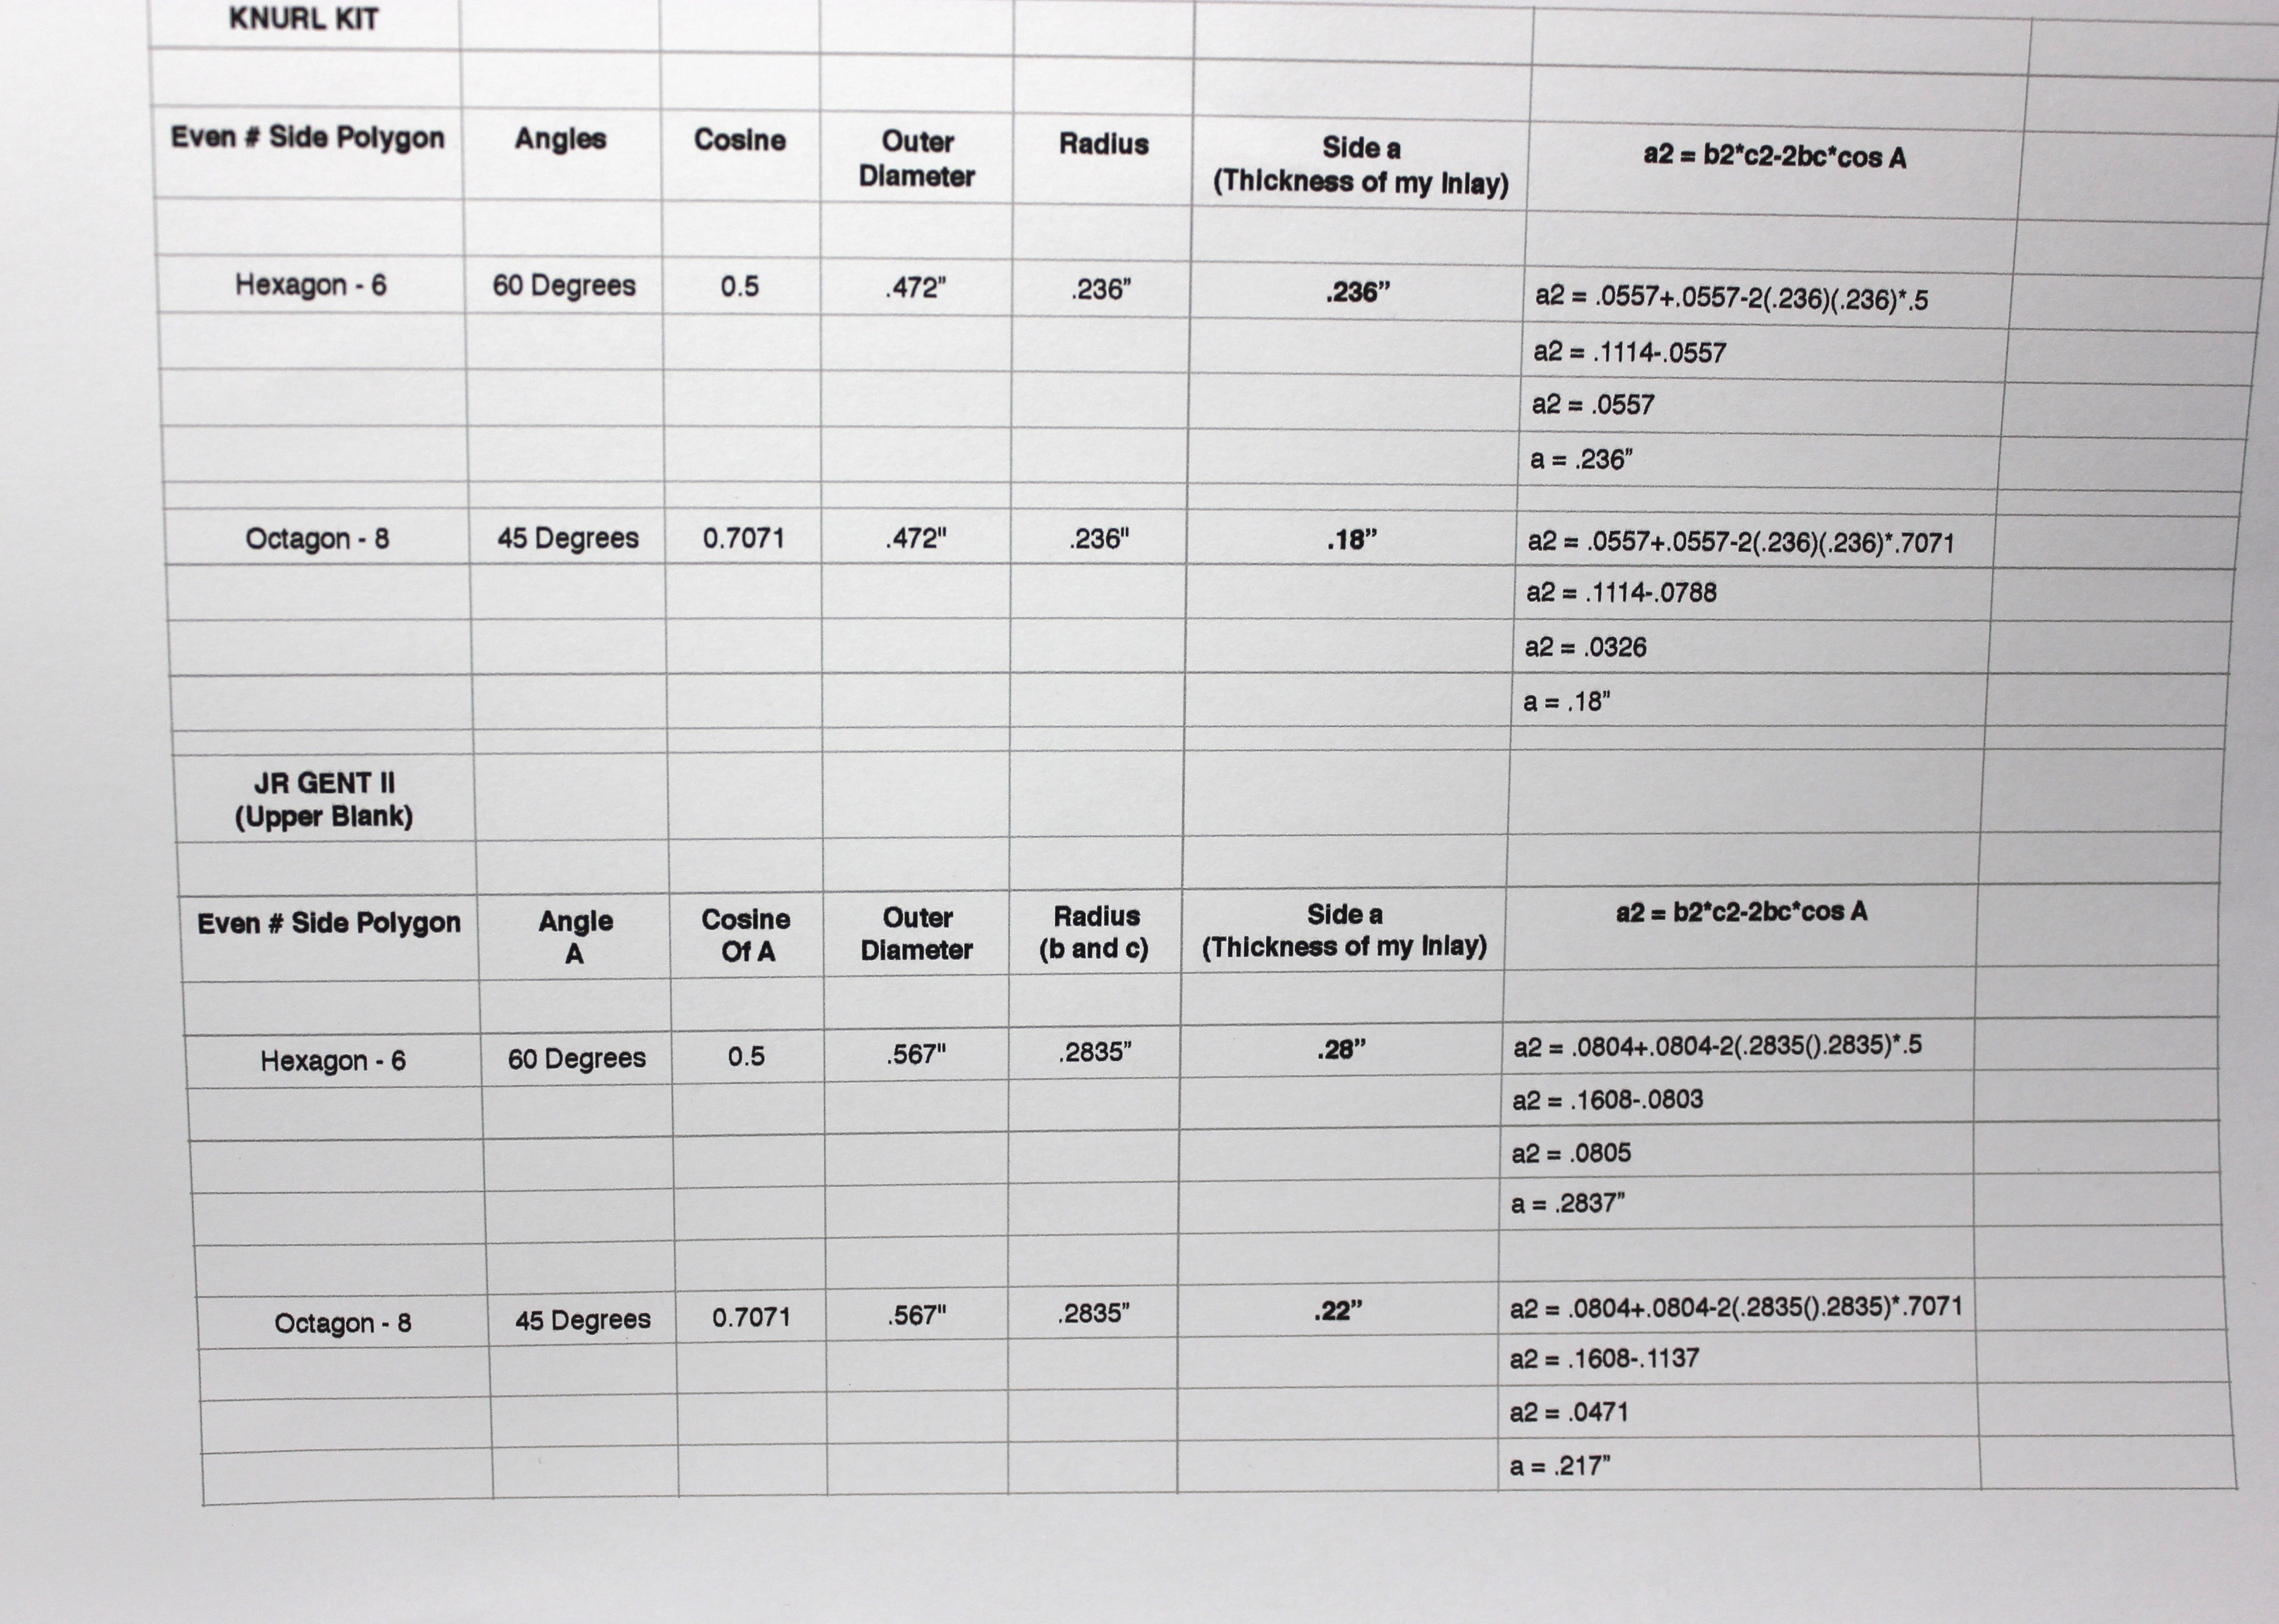
Below is a cheat sheet for the dimensions of Chevron Inlays (or any inlays for that matter) for a few examples if anyone wishes (and I do hope so!) to try this also. (I was bored sitting in an airport).
View in Gallery
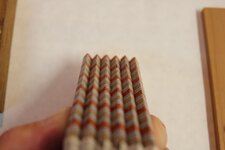
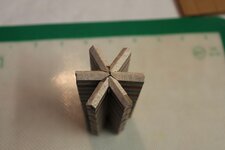
So, I now believed my Chevrons needed to be .18" thick, and sanded to an angle of 45 degrees to construct the "Star Pattern" which hopefully may result in a 360 degree chevron without any "spacers."
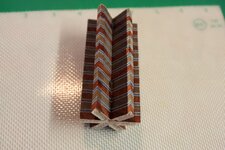
Fast forward - The chevrons were constructed, but blew apart while being sanded. I suspected just too thin for my skill set.
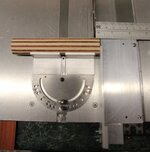
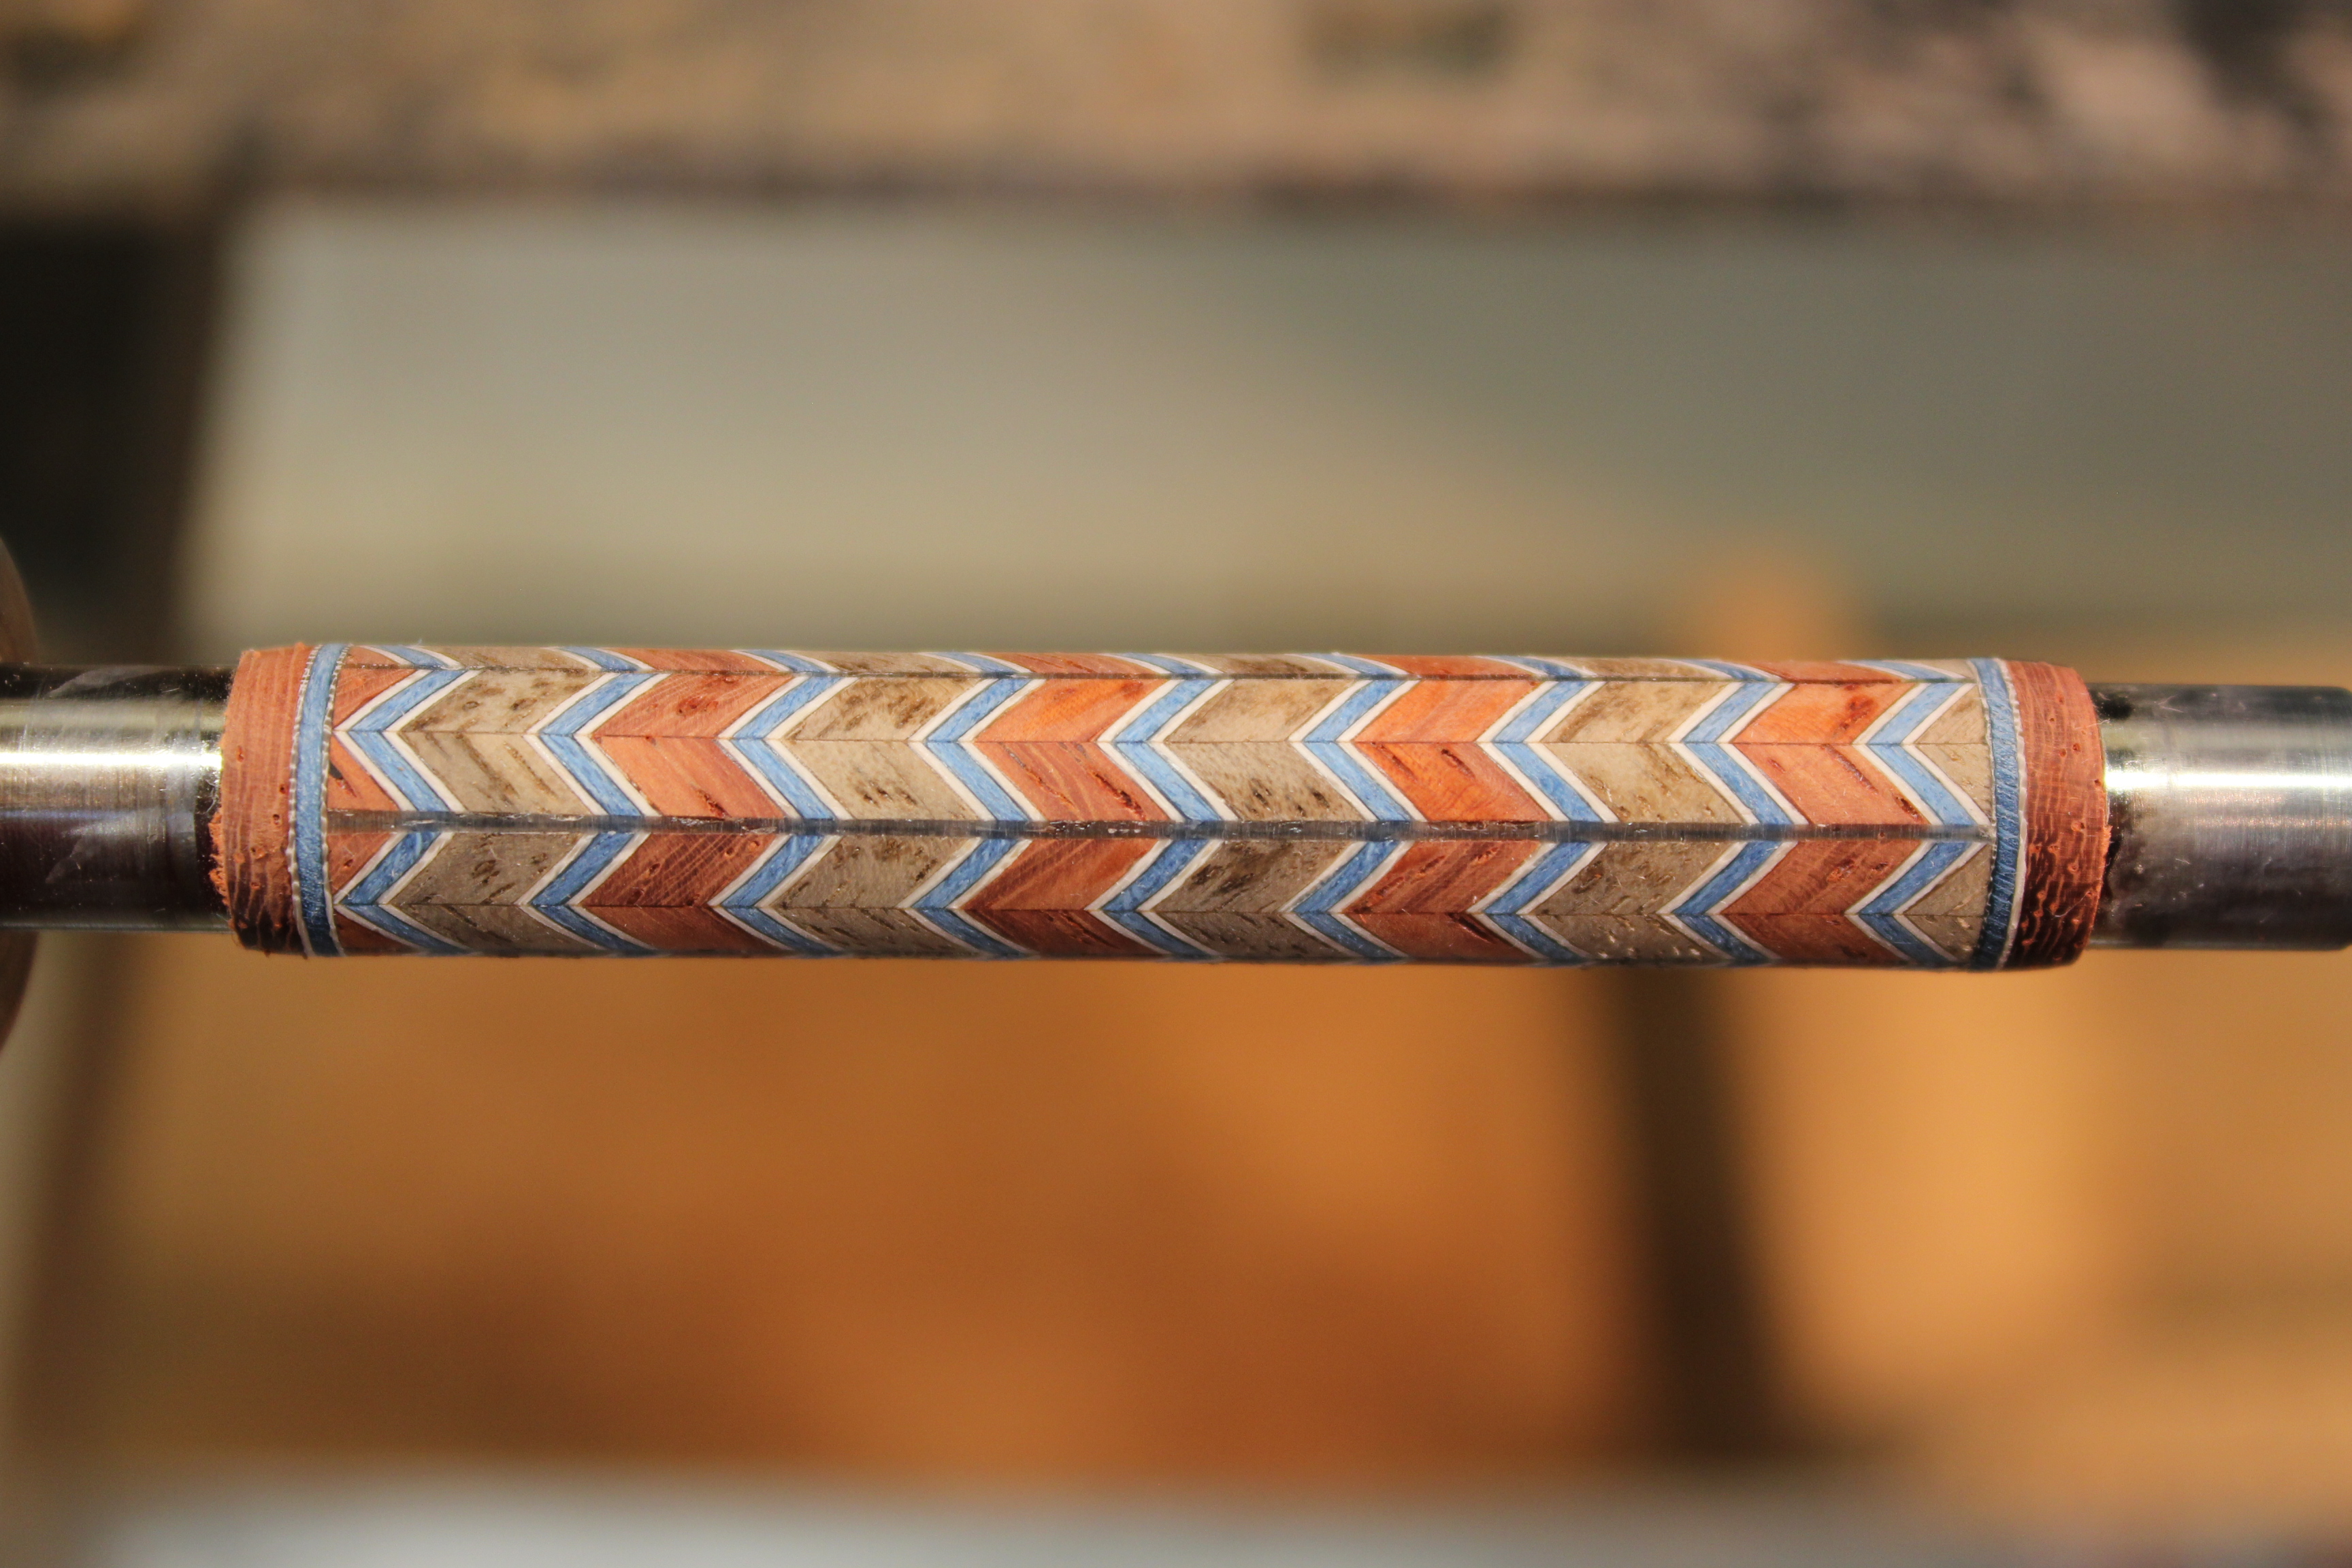
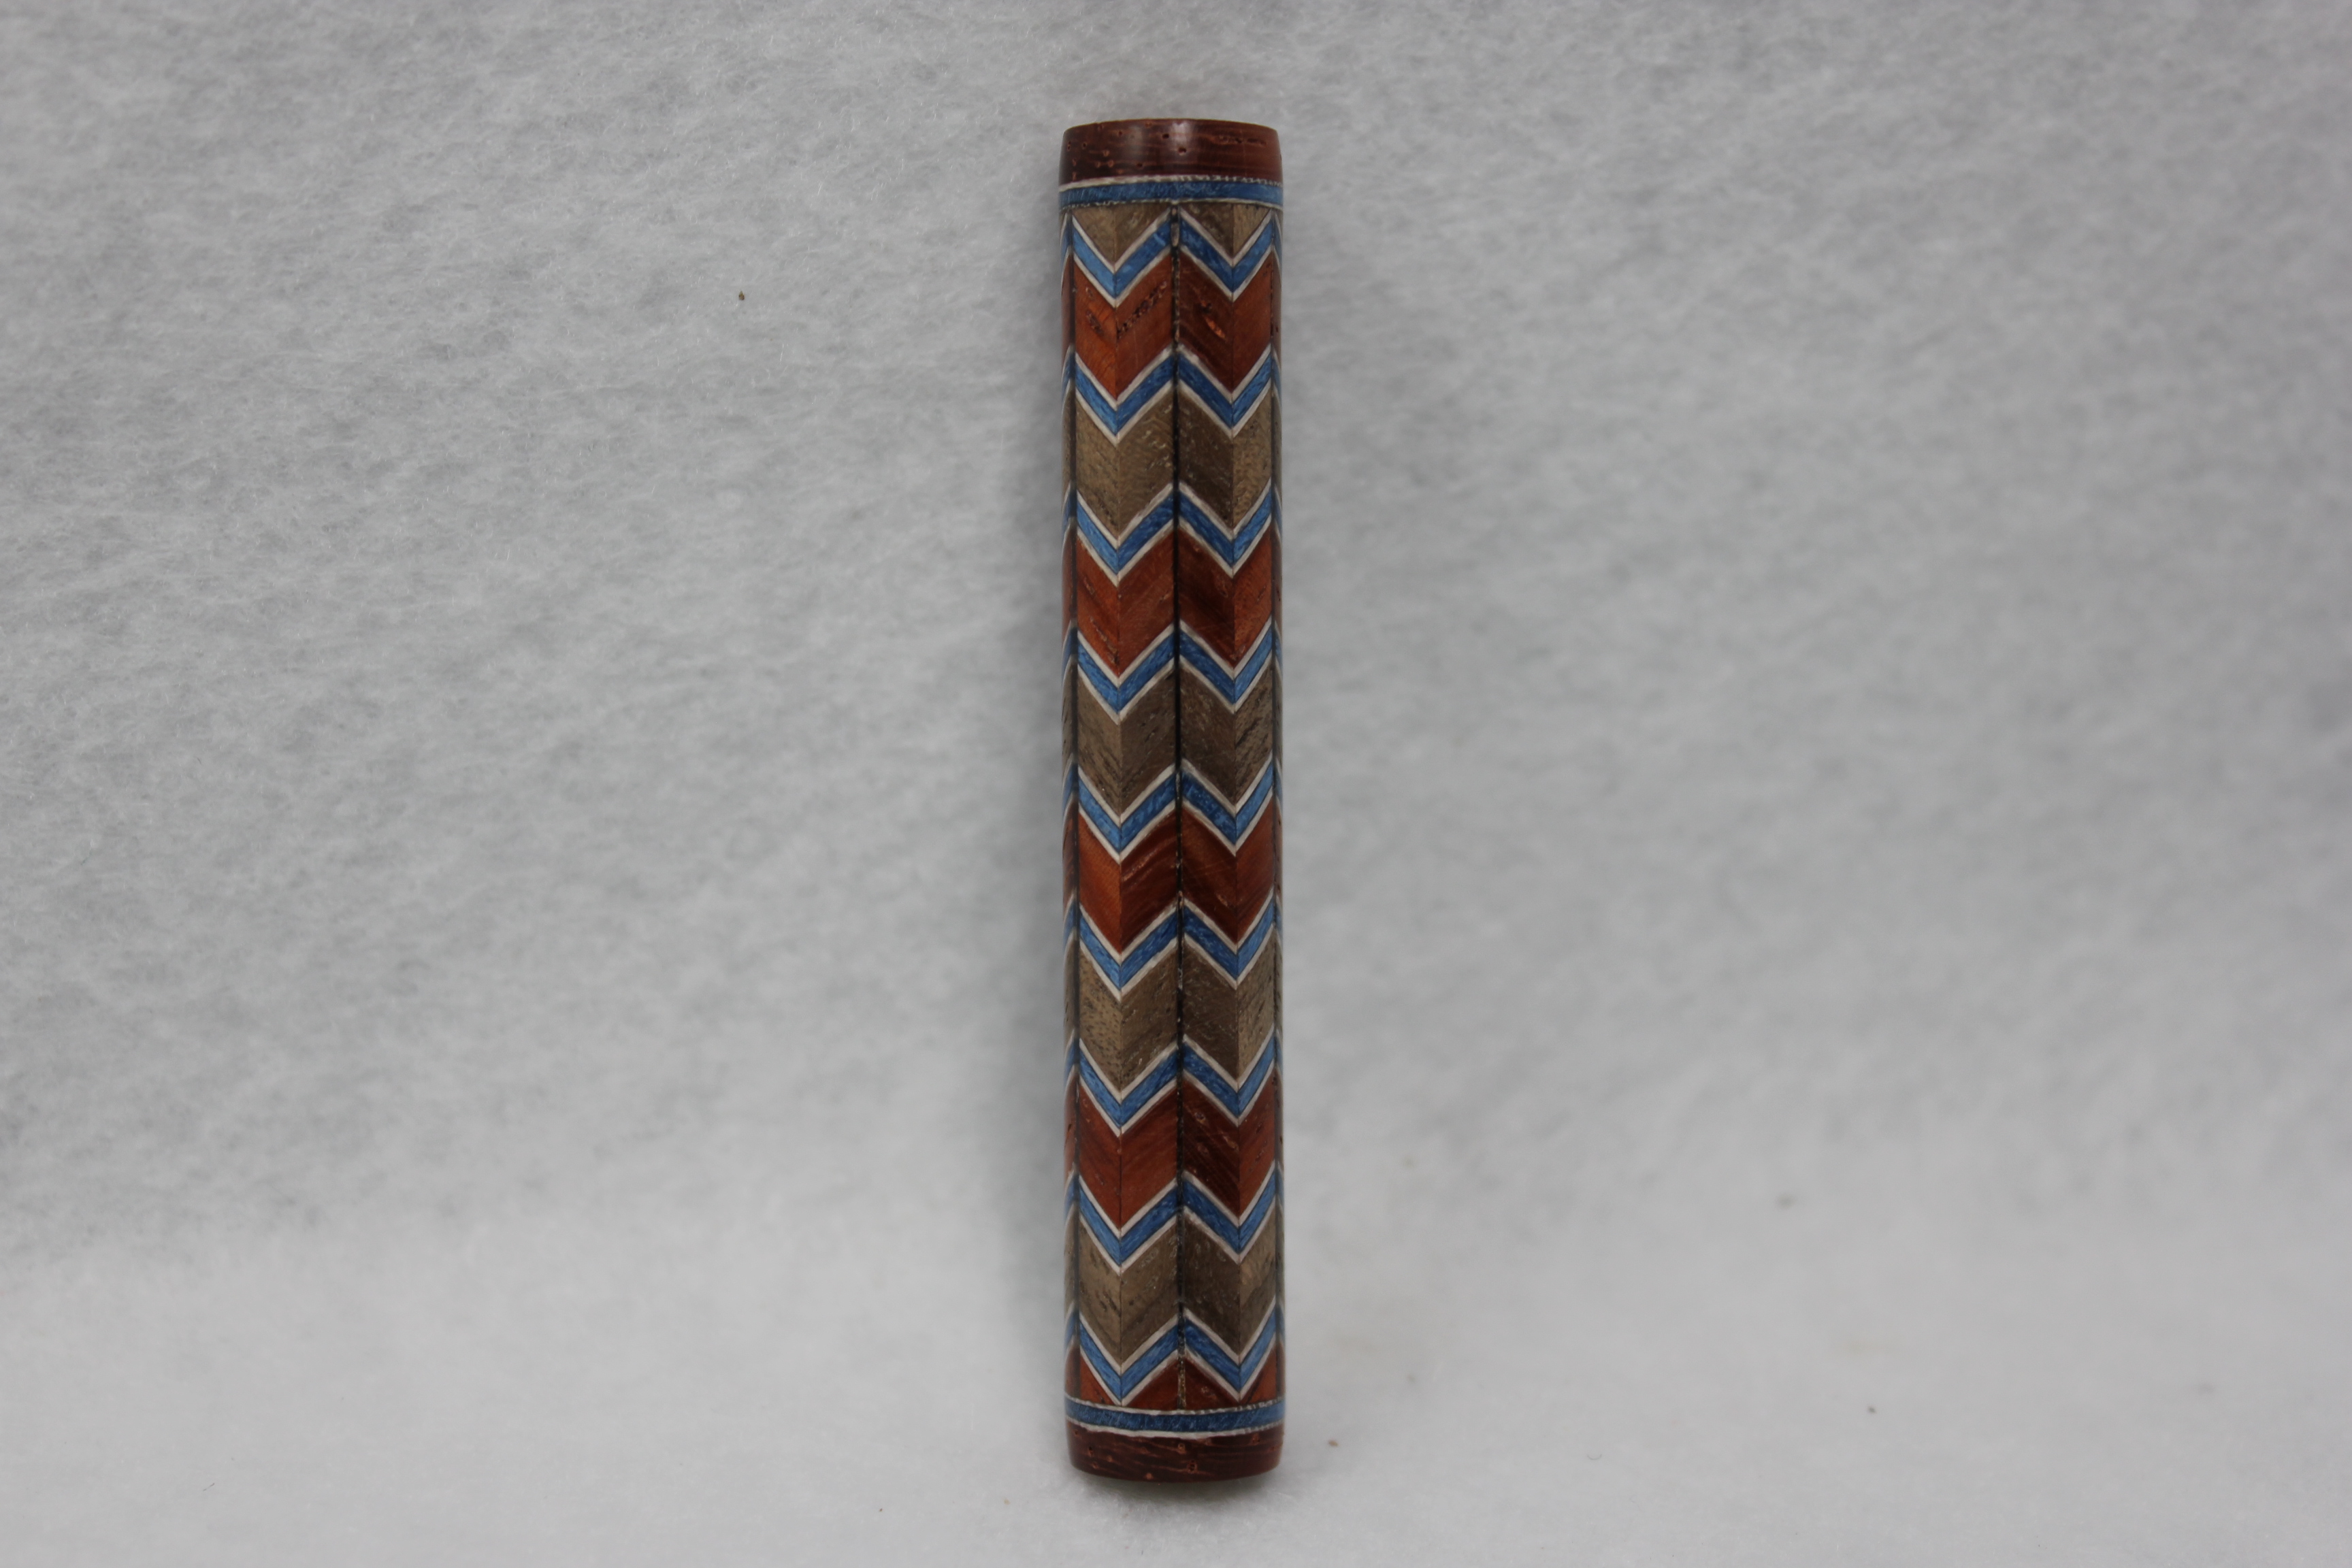
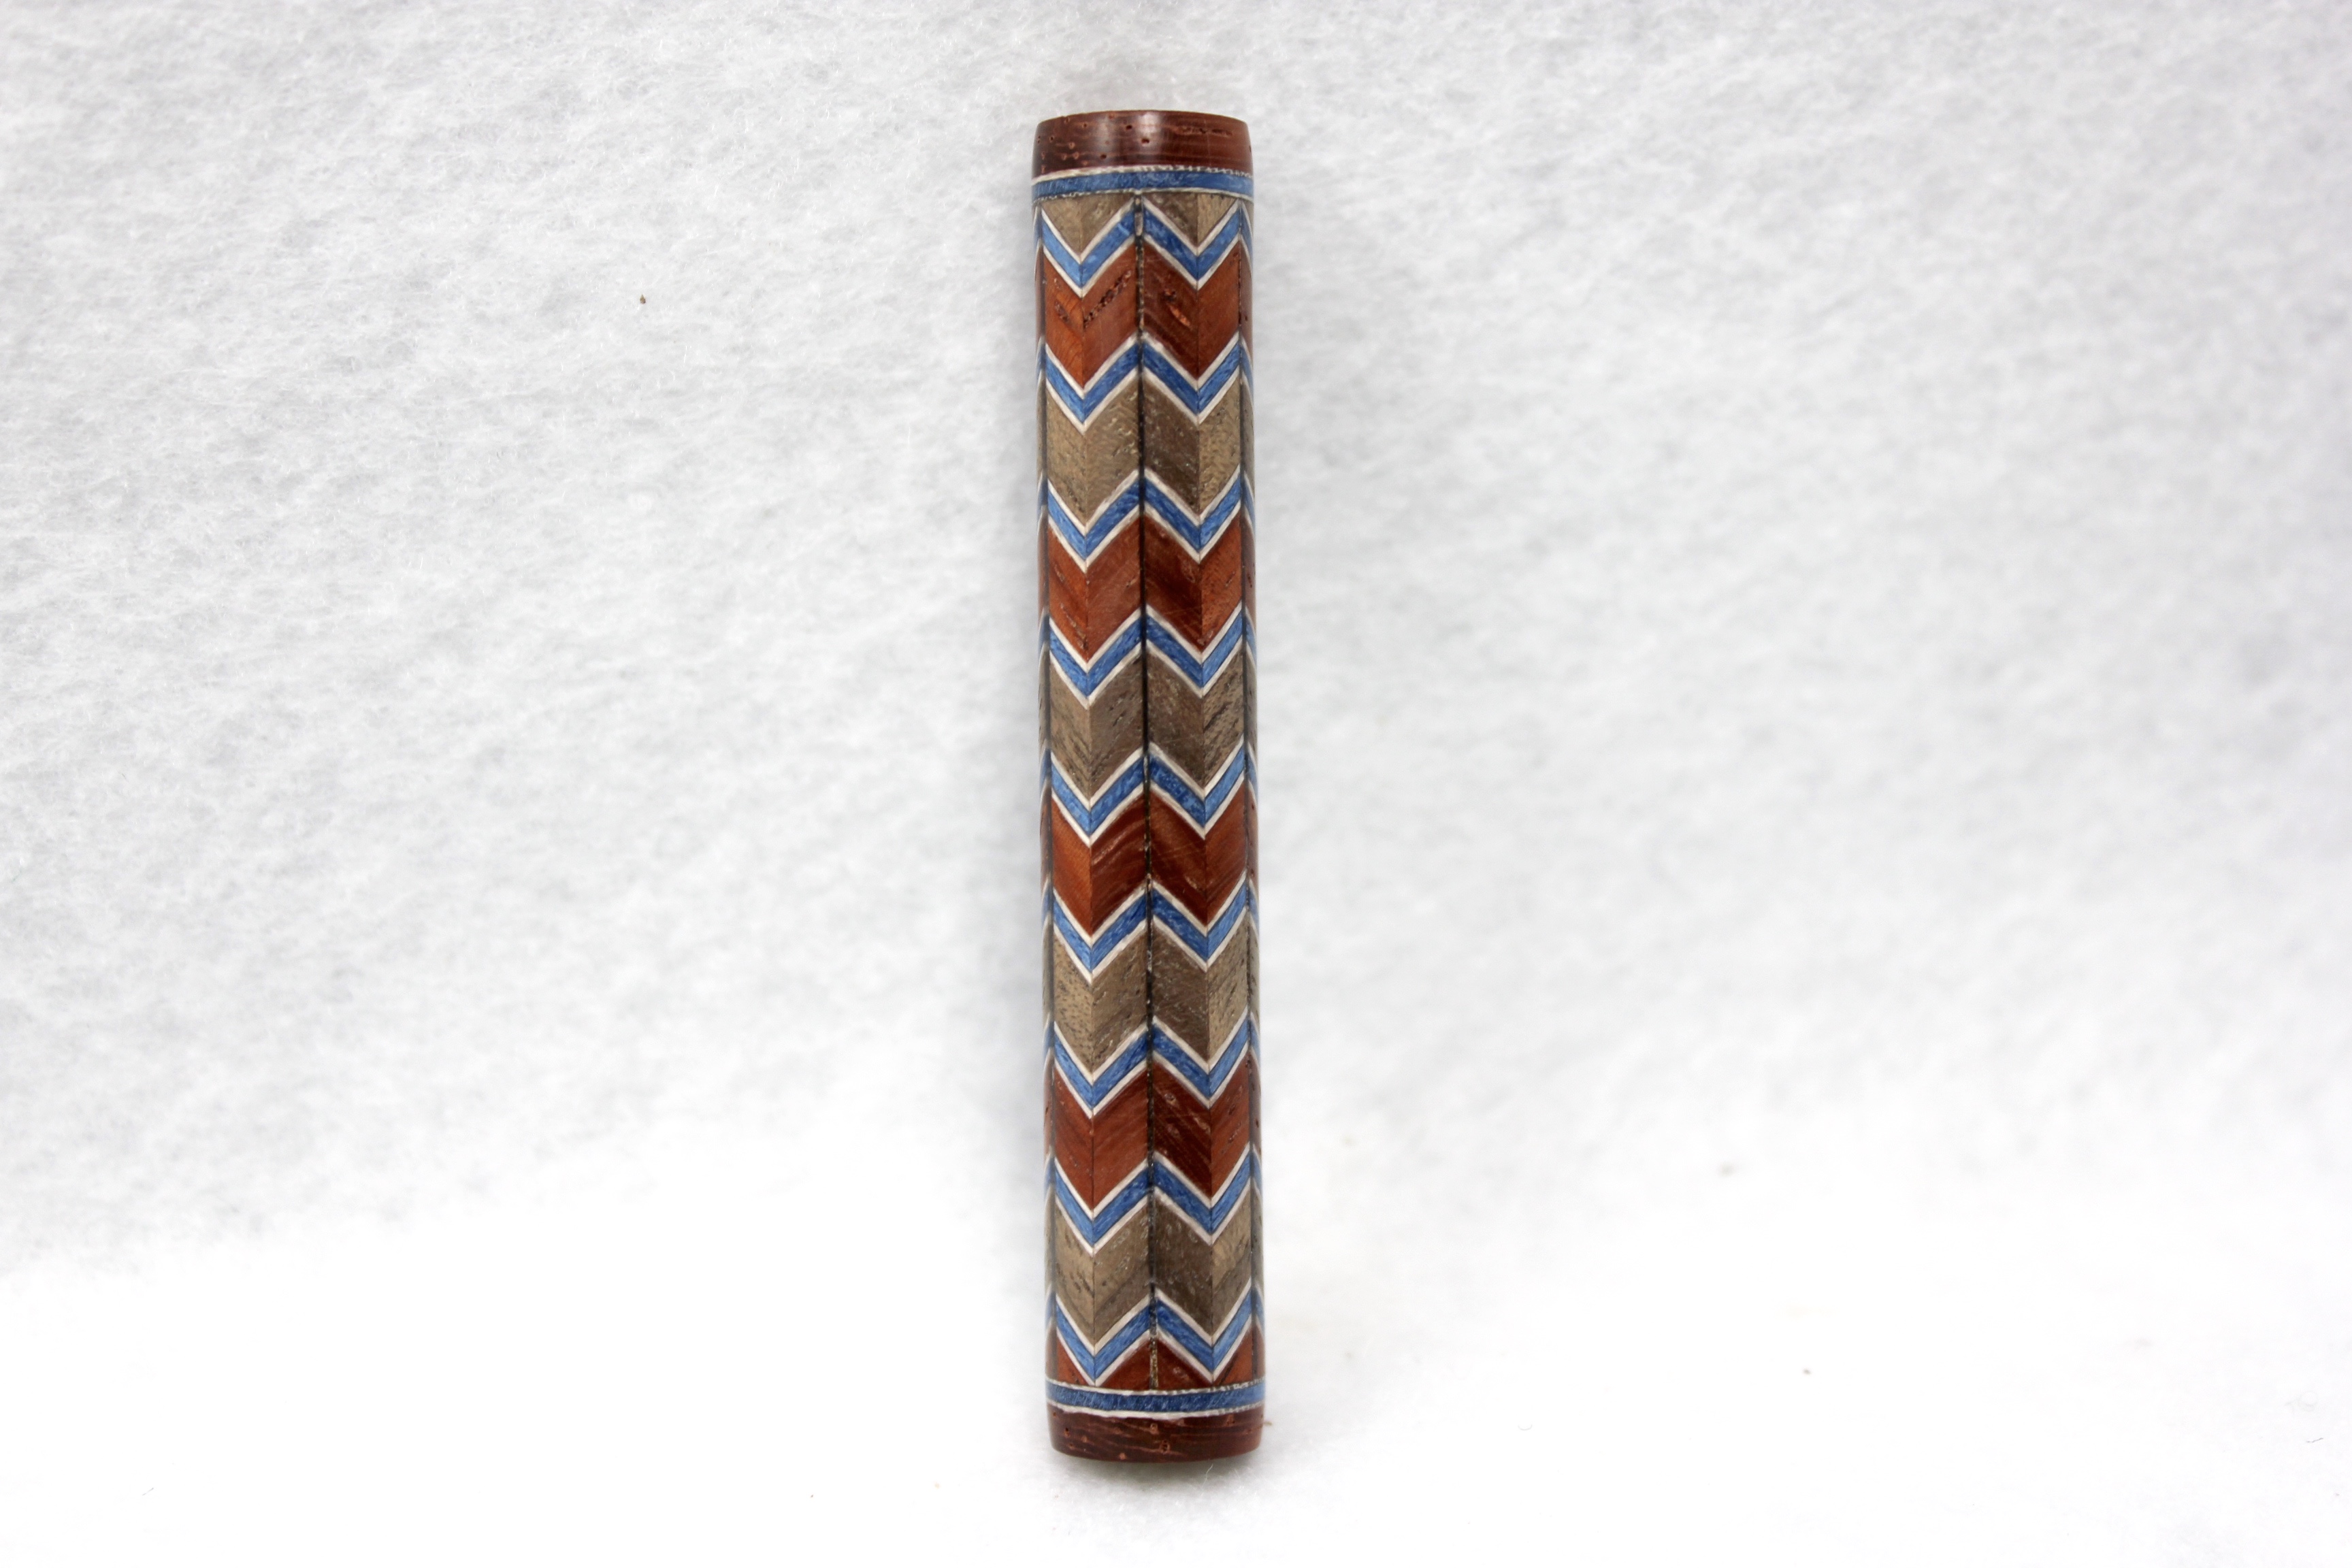
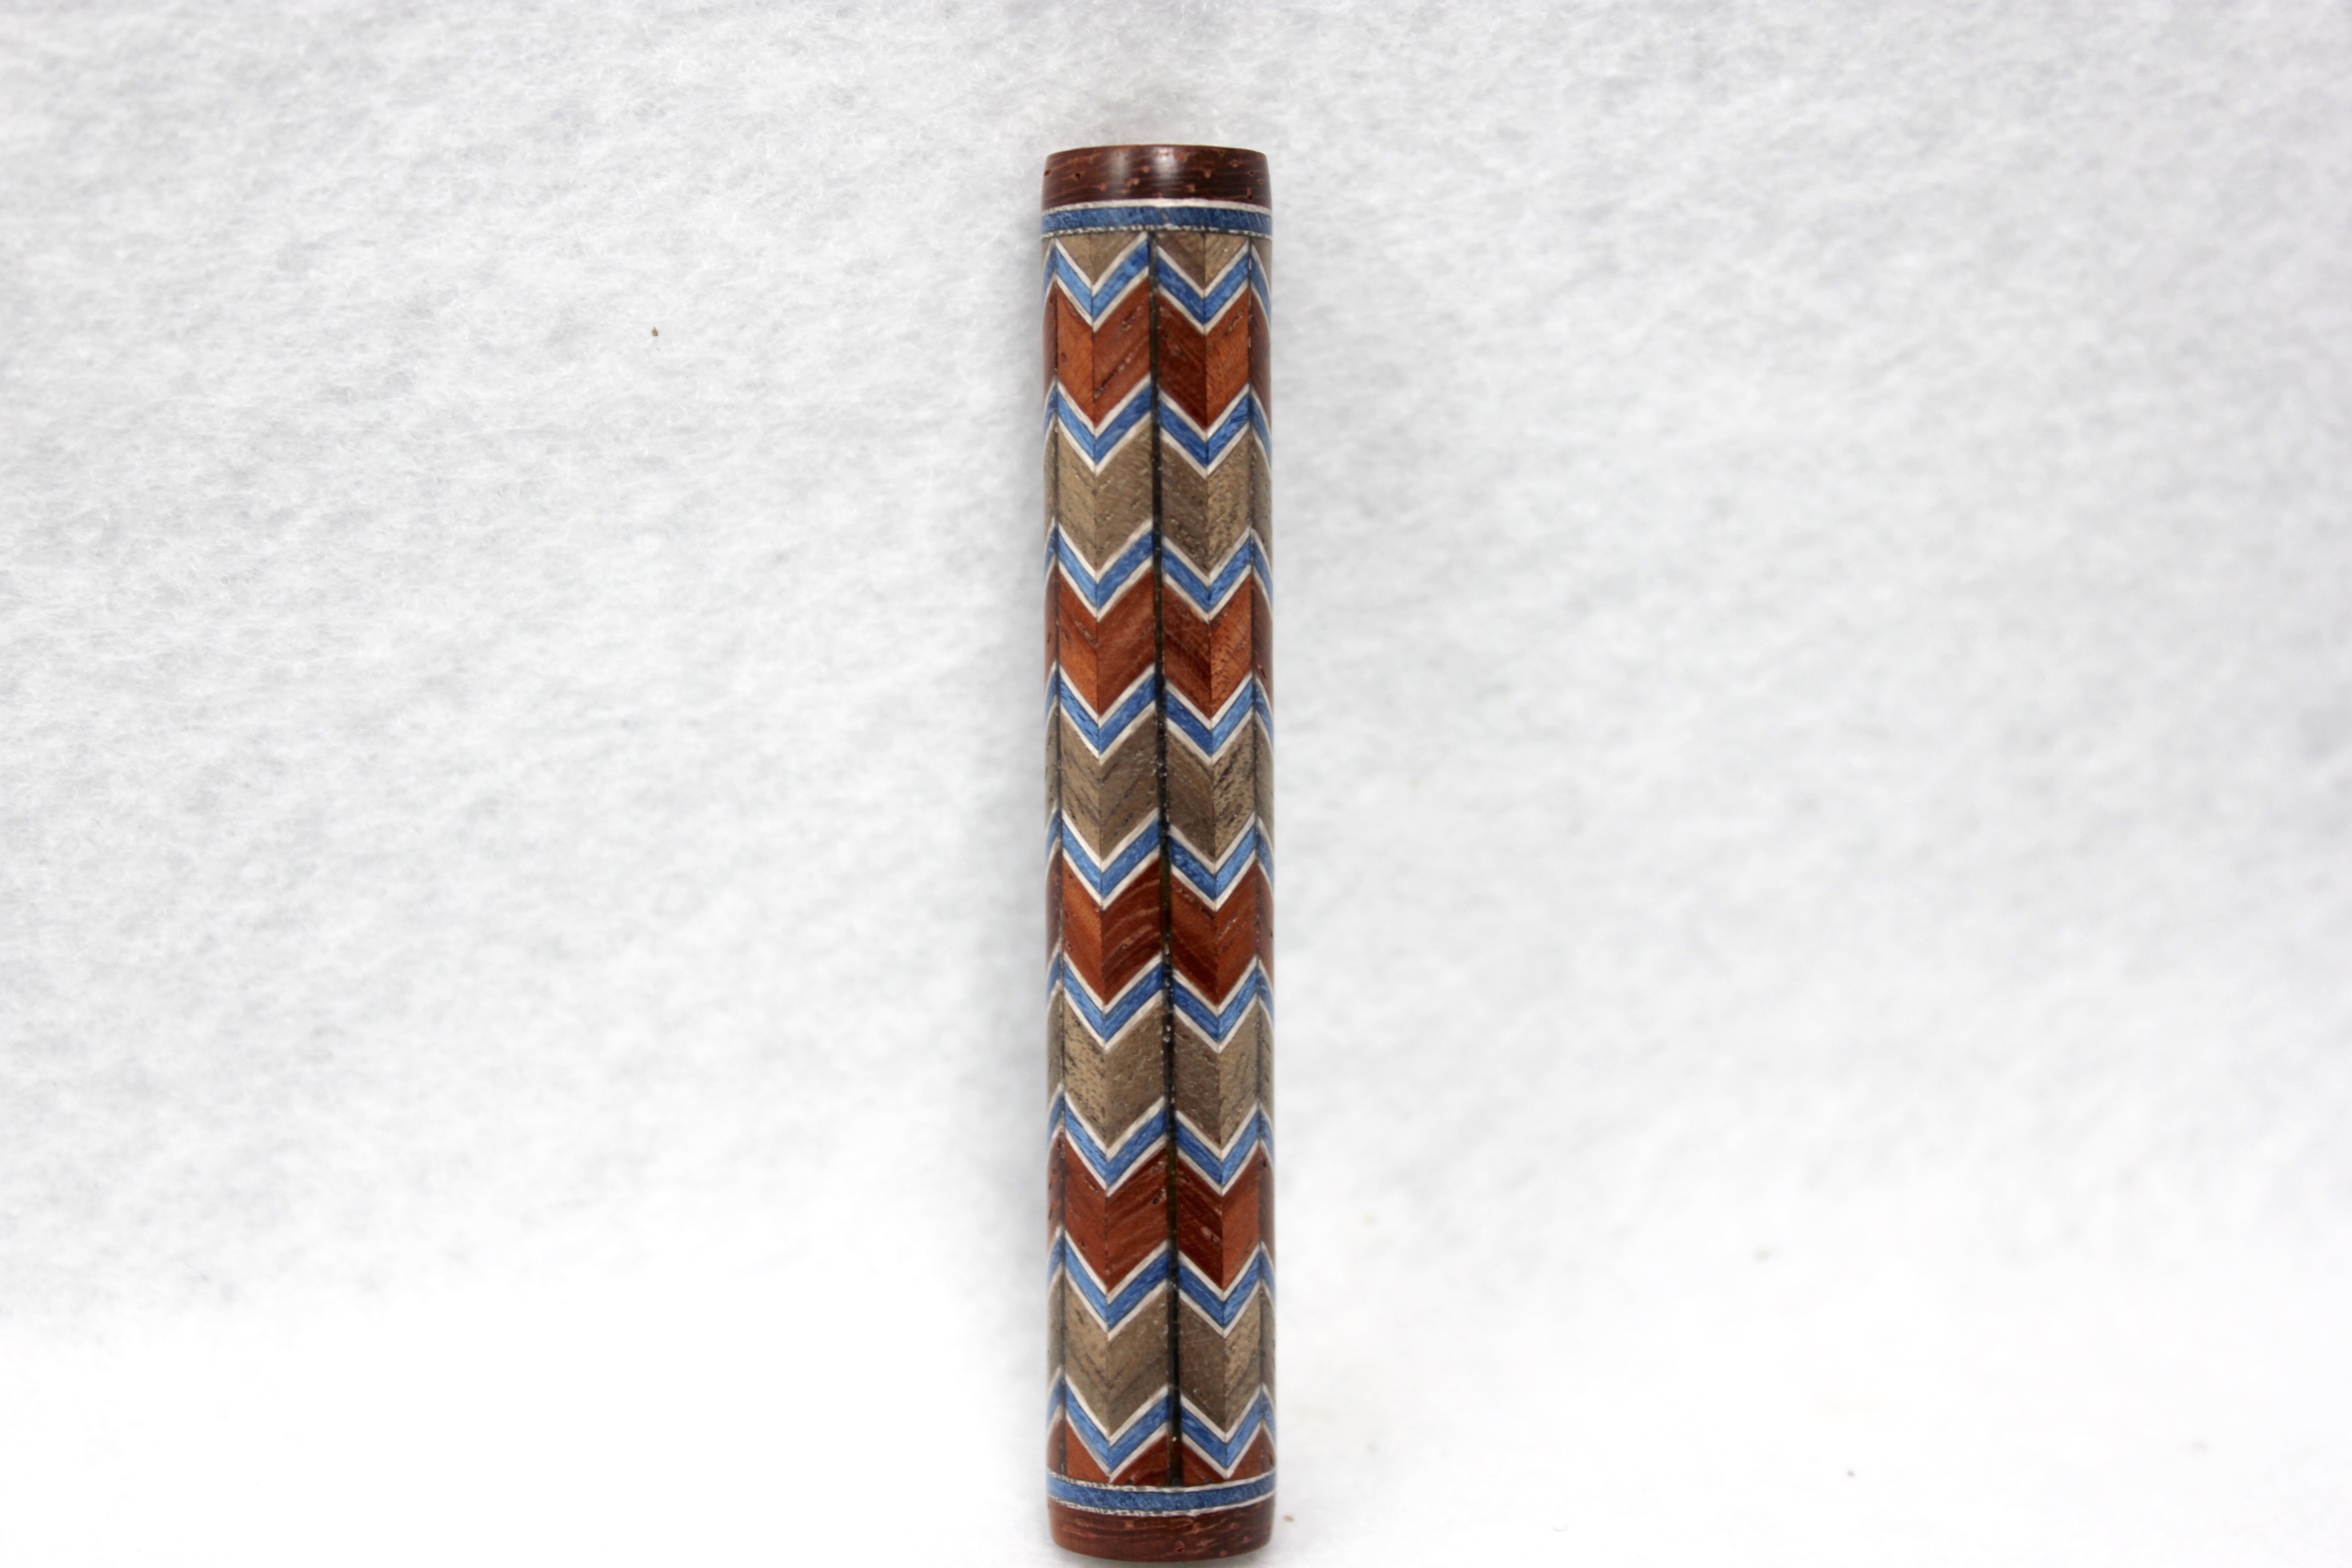
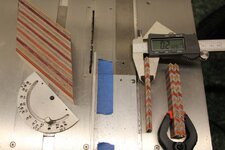
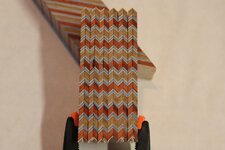
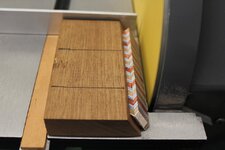
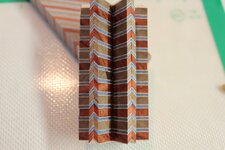
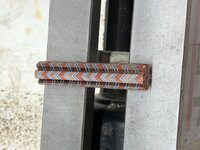
So, I changed the entire pattern to a Hexagon (6 inlays vs 8). Re calculating the dimensions, I came up with a width of .236" for the Chevrons, and the point angle is 60 degrees. This worked fine. In the thumbnails below are the basic steps.
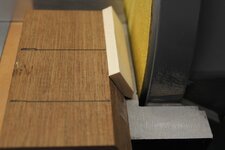
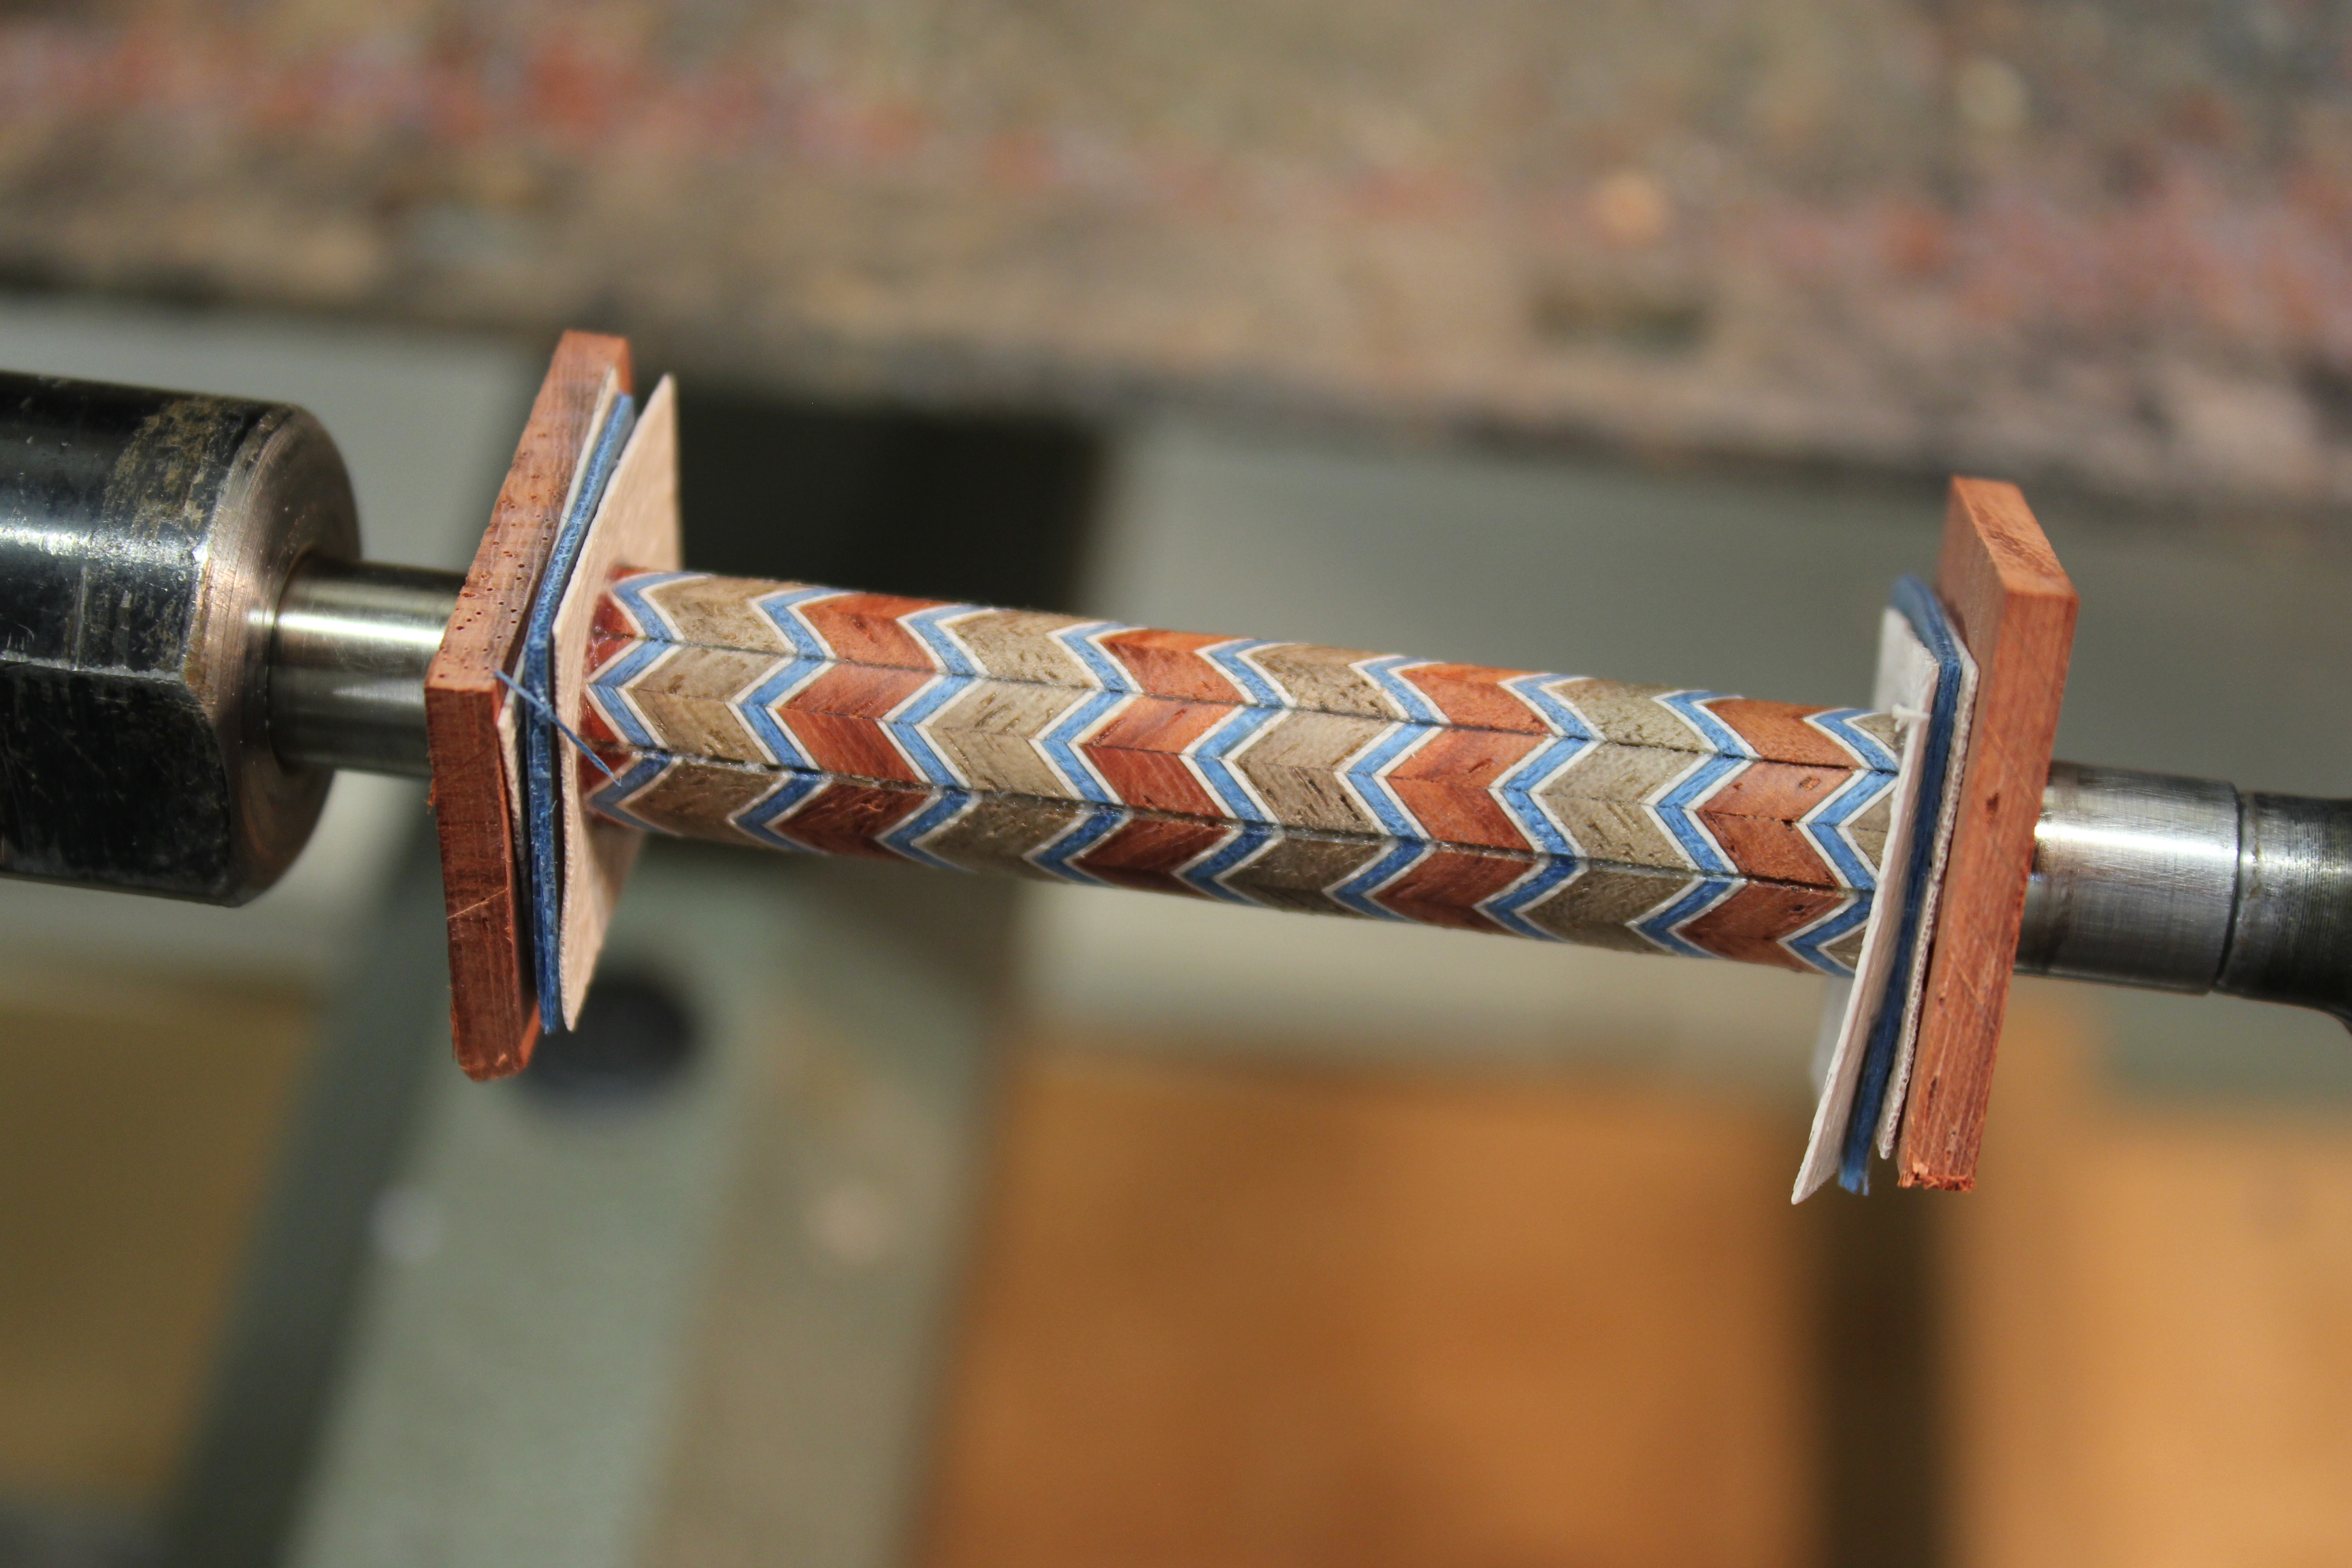
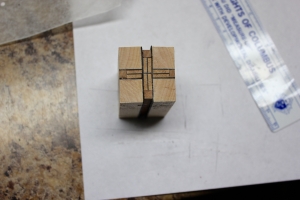
This morning I turned the blank to fit into a collet chuck, and drilled the blank. Alas, each of the joint lines between the chevrons are showing light, so the brass tube will show. I have painted the tube and will still glue it up and turn to get some hints of what I need to do to readjust my dimensions.
So feel free to add any thoughts on this method. This is a thread that any critique would be appreciated, and we all could benefit from. Brutal criticisms are also welcomed; because I'll take them and use them!! And if you see any potential to use any of this, be my guest!!!
I'll add pictures in a few days of the finished blank (I may not assemble it unless I am wrong about its flaws), so we can critique it as well.
Back in April "Skiprat" (Just Another Pen) suggested for folks to attempt a complete "360 degree Spiraling Chevron Pattern". I was really hoping someone else - anyone else… would step up so I could watch and learn. Alas, nobody has replied. "Hello, anyone out there???" (Would make a great song lyric!) Sigh, silence from my Segmenting Mentors.
So, I contemplated several different methods, based on what I had done previously - Building a square blank with 4 Chevron inlays with spaced blocks on the corners. I could change the dimensions of the inlay thicknesses, but how to get rid of the small corner spacers?

View in Gallery
Or, construct Chevron inlays for slots cut into a round dowel (4, 5, 6, 7 slots).

View in Gallery
Same dilemma; on the finished pen there are the straight spacers.
I also thought of constructing 1/2 Chevrons cut from a basic block into even numbered pie shaped staves, flipping every other to give the 360 degree pattern. This method I had not tried before, and was skeptical of my skill set.
But, I believe each would work, with advantages and disadvantages for each method. Others may have better results than I anticipated.
I then remembered that I actually had a similar method, which is how I constructed the Chevron Finials - sanding down points to meet in the middle.
View in Gallery
While the finial pattern was on the top, the same sanding technique should work on the side, I just needed to expand this from 1/4" long to 2 1/2" long, hopefully retaining the symmetry. I settled on constructing a basic Chevron inlay (anywhere from approximately .20"-.30" wide, 2 - 2/1/2" long. Then sanding each side to a measured point to assemble a polygon.
Sheesh, now is when it gets complicated.
"Strap yourself in Chewbacca!"
"Strap yourself in Chewbacca!"
NOTE: I did poorly in High School Math, and remembered essentially none of this before diving into this project. Where was Don Ward when I was sleeping in Algebra II? And I readily acknowledge that my terminology and explanation may not be correct - Feel free to correct any of my mistakes! One reason for this thread is for others to take whatever you can and run with it.
I decided to try to construct this for the Knurl Kit with 8 Chevrons because of the approximate dimensions. My last effort had 7 Chevrons, and it was not a complete ring (although that was not the intent).
The desired pattern needed matching points for all 8 Chevrons around the circumference (Final outer diameter of the pen), with each Chevron the same outer width. After a rough sketch of the 8 Chevrons sanded to fit together, and drawing a ring for the final outer diameter, an Octagon appeared, and I suspected a way to get some dimensions.
The outer side of each Polygon (opposite the inner angle) - side "a" (lower case), needed to be very close to the radius of the final outer diameter of the pen (1/2 of the Diameter). These would be sides: "b" and "c" of the diagram below. (I told you it would get complicated… Keep reading, it gets worse if you are like me with a poor background in Math - but we can relearn.)
I needed to figure out the dimension of the side opposite to the inner angle because this is the width of each Chevron. In the equation, this side is "a" (a small a). This was my unknown.
The inner angle is "A" ( a capital A), which is 45 degrees (360 degrees/8).
The outer diameter of the finished Knurl Bushing is .472", so the Radius (1/2 of the diameter) is .236". This is the dimension of sides b and c.
So I had angle A and sides b and c. Time to learn what I should have learned in 10'th grade…
View in Gallery
Octagon - Knurl Chevron Calculation
a2 = b2 + c2 - (2bc) * cosine of angle A
b and c = .236"
A = 45 degrees
Cosine of A = .7071 (I cheated, Googled this! I remember hearing about cosines... Second cousin to a stop sign, no?)
a2 = .0557 + .0557 - 2(.236)(.236) * .7071
a2 = .1114 - .0788
a2 = .0326
a = .1805" Width of the Chevron = .18"
Below is a cheat sheet for the dimensions of Chevron Inlays (or any inlays for that matter) for a few examples if anyone wishes (and I do hope so!) to try this also. (I was bored sitting in an airport).
View in Gallery
So, I now believed my Chevrons needed to be .18" thick, and sanded to an angle of 45 degrees to construct the "Star Pattern" which hopefully may result in a 360 degree chevron without any "spacers."
Fast forward - The chevrons were constructed, but blew apart while being sanded. I suspected just too thin for my skill set.
So, I changed the entire pattern to a Hexagon (6 inlays vs 8). Re calculating the dimensions, I came up with a width of .236" for the Chevrons, and the point angle is 60 degrees. This worked fine. In the thumbnails below are the basic steps.
This morning I turned the blank to fit into a collet chuck, and drilled the blank. Alas, each of the joint lines between the chevrons are showing light, so the brass tube will show. I have painted the tube and will still glue it up and turn to get some hints of what I need to do to readjust my dimensions.
So feel free to add any thoughts on this method. This is a thread that any critique would be appreciated, and we all could benefit from. Brutal criticisms are also welcomed; because I'll take them and use them!! And if you see any potential to use any of this, be my guest!!!
I'll add pictures in a few days of the finished blank (I may not assemble it unless I am wrong about its flaws), so we can critique it as well.
Attachments
-
 IMG_0840.jpg204.8 KB · Views: 420
 -
 IMG_0842.jpg160.5 KB · Views: 418
 -
 IMG_0839.jpg179.2 KB · Views: 390
 -
 IMG_0843.jpg134.8 KB · Views: 398
 -
 IMG_0844.jpg136.2 KB · Views: 390
 -
 IMG_0846.jpg123.9 KB · Views: 390
 -
 IMG_0848.jpg137.6 KB · Views: 387
 -
 IMG_0849.jpg159.2 KB · Views: 396
 -
 IMG_0850.jpg87.8 KB · Views: 375
 -
 IMG_0851.jpg167.2 KB · Views: 392
 -
 IMG_0853.jpg157 KB · Views: 393
 -
 IMG_0852.jpg92.9 KB · Views: 386
 -
 IMG_0065.jpg304.7 KB · Views: 431
Last edited:
") And I can't wait to see the finished product
And I can't wait to see the finished product