
Chief TomaToe
Member
Inspired by Mark James chevrons, I wanted to give them a try myself. However, even with his great tutorials, I still have quite some hurdles to get through first. One, I have virtually no woodworking experience other than a year of pen turning. Two, I am limited to my investments in modest tools at this stage in life. However, I wasn't going to let that stop me, so I wanted to take some first steps to get some of the techniques down. You may find that some of my techniques are crude, but hopefully this may be something somebody inexperienced like myself would like to try.
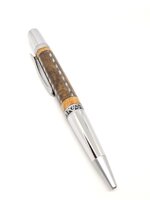
My thought was instead of trying to get perfectly matched chevrons on my first try, how about getting halfway there? My goal was to make a blank with 45-degree alternating Maple and Walnut inlay separated 90 degrees apart. The blanks below were made from Black walnut crotch for the main body, maple and walnut strips for the inlay, color veneer, and Maple burl for the end caps.
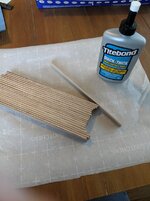
To start, I used 1/16x1x12" strips, 15 each, of Walnut and Maple. I had a good friend at work who has a nice thickness sander to help with this. You can also buy 1/16" stock and cut strips yourself as another option, which was my backup plan. I created a block to cut inlay from by alternating strips of walnut and maple, using Titebond Quick and Thick since it dries clear. I also tried my best to stagger the strips at a 45-degree angle to reduce waste. I took my finished block to the bandsaw and sander to touch it up, and I was ready to cut some inlay!
My block was large enough that after cutting a strip of inlay, the strip was long enough to cut in half and be used for a single body pen. I went ahead and glued by color veneer on both sides of the inlay strip before cutting. The thickness of the inlay doesn't matter here since we aren't trying to do a chevron match, but I wouldn't make it thicker than 1/8".
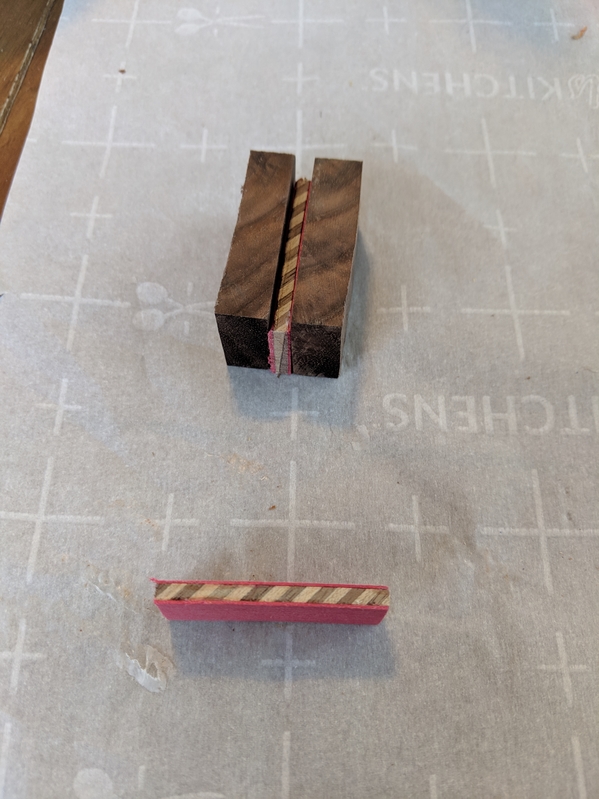
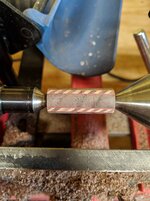
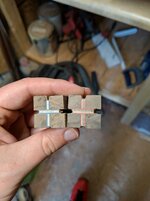
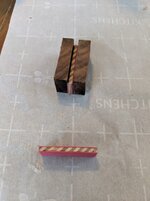
Once I had my two pieces of inlay, I took the black walnut crotch blank and cut a piece the same length as the pieces of inlay. I took the walnut piece and cut it in half, sandwiching in the inlay between the halves. Once dry, I rotated the blank 90 degrees and did the same again. The key here is that you have nicely aligned crosses on either side of the blank so your inlay slices run nice and parallel. I sanded the ends flush, and then turned the blank round between centers.
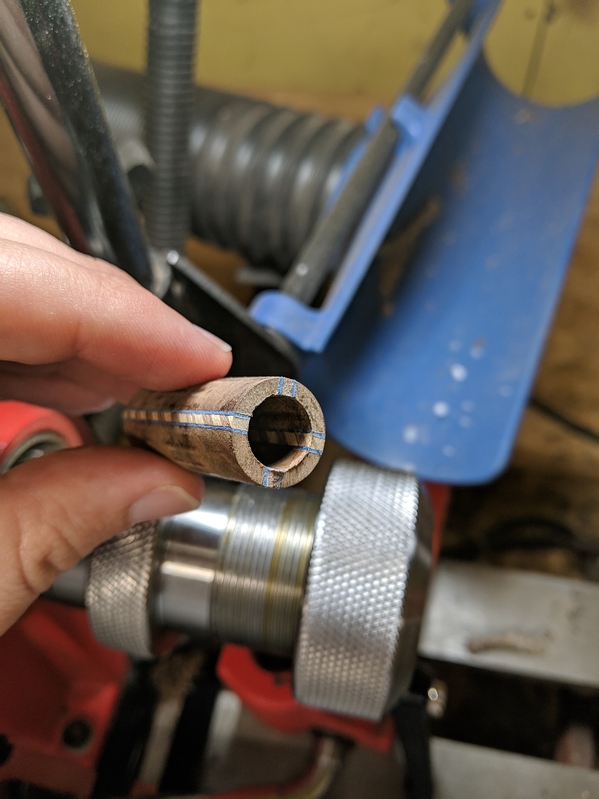
Once the blank was round, I used my collet chuck system to drill on the lathe for my tube. After that, I did the glue up with 15-min epoxy also adding the veneer and end caps. Once cured, I turned and finished as normal.
There's a lot of details I'm leaving out, so feel free to ask more questions. I may or may not have shared anything of use to you, but I figured I would at least share to contribute in some way!


My thought was instead of trying to get perfectly matched chevrons on my first try, how about getting halfway there? My goal was to make a blank with 45-degree alternating Maple and Walnut inlay separated 90 degrees apart. The blanks below were made from Black walnut crotch for the main body, maple and walnut strips for the inlay, color veneer, and Maple burl for the end caps.
To start, I used 1/16x1x12" strips, 15 each, of Walnut and Maple. I had a good friend at work who has a nice thickness sander to help with this. You can also buy 1/16" stock and cut strips yourself as another option, which was my backup plan. I created a block to cut inlay from by alternating strips of walnut and maple, using Titebond Quick and Thick since it dries clear. I also tried my best to stagger the strips at a 45-degree angle to reduce waste. I took my finished block to the bandsaw and sander to touch it up, and I was ready to cut some inlay!
My block was large enough that after cutting a strip of inlay, the strip was long enough to cut in half and be used for a single body pen. I went ahead and glued by color veneer on both sides of the inlay strip before cutting. The thickness of the inlay doesn't matter here since we aren't trying to do a chevron match, but I wouldn't make it thicker than 1/8".
Once I had my two pieces of inlay, I took the black walnut crotch blank and cut a piece the same length as the pieces of inlay. I took the walnut piece and cut it in half, sandwiching in the inlay between the halves. Once dry, I rotated the blank 90 degrees and did the same again. The key here is that you have nicely aligned crosses on either side of the blank so your inlay slices run nice and parallel. I sanded the ends flush, and then turned the blank round between centers.
Once the blank was round, I used my collet chuck system to drill on the lathe for my tube. After that, I did the glue up with 15-min epoxy also adding the veneer and end caps. Once cured, I turned and finished as normal.
There's a lot of details I'm leaving out, so feel free to ask more questions. I may or may not have shared anything of use to you, but I figured I would at least share to contribute in some way!
Attachments
-
 Webp.net-resizeimage (6).jpg60.2 KB · Views: 808
 -
 Webp.net-resizeimage (7).jpg292.7 KB · Views: 784
 -
 Webp.net-resizeimage (8).jpg362.6 KB · Views: 746
 -
 Webp.net-resizeimage (9).jpg290 KB · Views: 798
 -
 Webp.net-resizeimage (10).jpg314 KB · Views: 793
 -
 Webp.net-resizeimage (11).jpg373.1 KB · Views: 813
Last edited:
 ).
).