Unusual small item photography setup?

Signed-In Members Don't See This Ad

AlanZ

Member
Joined
Mar 2, 2009
Messages
266
Location
Oradell, NJ
Okay, let's have a little fun.

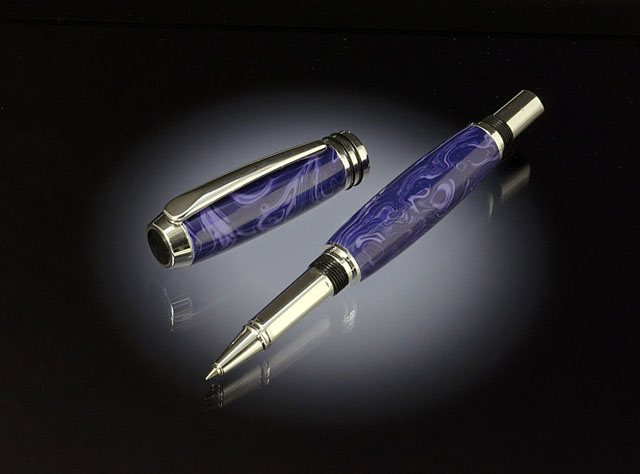
In another thread in the Penturning forum, I mentioned that I just finished a turning a purple TruStone pen and added a video tutorial.

I also photographed the pen it using an interesting setup... the first time I've tried this approach.

So, EXCLUDING the people who already know how I made this photo, how would YOU go about making a photo like this?

For those that don't know me... years ago, I was a commercial photographer with a studio in New York City. This would have been typical of my small product photography. Previous photo styles and preferences persist!

I'll explain the details of this setup after we get a few replies.

There are many ways to any end result... this one is particularly interesting < vbg >


purple_trustone_open_640.jpg


purple_trustone_closed_640.jpg
 
Last edited:
Signed-In Members Don't See This Ad
Looks like you PhotoShopped the pen onto the background and used some sort of reflection option to make it look like it was actually sitting on it. Just a guess, I dont have Photoshop but have seen some crazy things down w/ it.
 
I'll play

Black plexi with a light underneath. Since there are no shadows I assume three possibilities

1-top light with diffused light coming from right and left of the photographer
2-Diffused ring light on camera.
3-Product box with light being diffused.

I am going to guess it is number 3.

How did I do?
 
So we've had guesses that it's either on glass or plexiglass.

Assuming that it is one or the other, do you know how to determine which one?

There is a clue in the photo.

The results/artifacts might have an impact on the design decisions, and influence the background choice.
 
Glass on a white or gray paper, black box with a pinhole with a good dailight bulb on top that let just a small amout of light coming in. Probalby an other source of lightning for the overall light
 
Black 'smoked' type glass base with a light beneath, another light in front of and to the right of the pen higher than the lens. Possibly a strip light in that location?
 
I think I see two reflections in the first photo, so I'd guess the pen is on clear glass, above a black background with a white center (or perhaps a black vignette through which a light is shining). The glass is much higher, so that the background is well out of focus. I haven't looked closely at the pen to count the lights yet.

Regards,
Eric
 
Double reflection is plexiglass..probably smoked. Lit from below with floodlight style bulb. White reflector in front. Sides, back and top of box black, thus reflecting black in the plexiglass
 
Last edited:
Oh, I forgot to ask... do you like the photo? <vbg>

Yes!

And my own thoughts on how you created it leans me towards the pen sitting on glass or plexiglass, either frosted or a translucent material to create the frosted light affect in the center. Finally a black frame under the above providing the hole for the light to shine through.

Optionally, some computer software to duplicate the effect of the manual (old fashioned) method I envisioned. :eek:
 
Two pieces of glass. The pen sitting on one piece of glass, another piece of glass below the pen glass with vellum on a dark gel filter. A tiny fill light under the Vellum. Product in a light tent with a main and fill light.
 
I did use a tent, but similar results could be achieved without the tent.

There was one fluorescent light shining through the left side of the tent, and a simple white reflector to the right of the pen.

Oh, and the other thing... I will upload a photo soon <vbg>
 
Last edited:
I see the crowd getting restless and sharpening their pointed sticks...

Here's a photo of the important part of the setup.

I'll fill in the details after some of you stop laughing <vbg>
 

Attachments

  • softbox1.jpg
    softbox1.jpg
    36.3 KB · Views: 676
Cool! Geeky setup.... Do you take the picture with the iPhone? And i think the iPad definitely qualifies as the most expensive material to lay the pen on that I've seen!
 
No, the camera was a Nikon D7000, but I certainly could have used the iPhone, as I've made a tripod mount for it (used for some video recording)

In this case, the iPhone was actually controlling/adjusting what was being displayed on the iPad. This way I don't have to touch the iPad once the pen has been put into place.
 
I'm guessing that lots of IAP members have iPads or other tablets these days.

By the way, a similar setup could be done using a flat screen computer monitor or laptop display as a background.

You can start imagining the possibilities. I chose a simple white spot for my photo, but the background could have been just about any shape, color, image...
 
Last edited:
I am using software on my iPad called Photo Soft Box Pro HD. It's generally used to configure an iPad as a photographic light source (by displaying various images or patterns, e.g., a divided window). I think it costs a massive $2.99

I decided to use it as a background, and display a bright spot under the pen. The software lets you change all the parameters of the underlying image... size, position, rotation, color, brightness, etc.

One cool thing is that there is a companion app for the iPhone (Photo Soft Box Pro Remote, another $0.99)... and via bluetooth, the iPhone controls the iPad app, so I could change color, intensity, etc without touching the iPad screen.

Cool, eh?

The iPad was placed in a photo tent. There was one fluorescent light shining through the left side of the tent. A white reflector on the right, next to the iPad. A black board was angled above the iPad so the screen reflected the black card.

The reason the color of the pen is not quite right in my first attempt was that I was experimenting with the color temperature of the spot displayed on the iPad. I needed to make it cooler so I could up the red in the pen without the spot going red.

So, this setup is really only suitable to small items, but it suits my style (I like using reflective backgrounds anyway).

What do you think?
 
That's really creative Alan. I like it a lot. Now I have to swipe the iPad that I gave my wife and hook it up with my iPhone.
 
So I wonder how long it will be until the next photo using this technique appears on IAP.

If any of you give this a try, please post your photos here and we can tweak the process.

There are a few considerations, and perhaps some surprises when using this method. It might have some folk scratching their heads, but I'm happy to help.

I don't post many pictures to IAP, but I thought this technique was a natural for penturners who want to try something different with (and possibly improve) their photographs.
 
I see the crowd getting restless and sharpening their pointed sticks...

Here's a photo of the important part of the setup.

I'll fill in the details after some of you stop laughing <vbg>

OK... I haven't seen an iPad used for that yet! Cool!
 
Signed-In Members Don't See This Ad
Back
Top Bottom