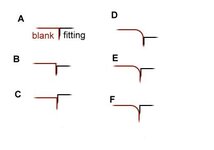
Matthew, I am trying to turn down to the bushing, and I am getting very close, but I invariably nick the bushing some, no matter how much I try to prevent that from happening. I have been doing my finishing between the lathe centers without using the bushings and that is working out real well. I think turning down to the correct bushing diameter measured with a caliper & sanding & applying the finish should keep me close enough. Is that safe to say? Thanks for the help! ------bobby moyers
I used to go right down to the bushing with my skew, and it worked well enough. My bushings gradually got smaller and once in a while I stained a blank.

But yeah, it's safe to say that if you turn down close to the bushings, then switch to between centers and use calipers to get to final size, you'll have better results. The only thing I'd change is where you said, "turning down to the correct bushing diameter"... you want to turn down to the correct
pen component diameter. Even within the same brand, style, and plating, there can be several thousandths difference. Across different platings in the same style, it can be even more of a difference. And of course from brand to brand, all bets are off, even if the pen style and nominal tube size are the same. For the best results, measure the actual parts for the kit you plan to put on that blank. Also, most kit parts aren't round, so measure at several points. Your target is the
largest reading. When taking measurements, don't squeeze the parts - the part can flex and give you a low reading.
Pay attention at first - and perhaps even keep notes - to get an idea of how much you take off with sanding and how much you build up with finish (and how much you take off with sanding/posishing the finish, if you do that). Also note how you like the feel of different sizes relative to the pen components.
In general, you want the final size to be the same as the pen component. Even the tiniest bit smaller is usually bad, because the sharp edge of the component is easy to feel when it sticks up over the barrel. On the other hand, a few thou over is much less noticeable, especially if you - very slightly - round the corner during polishing. If you're turning wood, remember that it is not stable, and will tend to shrink and expand. I make wood a few thou oversize so that when it shrinks, the components don't end up sticking up proud of the barrel. Try it different ways and see how you like the feel of each.