Lots of Photos ----Beware
You can actullay cut the quater in half if you so choose to do that very easily if you have a scrollsaw. Use a jewlers blade and sandwich the quarter between two pieces of mdf and away you go. When done sand the back side of both smooth. Now that is pretty thin.:biggrin:
John, I challenge you to do that! And show me pictures, hope you have a steady hand. :redface:That would seem damn near impossible by hand.
Well for those that are just stepping into this thread, A member here ( Seamus) makes some very unique and great looking state quater pens. He put forth the challenge of scrollsawing or resawing a quater in half using a scrollsaw because I had mentioned in a previous post that it can be done. There are doubters so I set out to prove them wrong.
")
First I will give a short explanation of what I did along with the photos. Then I will explain some findings and some mistakes that are correctable. I will also go on record and say this is not the easiest way to do this and I did find an easier way which I will show at the end.
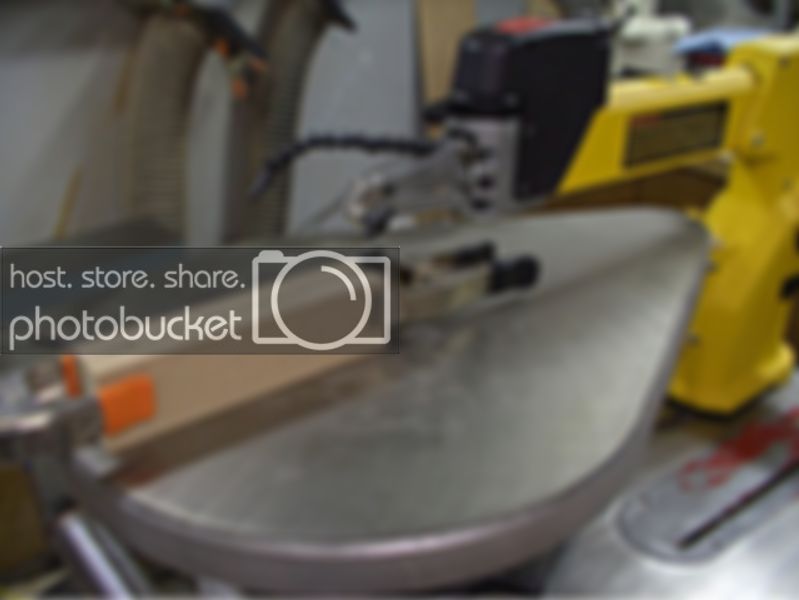
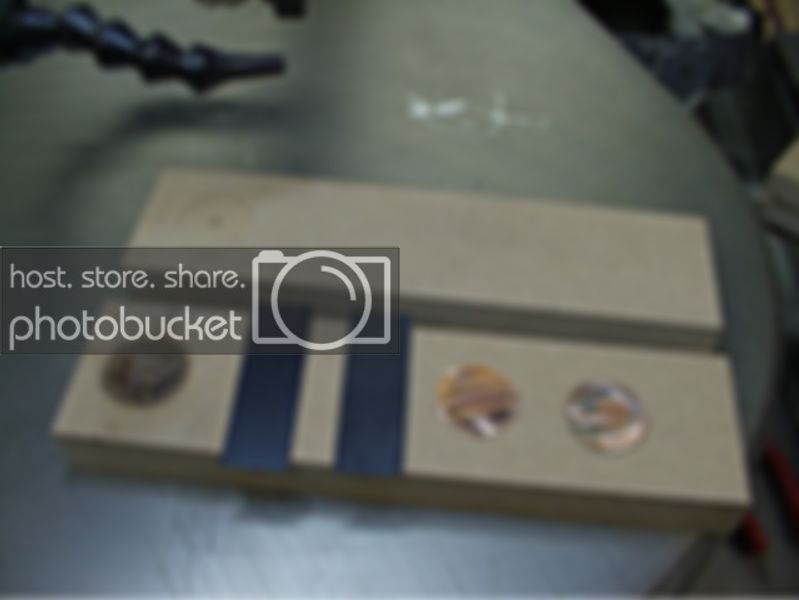
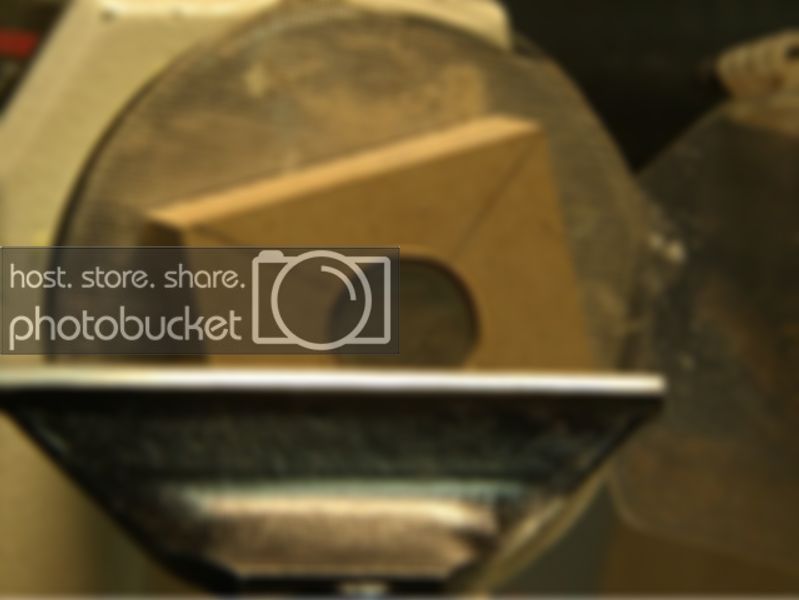
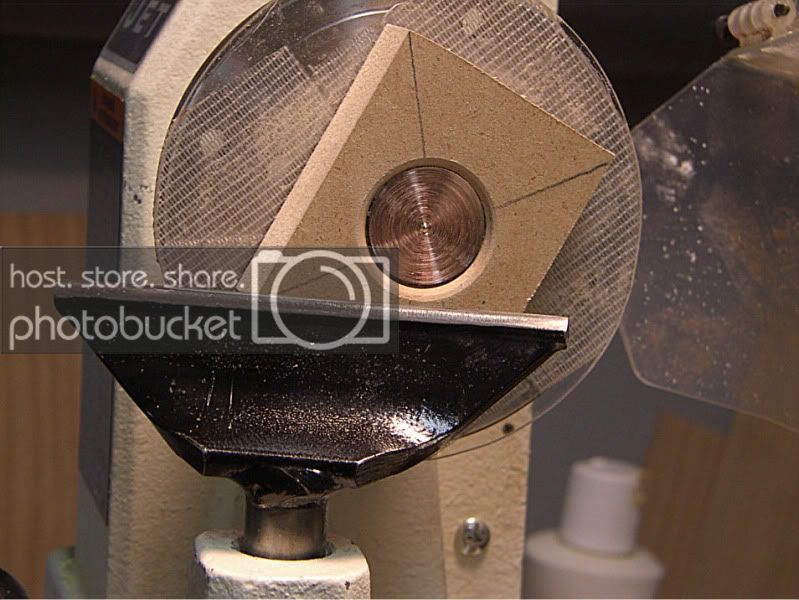
To get started the first thing that is needed is a way to hold the quarter at a 90 degree angle and steady enough to be resawn. Then a good jewlers blade is needed. I took 2 pieces of 3/4" MDF and cut some strips. I then drilled a 1" hole using a forstner bit because I could not find my quarter forstner bit ( do need to find that) I drilled a hole on the opposite side of the other piece of mdf making sure they were exact opposites and that is easily done using a drill press and a fence. I drilled the holes deep enough to allow approximately 1/2 of the quarter still showing and did the same on the other piece. I needed to leave a small bit of the quarter showing when the 2 sides were pressed together to allow for the blade to cut the quarter. I then added shims on both the front and back ends of the jig and what this did was take up the difference in the thickness of the blade or else the quarter would collapse on itself thus making it difficult to keep the blade cutting without binding. I held this together with 2 small spring clamps as seen.
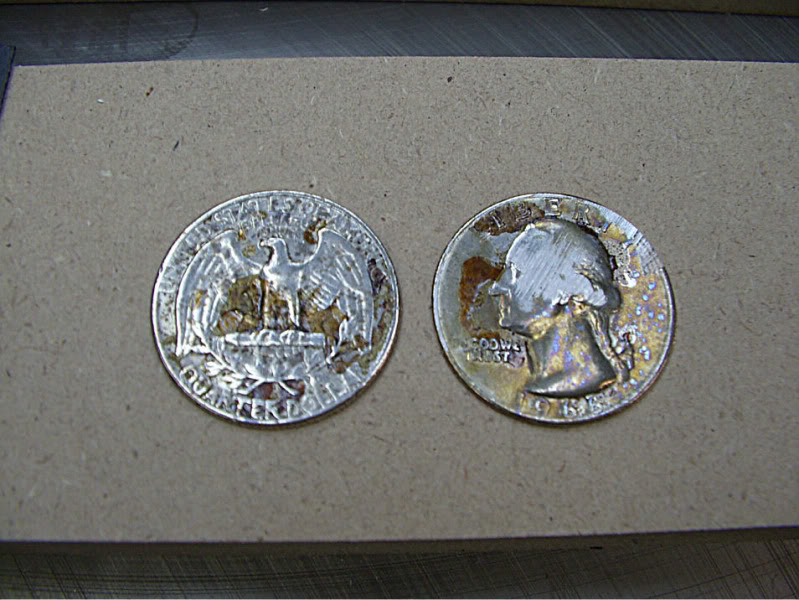
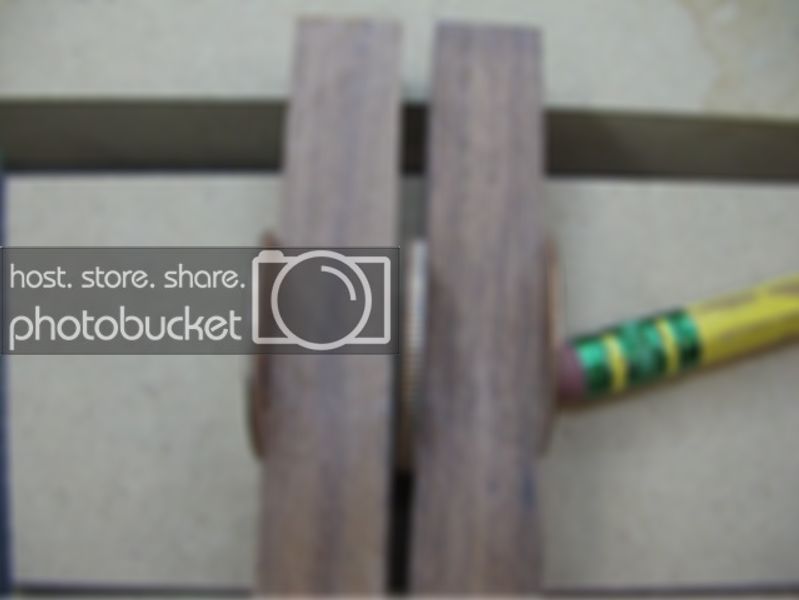
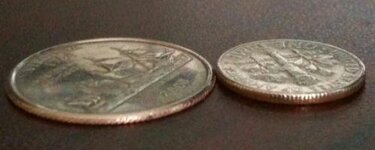
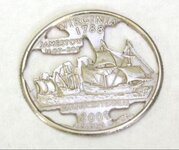
Now threading the blade and I used a #2 jewlers blade to do the cutting, I began the cutting advancing slowly. I wound up using 8 blades to cut this quarter and the first 2 were sort of throw aways because I had the speed of the saw set too high. When I finally found an optimum speed the cutting went better. It took about 40 minutes to make the cut which included changing the blades when they either broke or got dull. Will have to say the cuts came out rather well as far as uniform all the way around. I will explain what I found though that I needed to change. But now the photos. I show the jig set up on my saw. I then show the parts of the jig with the holes drilled and the shims used. In that photo is also the 2 sides of the Quarter after it was cut. The next photo shows the faces of the quarter and I will explain some things here also. Then the last photo is a reference to the thickness with the center quarter a full sized quarter and the 2 outer ones the cut ones.
Findings:
Now to the findings. First I tried to use doublesided tape to hold the quarter in place but that failed immediately. Then I used epoxy and that did hold. I probably should have tried using CA but was afraid the heat would blow that away too. (not sure) The thing with the epoxy I had a hard time removing it from the faces thus you see all the scratches so I just left it for this demo.
The next thing I found and turned out to be critical was I should have paid more attention to the thickness of the blade I was using and matching the shims to this exactly. The reason was that as you see in the thickness photo one side of the quarter is thicker than the other. In fact one is .79 and the other is .45mm What happened is when the blade started cutting it rode against one side of one MDF strip. If setup right and drilled to the proper depth the blade would have kissed both sides of the mdf strips and would cut right down the middle. Maybe I should have explained why I used the MDF to begin with and it was because I needed to keep the blade from wandering and running true which this did its job very well. It is an old scrolling trick.
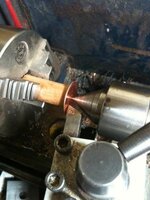
Now as mentioned I gave this a try and agree this is not an efficient way of doing this but as you can see it can be done. Maybe this technique can help someone in the future with something similar. But anyway I thought I would try using the lathe and sure enough this is a more efficient, fast way of doing this. The only thing is you waste one side of a quarter as with the other method you can wind up with both sides intact. I used doublesided tape to hold my quarter jig on a faceplate. I then used my 1" forstner bit to drill a hole to accept the quarter and then CA glued the quarter in place. I then used my carbide cutting tool and proceded to face cut the quarter and it worked great and efficiently. I could have made the quarter any thickness I wanted and it was already finished.
Warning if doing this method. Use only strong doublesided tape. I use the outdoor carpet tape as opposed to the indoor stuff. Alot stronger. Next warning is to cover the bed especially if the motor is underneath it. Don't want those filing to penetrate the motor housing!!! Also be carefull of the shavings and dust. Do a vac every so often to keep things clean and safe. Here are the photos to this set-up.
All in all it was a fun challenge but I think I will leave the quarter pens to Seamus. I am sure he has his methods and they work well for him because we all see the fine results he shows. Hope this was helpfull in some small way. :biggrin: