Sierra Vista Laser Inlay

Signed-In Members Don't See This Ad
See more from qquake

qquake

Member
Joined
Feb 8, 2004
Messages
5,028
Location
Northern California
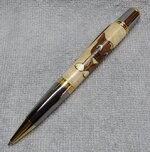
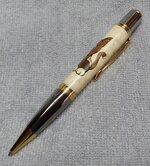
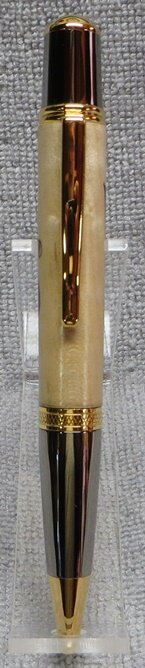
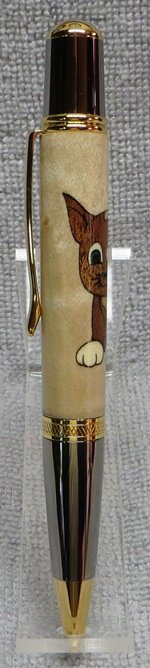
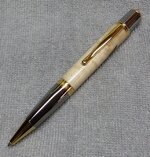
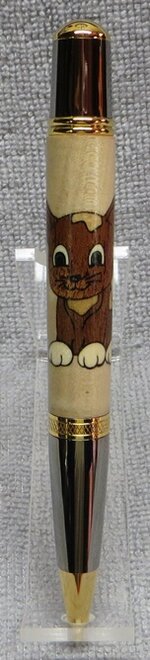
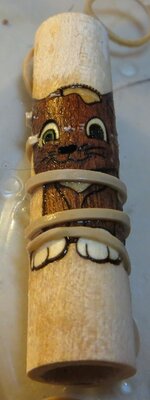
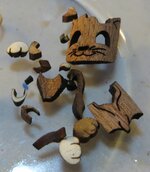
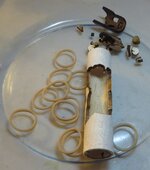
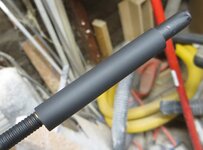
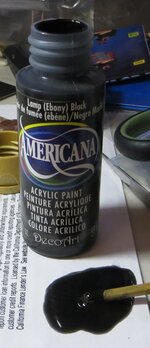
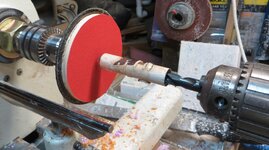
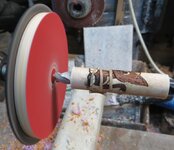
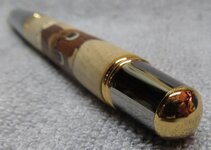
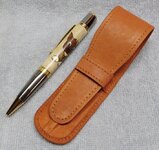
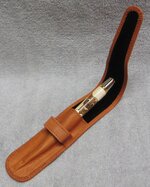
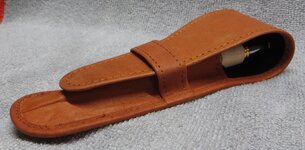
This is my first Sierra Vista pen, and my first laser inlay. The pen finish is black titanium and titanium gold. It's for my ex-wife's cousin, who is graduating from university. Her cousin has always been a cat person, so we both decided the kitten inlay would be perfect. The inlay was definitely challenging, but I'm very happy with how it turned out. My ex chose the perfect kit. I think Lori will be pleased with it.
 

Attachments

  • 052.JPG
    052.JPG
    229 KB · Views: 225
  • 053.JPG
    053.JPG
    208.4 KB · Views: 126
  • 054.JPG
    054.JPG
    58.7 KB · Views: 97
  • 055.JPG
    055.JPG
    57.1 KB · Views: 113
  • 051.JPG
    051.JPG
    241 KB · Views: 180
  • 056.JPG
    056.JPG
    59.5 KB · Views: 113
  • 057.JPG
    057.JPG
    59.4 KB · Views: 107
Signed-In Members Don't See This Ad

qquake

Member
Joined
Feb 8, 2004
Messages
5,028
Location
Northern California
Like I said, the inlay kit was challenging. Very challenging. The instructions say to remove the tube at one point, before all the pieces are glued in. That allowed some of the pieces to depress, and I had to sand the inside to get the tube back in. Some were so low, I thought they weren't going to turn with the blank. But in the end, they all turned. Either the nose piece was missing or I lost it, so I filled the nose hole with medium CA.
 

Attachments

  • 010.JPG
    010.JPG
    114.1 KB · Views: 149
  • 009.JPG
    009.JPG
    62.3 KB · Views: 100
  • 004.JPG
    004.JPG
    113.9 KB · Views: 100
  • 002.JPG
    002.JPG
    104.8 KB · Views: 154

qquake

Member
Joined
Feb 8, 2004
Messages
5,028
Location
Northern California
Since there were spaces between some of the inlay pieces, I painted the tube and colored the epoxy. Also, the instructions said to sand the tubes, not to use a barrel trimmer. So I made up a sanding disc, and used a letter V drill as a guide. It worked well.
 

Attachments

  • 014.JPG
    014.JPG
    140.1 KB · Views: 167
  • 017.JPG
    017.JPG
    77.3 KB · Views: 132
  • 018.JPG
    018.JPG
    115.7 KB · Views: 107
  • 021.JPG
    021.JPG
    165.7 KB · Views: 110
  • 024.JPG
    024.JPG
    132.9 KB · Views: 110

qquake

Member
Joined
Feb 8, 2004
Messages
5,028
Location
Northern California
I underturned the finial end, and I'm not quite sure how it happened. I was careful to match the bushing diameter. So either the bushing is too big, or I wasn't as careful as I thought. The finial bushing is slightly larger than the nib bushing. I need to measure and see what happened.
 

Attachments

  • 060.JPG
    060.JPG
    126.9 KB · Views: 130

qquake

Member
Joined
Feb 8, 2004
Messages
5,028
Location
Northern California
I decided such a nice pen deserves a nice leather case.
 

Attachments

  • 062.JPG
    062.JPG
    235.1 KB · Views: 106
  • 063.JPG
    063.JPG
    190.3 KB · Views: 93
  • 064.JPG
    064.JPG
    145.5 KB · Views: 132

qquake

Member
Joined
Feb 8, 2004
Messages
5,028
Location
Northern California
I underturned the finial end, and I'm not quite sure how it happened. I was careful to match the bushing diameter. So either the bushing is too big, or I wasn't as careful as I thought. The finial bushing is slightly larger than the nib bushing. I need to measure and see what happened.

Okay, the "rings" at the finial end measure 0.548", and the bushing measures 0.549". The specs say that the bushing should be 0.550". But regardless, I underturned it. That's definitely more than 0.002".
 

Mortalis

Member
Joined
Aug 19, 2013
Messages
661
Location
Bardstown, Ky
Good job!

I've made several of the light house inlay pens and they can be challenging also. I made one with a Monet pin kit, very similar if not the same to your Sierra. The pen turned out really well but I dont like the slick end that you hold onto when you write.

I keep a vial of brass shavings that get from my local Lowe's from their key cutter as well as some turnings from nice wood that I use for filler when I need it. That would have come in handy for your missing nose. Probably could have painted a toothpick and then glued that in place also.
 

Mortalis

Member
Joined
Aug 19, 2013
Messages
661
Location
Bardstown, Ky
One other thing I have learned with inlay kits is to always work out of the package. I place the package on a paper plate when I open it and leave the parts in it there as I work on the inlay. That way if I find myself "missing" a piece it's likely statically stuck to an inside corner of the package.
I also purchased a good pair of tweezers with sharp points that meet.
For easy assembly I use magnification. Due to my old eyes I use readers and they work very well.
 

Charlie_W

Member
Joined
Nov 16, 2011
Messages
5,918
Location
Sterling, VA USA
Nice job Jim! You overcame your challenges on the blank!
I am sure she will not only like the pen but will love that you made it especially for her!

As for the blank diameter at the finial end of the pen, I have found that with the Sierra and Sierra Vista variants, Wall Street II & III, etc, that some of the pens have a bead at the top where the blank meets as in your case and others have a square edged ring. These can vary in diameter. I measure the particular pen and will make the top of the blank smaller to come in to the flat of the bead....or you can roll the top edge of the blank to replicate the bead it is going to mate up against. These techniques will take care of that issue. Just check the pen to your bushings first and then you will have a plan.
 
Top Bottom