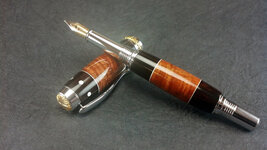
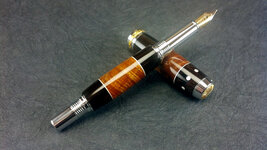
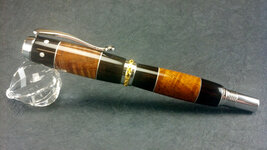
Tried something a little different with the aluminum. Took quite some time to get the dots evenly spaced and seated in the wood secure enough to turn. The wood is exhibition grade curly Tasmanian and African Blackwood. Not sure why I had trouble getting a focused picture this time. This could be my excuse to sink a few hundred into a camera, no wait, I want that pressure pot, or was it the new nova chuck, or....")
Thanks for looking,
Mike
Thanks for looking,
Mike