Practice, Practice, Practice

Signed-In Members Don't See This Ad

Drewboy22

Member
Joined
Aug 21, 2015
Messages
727
Location
San Antonio, Tx
I spent the morning with 'Flyitfast' getting some instruction and some practice. Thanks for all your help today Gordon :highfive:

20150919_161938_resized_zps2108c830.jpg


20150919_192526_resized_zps46dde991.jpg
 
Signed-In Members Don't See This Ad

Drewboy22

Member
Joined
Aug 21, 2015
Messages
727
Location
San Antonio, Tx
Pen #1

This is my first pen. I is made from cherry wood. Turned with a Gouge and skew, sanded with 150 - 600, then applied a minwax furniture finish. I have noticed now that I did not get it quite close enough to the bushings but all in all I am very happy with the way it turned out.

20150922_174213_resized_zpsnruwy13l.jpg


All C&C are welcome

Thanks
 
Last edited:

Drewboy22

Member
Joined
Aug 21, 2015
Messages
727
Location
San Antonio, Tx
Pen #2

This one is made with Bubinga. This must be an extremely hard species as it was took more effort to turn. I used the same process as I did on pen one.
Turned with a gouge and skew, sanded from 150 - 600 and used minwax as the finish.

This is the first time I used the buffing wheel. I thought it would help the wax finish. However I think I just buffed off the wax. I also cut a little to deep on the upper part and tried to use the clip to cover it up. :tongue:

20150923_162051_resized_zpsfhf0mjir.jpg


All C&C are welcome
 
Last edited:

Brian G

Member
Joined
Jul 2, 2013
Messages
1,574
Location
Bloomington, MN
Looking good, especially where the nib and lower barrel meet. Next challenge is pitching the kit center band and making your own. That's what scraps are for. :)

A little bit of oil, like boiled linseed oil or walnut oil, applied and left to dry before the minwax will enrich the grain and deepen the color.
 

Drewboy22

Member
Joined
Aug 21, 2015
Messages
727
Location
San Antonio, Tx
Looking good, especially where the nib and lower barrel meet. Next challenge is pitching the kit center band and making your own. That's what scraps are for. :)

A little bit of oil, like boiled linseed oil or walnut oil, applied and left to dry before the minwax will enrich the grain and deepen the color.

That is great feedback. I wasn't sure what you could do. Weather the wax would stick if oil was used. Only oil I got right now is vegetable oil and I don't think this would work well, ha ha. I will look into some BLO and see what I can find.

P.S. This bubinga came from you also :wink:

Thanks
 

Brian G

Member
Joined
Jul 2, 2013
Messages
1,574
Location
Bloomington, MN
Danish oil, which you can find at your favorite Big Box home center, will work too. You don't need much. I typically wipe some on, let it soak a few minutes, wipe on some more, let it soak a few minutes, then wipe off the excess. I'll let it sit overnight or two before applying the top finish.

It will really help those stabilized blanks.
 

Skie_M

Member
Joined
Aug 7, 2015
Messages
2,737
Location
Lawton, Ok
I use Minwax Stain and Seal (natural color) right before I apply CA for my topcoat finish.


A nice tip to remember .... if you can still feel the bump between the wood and the bushings while it's turning, you're probably not close enough yet, unless you want that in the final design.


For safety's sake, you can turn the lathe off and then put your hand around the pen barrels as though gripping it to write with ..... is it comfortable? smooth to the touch? do your fingers slide down the barrels without catching on the transition points?

As you get to be much more familiar with lathe work, you tend to do this kind of checking as you go, even while the lathe is still running. Obviously, you're not going to try to actually grip the barrels, but just get a feel for how it fits your hand. This type of step is reserved for when you're getting ready to start finish sanding.


While Minwax has "wax" in the name, most of their products do NOT contain a wax. Their furniture finishes can contain dyes, polyurethanes, stains, ect .... perhaps some of the topcoat styles contain a wax of some sort for water repellent qualities.

The Minwax that I use is a penetrating oil and uncolored natural stain. It deepens the color and helps the grain stand out, as though the wood is wet. This is further enhanced by applying a CA finish, for an "encased in glass" look and feel.
 

Drewboy22

Member
Joined
Aug 21, 2015
Messages
727
Location
San Antonio, Tx
Another slim-line set.

This one is made with Bocote (I believe it is pronounced Bow-Co-Tee, Please correct me if I'm wrong)

Finish sanded to 600 - attempted to do a CA coat, resanded from 220 - 600, attempted again to do a CA coat, Resanded again from 220 - 600. Finally applied 12 coats of CA. To be honest I am not real happy with the turn out but I think some MM might on the next one.

20150925_171915_resized_zpsvpd13wxx.jpg


20150925_171932_resized_zpsczthfa7a.jpg


All C&C are welcome
 

Skie_M

Member
Joined
Aug 7, 2015
Messages
2,737
Location
Lawton, Ok
What I usually do is right before I get into my finish coat, I sand up to 1000 grit, nearly giving a polished appearance to the wood.

Then, while the lathe is spinning at low speed, I apply rubbing alcohol. This evaporates pretty fast, stripping the oils and a little water out of the surface of the wood. Then, I apply Minwax Stain and Seal "natural" color, and while that's still wet, I apply a coat of CA. I don't spend more than 3 seconds with the applicator against the wood. Any more than that and I risk the applicator getting glued to the pen barrel.

After applying 6 - 9 coats of CA, I then begin my wet sanding, starting with 1000 grit to knock off any ridges that may have formed. Then I sand "with the grain" with the lathe turned off. Then I jump to micromesh pads (I get them from Hobby Lobby), 3200 grit, wet .... followed by turning the lathe off and sanding "with the grain" again. As I work my way up to 12,000 grit, every 3 pads or so, I stop the lathe again to sand "with the grain".

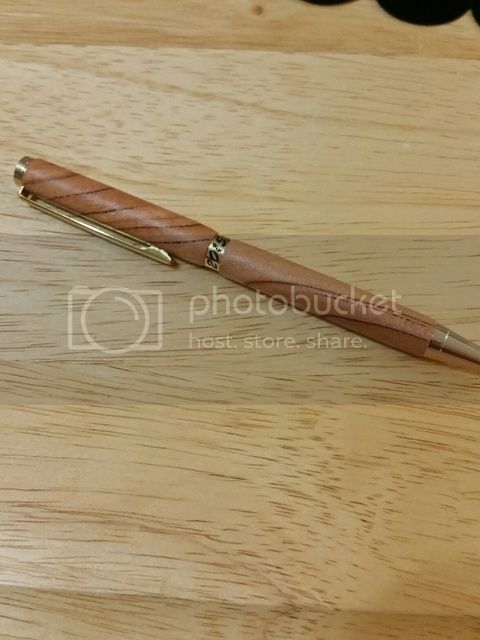
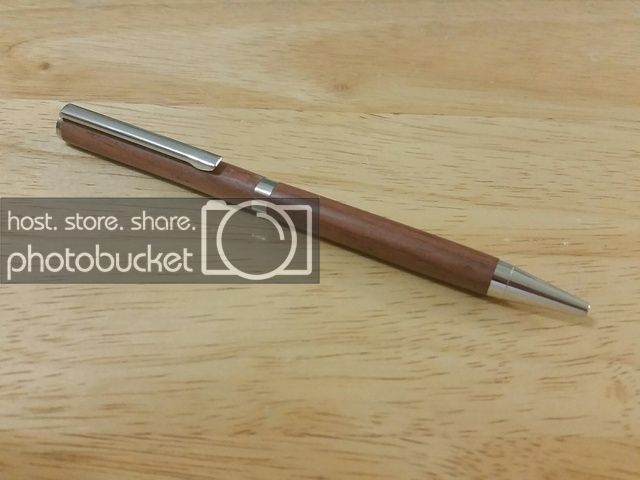
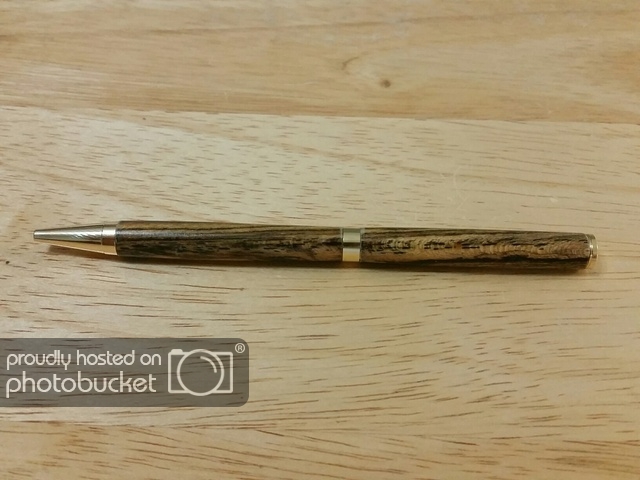
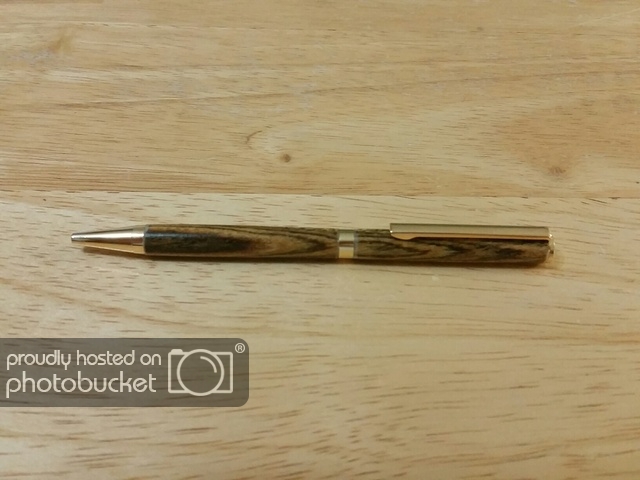
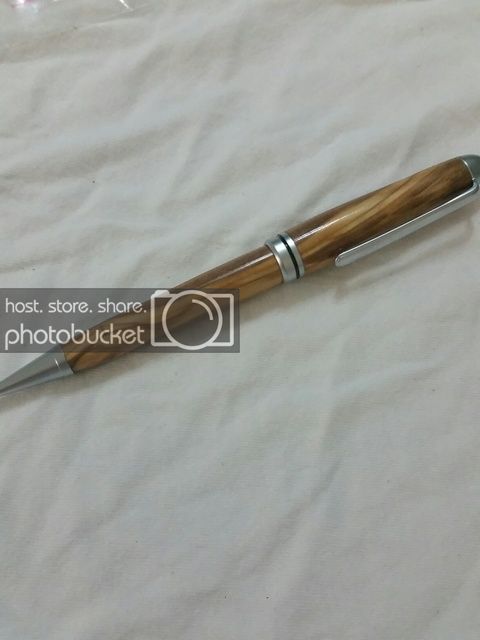
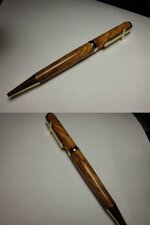
Finally, I apply some Meguiar's PlastX and buff at high speed .... I leave the lathe spinning at high speed while I follow up with a coat of Turtle Wax Hard Coat and buff it to a glassy mirror shine. The results look as though the wood was encased in glass.


Keep in mind that if you are looking to get results like mine, you'll have to follow my entire procedure step by step, taking no shortcuts or deviations. Certain substitutions may work well, like swapping out my minwax for some danish oil, boiled linseed oil, walnut oil, or what have you ... the brand of superglue used can also be changed up, as I just use the cheap stuff I buy at Harbor Freight in the 10-packs. If you have One-Step plastic polish, you can swap that in to take the place of the PlastX. In fact, they're both made by the same company. :p
 

Drewboy22

Member
Joined
Aug 21, 2015
Messages
727
Location
San Antonio, Tx
Pen/Pencil #4

Holy Land olive wood pencil

I received a package from HCPENS this weekend and inside were 2 blanks of Olive Wood from the Holy Land.

I bought a matching Pen/Pencil set from WoodCraft and this is the first piece.

20150927_175224_resized_zpstrkh3viy.jpg


20150927_175238_resized_zpsuamswdqr.jpg


All C&C are welcome.
 

Skie_M

Member
Joined
Aug 7, 2015
Messages
2,737
Location
Lawton, Ok
That last one is looking great!


I do love the colors and figuring in Bethlehem Olive Wood ... :)


attachment.php


24kt gold Comfort Grip (no rubber grip) with upgraded 24kt gold cross clip in Bethlehem Olive Wood. This is the only burl type cut in BOW that I've gotten so far... most of what I get is straight grain and diagonal grain.
 

Attachments

  • bow.jpg
    bow.jpg
    59 KB · Views: 313
Last edited:

Drewboy22

Member
Joined
Aug 21, 2015
Messages
727
Location
San Antonio, Tx
A Couple more I have added to my repertoire.

Slimline with BOW
20151005_170939_resized_zpscje5yx9c.jpg


Designer with Cocobolo
20151007_223237_resized_zpsgqhi0mcx.jpg


Designer with BOW
20151008_181002_resized_zpspcmbfhsz.jpg


I just ordered some Executives from Smitty so you should see those before to long :biggrin:

and please if you see something I missed or am doing wrong or even can do better please let me know. I have only made 13 pens so every one is a learning process.

I am still trying to get some depth in my finish, but that will come with practice. I have seen some pens that almost look like they were dipped in a plastic coating and polished up. I just need to keep trying.

Thanks,

Drew
 
Last edited:

Skie_M

Member
Joined
Aug 7, 2015
Messages
2,737
Location
Lawton, Ok
There actually is a finishing process that ends up coating your barrels in acrylic plastic in large quantity ... it is termed "Plasti-kote", I think ... check the finishing forum and look for that. Keep in mind that it's some nasty stuff you won't want to keep in the house, and it's flammable and toxic till it's cured. If you make any, keep it under lock and key for sure!
 
Top Bottom