Not sure what I'm doing wrong Drat!

Signed-In Members Don't See This Ad

Fay Prozora

Member
Joined
Jul 20, 2014
Messages
469
Location
Port Angeles, Wa
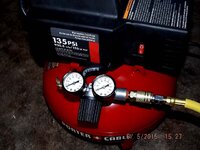
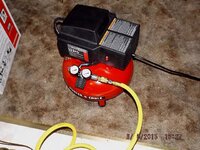
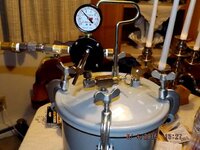
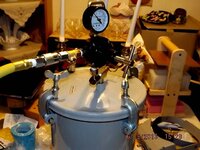
I have my pressure pot set up with the air compressor and it won't get to 40 PSI I tried a few times and got some leaks and then it still drops pressure and it did hold at 20 for about 15 minutes only to start dropping. Can't find any more leaks. I wonder if I should have put some thing in the pot before adding any air. I'm not really understanding how to adjust the pressure guage. Do I let it get to where it is supposed to be and then adjust it or what. The pin on the safety valve pops out before it gets to 30 or 40 PSI. I wrapped more tape around the threads and that seemed to help. I don't think I will do any more tonight because I live in an apartment and that thing is a little bit loud and I don't need any one complaining about noise. May have to set the air thing outside. Any ideas? Thanks in advance.. Fay
 
Signed-In Members Don't See This Ad

wyone

Member
Joined
Jul 16, 2014
Messages
1,764
Location
15314 Grasslands, Parker, CO 80134
The pressure relief should say what it is rated pressure wise on it. It might only be 40 PSI or so. Did you lubricate the gasket when you put the lid on? It makes a huge difference. to test for leaks, make a soap bubble solution with water and some dish soap and apply to all the fittings. If they blow bubbles, they are leaking. I find that if I tighten the clamps improperly it makes a difference. I basically tighten opposite sides sort of tight, then the other two, then go back to the first two and tighten more and back, and then go in a circular pattern all around just making sure they are all tight.
 

BSea

Member
Joined
Dec 28, 2009
Messages
4,628
Location
Little Rock, Arkansas
Are you leaving the compressor connected? You are going to get a little leakage, but it should hold for at least a few hours. But even if your's leaks, leaving the compressor connected should compensate for the leaks easily. Be sure your compressor is set to a pressure below the pressure relief valve.

Wyone gave you good advice. I agree with everything he said.
 

le_skieur

Member
Joined
Sep 29, 2010
Messages
329
Location
Ca
Have you get ride of those cheap fittings that comes with your paint pot? If not, have new brass fittings to replace them. Make sure you install a ball valve at the entry.

The safety valve that come with it is garbage, I did not install it, it says that you can make adjustment but it pop up at less then 45psi.

If you do that and you have no leakage, you don't have to let it connect to your compressor. If you have leakage, make sure you used good Teflon tape and the lid is well tighten.
 

BSea

Member
Joined
Dec 28, 2009
Messages
4,628
Location
Little Rock, Arkansas
I should add that you don't have to leave your compressor on. The pressure in the storage tank should be more than enough to keep your pot pressurized for as long as it needs for the blanks to set.
 

Fay Prozora

Member
Joined
Jul 20, 2014
Messages
469
Location
Port Angeles, Wa
I was not able to remove the parts that came with the pot. Maybe I'm not strong enough or they are glued in some how. They are in so tight they don't budge at all. I'll readjust the safety valve and then see how that goes. It did not pop out before. Now, do I turn on the compressor and let it get to pressure before I hook it to the pressure pot? Some thing I'm just not getting. Or do I just hook it to the pot and then let it run? I'll try it again for kicks. Another thing, there are 2 gauges on the compressor and which one do I watch or both? It shouldn't be rocket science but to me it is. Maybe I should snap a few pictures to show you my set up. That compressor is a bit noisy and I hope the neighbors won't complain too much. .
 

Ironwood

Member
Joined
May 31, 2010
Messages
1,228
Location
Mackay. Australia
Fay, get one of those cheap plastic spray bottles, put a good squirt of dishwashing detergent in and fill with water, now spray the mix all over the fittings on your pot and around the lid gasket while it is pressurized, you will soon see where your leaks are.
 

jsolie

Member
Joined
Apr 25, 2013
Messages
2,100
Location
Sunny Murrieta, CA
Hi Fay,

I had a problem with the pressure safety valve on my HF paint pot. I had to take it apart and mess with it to get it to work correctly. The little white stopper piece was in backwards and it wasn't making a good seal.

You'll probably need an adjustable crescent type wrench to get some of the fittings off. On mine, one was on kind of tight, but it couldn't withstand the leverage from a wrench. It's also important to use that white teflon tape when replacing the fittings. The tape fills in the gaps between the threads and makes it harder for air to get out.

As for your air compressor, my little one is usually at some unknown PSI when I start to pressurize the paint pot. I know it's going to kick off and run, I just don't know when. It usually startles me when it begins running because it's so loud. It can pretty much be heard everywhere in my house, so I know it can be heard outside. At least it's a small air compressor so it doesn't run for too long.

I usually run my pressure pot up to about 40psi and then disconnect the air line. I'll let my castings sit in there overnight. Usually it drops a bit as I know it doesn't have a perfect seal. It's usually sitting around 30-35psi, and I can live with that.

Some pictures would help.

Hope some of this info is useful. You'll get there. :)


I was not able to remove the parts that came with the pot. Maybe I'm not strong enough or they are glued in some how. They are in so tight they don't budge at all. I'll readjust the safety valve and then see how that goes. It did not pop out before. Now, do I turn on the compressor and let it get to pressure before I hook it to the pressure pot? Some thing I'm just not getting. Or do I just hook it to the pot and then let it run? I'll try it again for kicks. Another thing, there are 2 gauges on the compressor and which one do I watch or both? It shouldn't be rocket science but to me it is. Maybe I should snap a few pictures to show you my set up. That compressor is a bit noisy and I hope the neighbors won't complain too much. .
 

Fay Prozora

Member
Joined
Jul 20, 2014
Messages
469
Location
Port Angeles, Wa
Ok I took a few pictures of my set up and I have air in the pot and it is holding up better so I'm getting the leaks and hopefully it will work in a day or so. Next I put some thread tape on the other end of the hose and lubricate the lid and hopefully that will get the rest of the leaks. I don't hear any more but it is holding the air better. I got the part with the ball valve on a little bit tighter and this time the pin did not pop out. I got it up to 40 PSI but then it is dropping air at a very slow pace. Take a look. Oh I turned off the compressor once it got to 45 or 50 PSI and then turned off the air compressor but left it hooked up to the tank. I'm in hopes it will work better after I do the other end of the air hose and the lid and we'll see. Here are some pictures. Fay
 

Attachments

  • Air compressor-1 (640x480).jpg
    Air compressor-1 (640x480).jpg
    90.6 KB · Views: 165
  • Air compressor-2 (640x480).jpg
    Air compressor-2 (640x480).jpg
    108.3 KB · Views: 153
  • Pressure pot set up-1 (640x480).jpg
    Pressure pot set up-1 (640x480).jpg
    93.7 KB · Views: 192
  • Pressure pot set up-2 (640x480).jpg
    Pressure pot set up-2 (640x480).jpg
    91.6 KB · Views: 153

low_48

Member
Joined
Jul 1, 2004
Messages
2,176
Location
Peoria, IL, USA.
First off, I think you are using the wrong candelabra for the paint pot you have. I prefer nickel plated. LOL Seriously, you really didn't need the regulator on the pot, you already have a regulator to control hose pressure on the compressor. It doesn't hurt, but it does make for more joints to keep from leaking. A simple pressure gauge would work better. If you are concerned about hand strength for tightening the handles on the pot, put a LITTLE more pressure on them by using a small adjustable wrench for leverage. DON'T overdo that, just a little tweak.
 

79spitfire

Member
Joined
Sep 19, 2010
Messages
366
Location
Nevada
The candles are a nice touch. I ended up having to change the pressure release valve to one that would hold rated value, lubing the seal helps to, be careful it can cause dirt to be attracted to the seal.
 

Fay Prozora

Member
Joined
Jul 20, 2014
Messages
469
Location
Port Angeles, Wa
Thanks every one. I have the pot sitting on the dinning room table for now. I found out the dirt issue last night when I took the lid off the pot. I wiped the gasket and the rim of the pot with warm water and I also fixed the other end oh the air hose so that should be pretty tight. Later today I will put a little bit of Vaseline on the gasket in the lid and then button it all down and try again. It did hold pretty well last night but it dropped pressure at a very slow rate . Hopefully it will work out today. Right now my back is hurting so I 'm going to lie down for awhile and then I'll get up and try again. Also forgot to drain the condensation from the tank so I will do that today after I put the air in the pot. Hopefully it will be better but once it leaked at a very slow rate. It took over an hour for the pressure to drop completely then maybe I'm closer to having it working. Thanks for help every one.. Will keep trying. Fay
 

79spitfire

Member
Joined
Sep 19, 2010
Messages
366
Location
Nevada
I got mine to the "slow leak state" and just left the compressor hooked up! I know that's not the best solution, but it does work for me.
 

Fay Prozora

Member
Joined
Jul 20, 2014
Messages
469
Location
Port Angeles, Wa
Do you leave your compressor running while it is hooked up? I finally got mine to hold air a little bit longer but it still has a very slow leak some where. I put more thread tape on some of the fittings and it's a little better. Also lubricated the gasket on the lid and that seemed to help too. Tomorrow I may try casting and see how it goes. Even if it means putting more air in. We'll see. I live in an apartment so I might have to take very thing over to my shop so the noise doesn't bother the neighbors. I was hoping to do my casting here and take the blanks over there to turn. I'm sure it will all come together before long. Thanks again.. Fay
 

79spitfire

Member
Joined
Sep 19, 2010
Messages
366
Location
Nevada
I do. I don't have neighbors to worry about. I also keep an 'ear' out if the compressor starts running too much. Alumilite sets in a couple of hours, so it's not too long. I don't pressure cast PR.
 

Fay Prozora

Member
Joined
Jul 20, 2014
Messages
469
Location
Port Angeles, Wa
Thanks. I will try to cast some thing tomorrow for kicks. I won't leave the compressor on until I get it to my shop but with a really slow leak, I might be able to do some thing with it. Even if I put a little more air in as if it drops too much. Not sure if that will work or not but it doesn't hurt to try it. Oh well hopefully it will work out. Thanks for the information. Fay
 

SteveG

Member
Joined
Dec 21, 2009
Messages
2,989
Location
Eugene, Oregon 97404
Aloha Fay, you are doing good, applying the help you are getting in this thread. So good for you, and the whole concept of casting by candle light seems kid of cool too!

One question you asked was about the gauges on the compressor. Looking at the pics provided, the gauge on the left (near to the relief valve) reads tank pressure, and will go up and down as the unit runs and as you use some air. The gauge on the right reads "regulated" pressure. That pressure is controlled by the black knob between the two gauges. So the tank pressure will rise and fall, but that pressure supplied to you pot will be constant at what ever you set by turning the black knob (as long as the tank has sufficient pressure in it to supply the desired regulated pressure). On some units, you need to pull the black knob out to be able to turn it to adjust the pressure. If so, push it back in once it is set, so it will not inadvertently get turned, and be providing a pressure you were not expecting.
Have fun with your new tools!
 
Top Bottom