No Centerband

Signed-In Members Don't See This Ad

aggromere

Member
Joined
Mar 27, 2009
Messages
1,385
Location
Tampa, FL
I've made a few pens that I have removed the centerbands from and made each end closed end. (using gent and Jr. gent kits).

I dont have any pictures of them yet but I have a few questions.

I make the pen in the standard way remove the centerband and sand off the last little silver ridge on the cap end of the centerband and leave off the little silver retaining ring on the nib end so they fit flush. I've tried cutting a groove around the tube so the parts fit in and can get a flush fit, but removing the hardware seemed the easiest to me.

My problem is getting the end of each of the barrels the exact same diameter. I use my calipers to measure and am careful, but once the pen is finished and you run your hand up and down it, you can readily tell where the seam is.

Is there a technique to getting it exactly right? I've thought about how you might assemble the pen before it is turned to final shape so you can sand the pieces at the same time, but have no idea how to do that.

Anyone have any suggestions or that can point me towards some reference materials that might help me.

As always thanks for the help.
 
Signed-In Members Don't See This Ad

mickr

Member
Joined
Apr 22, 2009
Messages
1,181
Location
wilderness
hmmm..never have tried to do that...I would suspect you may have to do it by hand (sanding) after it is off the mandrels..no way to put them together on the lathe..I don't think I'd ever attempt to achieve what you are as the tolerances would be very high, and with wood & sandpaper it would be a real chore. good luck
 

RussFairfield

Passed Away 2011
In Memoriam
Joined
Feb 10, 2004
Messages
1,522
Location
Post Falls, Idaho.
I know of only 3 ways to do it - turn and sand both sides of the joint at the same time, make them a different diameter so it doesn't matter, or turn them separately and count on there always being s "feelable" difference in diameter.
 

ngeb528

Member
Joined
Mar 4, 2009
Messages
808
Location
Deland, FL
I've done it with slimlines by removing the center bushing. Couldn't you turn a piece of acrylic or corian to the inside diameter of the tube to act as an invisible bushing between the upper and lower blanks?

If you made it long enough that a little vibration wouldn't allow it to shift side to side too far, then you could remove the center bushing and insert it at the point when you were ready to sand (which allows you to push the upper and lower barrels together in the middle) and then you could get the top and bottom to match the way you want it to.

Just a thought.
 

Russianwolf

Member
Joined
Jul 13, 2007
Messages
5,690
Location
Martinsburg, WV, USA.
Peter, I'd love to see some pics of what you are doing. I can't quite picture how it would look as a finished pen.

I think, the only way to do what you are after is to get the two parts closed to finished in the middle, but leave the ends larger. Join them with a custom rod that fits snuggly in both halves. Put one end of the pen in a scroll chuck and the tailstock on the other end, and sand the middle to spec. Then , pull it apart and do the closed ends on both halves. Try not to touch the middle sections again and hopefully they will come out like you want.
 

aggromere

Member
Joined
Mar 27, 2009
Messages
1,385
Location
Tampa, FL
Pictures of Centerband-less Pens

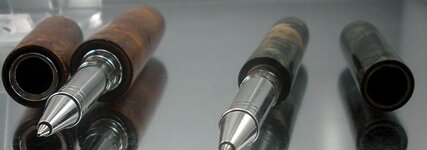
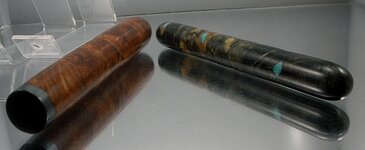
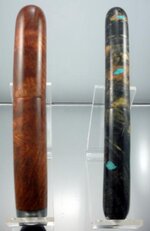
Here are some pics of two of the pens I've made without centerbands. One is a piece of Buck Eye Burl that was so pretty and had some nice voids in it for filling so I just made the whole thing into a pen. Not sure it's very practical, but it was kind of an excercise. It is made with the center band ground down smooth so it has no lip and the other end was assembled without the little retaining ring. The other is an attempt at coming up with a pen that looks like a cigar. It was big enough around that I cut grooves around the tubes and used the ring and did not grind off the lip. The reason that it has the black acrylic (to look like ash) on it is because I cut too far in when I was turning it and exposed the hole I drilled so I glued that on to cover the mistake. Although the both look crooked in the last picture they are not. But as you can see, they don't fit together perfectly at the joint.

I'm looking for any help or suggestions that could help me improve this process so I can move on to making pool cue pens with no centerband.
 

Attachments

  • ringless apart down.jpg
    ringless apart down.jpg
    18.9 KB · Views: 213
  • ringless down.jpg
    ringless down.jpg
    20.4 KB · Views: 229
  • ringless upright.jpg
    ringless upright.jpg
    19.4 KB · Views: 302

mickr

Member
Joined
Apr 22, 2009
Messages
1,181
Location
wilderness
I came up later with the same idea as Nancy & Mike..but once it went into a chuck amd you tried to keep 2nd part on with tailstock(??dent??) any runout, would give you a mismatch again...I truly think put together OFF the lathe on a custom turned rod and hand sand
 

randyrls

Member
Joined
Feb 2, 2006
Messages
4,830
Location
Harrisburg, PA 17112
My problem is getting the end of each of the barrels the exact same diameter. I use my calipers to measure and am careful, but once the pen is finished and you run your hand up and down it, you can readily tell where the seam is.

Is there a technique to getting it exactly right?

Peter; With Comfort Pens with 7mm tubes I often remove the center bushing and set the size of the center with a caliper. It helps me to get an even sweeping flow from nib to clip.

I believe you are making a pen with no metal showing at the center joint, and you are making a double closed end pen. On a normal pen and mandrel it would be relatively easy, but closed-end; that is a tough nut to crack!

Instead of trying to hide the joint, you might want to emphasize it?

I don't know what kind of setup and tools you have so bear that in mind.
After thinking for a few minutes, I came up with this hare-brained idea. This will likely only work if you make sure you keep the grain match / orientation the whole way thru the process.

  1. Turn the pen down to about finished size +1/16" or to the point you would start sanding.
  2. Make a convex cone shaped drive center for the headstock and tailstock.
  3. Make a loose mandrel to fit inside the tubes. The mandrel should match the length of the tubes and be a close press fit in the tubes. No slop allowed! You might be able to use the center fittings here?
  4. Install on lathe and sand the center down using a flat backer on the sandpaper.
  5. Finish the center section as normal.
  6. Now put the two ends back on whatever closed end mandrel you have and finish the ends.

Help this helps..
 

aggromere

Member
Joined
Mar 27, 2009
Messages
1,385
Location
Tampa, FL
Never thought of trying that. I will see what I can rig up. Will be an interesting experiement. Thanks all for the input and feed back
 

Narwhale

Member
Joined
Nov 9, 2006
Messages
79
Location
Houston, Tx..
Peter,
The pens look good and interesting.
I make my closed end pens using turned and measured hard wood press fit mandrels. A mandrel for either end.
To do what you are asking,
1. if one made both sections closed end and
2. then made a short center mandrel with a different diameter on each end.
3. turn some wood "centers" for both the tailstock and headstock that have little cups to hold the pen ( the two closed end sections with the center mandrel to hold the alignment.
4. Put the doble closed end pen between the two wooden centers, turn on lathe and sand the middle sections down to finished shape.
5. Then beginns the finishing part. (Acrlyics would be easy, wood pens would probleably have to remounted on their own mandresl for finishing.
Rich S.
 
Top Bottom