gketell
Local Chapter Leader
From Grant to Hans to me this is spreading faster than swine flu.
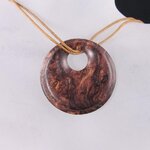
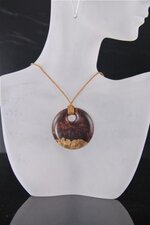
This one is 1-1/2" diameter, 3/16" thick and made from a slice off a Honduran Roserwood Burl bottle-stopper I had laying around.


Things I learned from this:
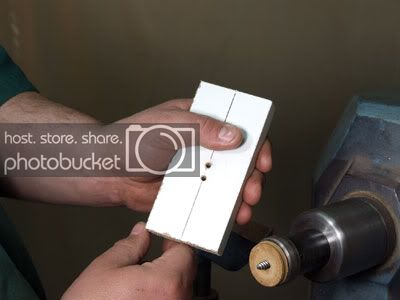
1) Your backing board should be should be balanced when turning the main shape. I used a rectangular block with the pendant near the top and that hurt. :redface::redface:
2) To me the cord hole should be closer to the center and bigger. I drilled it at 1/2 the distance from center to edge adn so was limited in size. Next time I will do it 1/3 the distance.
Thanks for looking.
GK
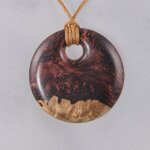
This one is 1-1/2" diameter, 3/16" thick and made from a slice off a Honduran Roserwood Burl bottle-stopper I had laying around.
Things I learned from this:
1) Your backing board should be should be balanced when turning the main shape. I used a rectangular block with the pendant near the top and that hurt. :redface::redface:
2) To me the cord hole should be closer to the center and bigger. I drilled it at 1/2 the distance from center to edge adn so was limited in size. Next time I will do it 1/3 the distance.
Thanks for looking.
GK
")