Making a silicone mold

Signed-In Members Don't See This Ad

Gilrock

Member
Joined
Oct 18, 2011
Messages
560
Location
Tucson, AZ
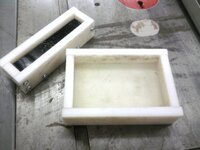
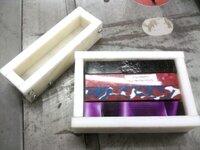
After trying a couple different model molds I'm going to try making one so I can do some small modifications. I was following one tutorial in the library using silicone and I've got it curing right now but I've got this question in my head....how is the silicone going to harden when I've basically encapsulated it with wood covered by saran wrap? I know it's not airtight but it seems like it would almost be the same as sitting in the container. In anticipation that it's going to fail I found another library article that had a nice link for the pink Mold Max 30 stuff so I ordered a gallon of that for backup.

Gil
 
Signed-In Members Don't See This Ad
Joined
Jul 9, 2007
Messages
1,706
Location
warren, michigan, USA.
I have failed twice with the tube stuff.But you will love the mold ax 30 it will give you a super strong mold that will last a long long time.Its easy to use just sticky(really),and you can make molds with great detail(more for non pen stuff).Make your molds out of wood(fine grain is best like hard maple,but I have used poplar),make them to come apart with screws,then cover everything with lacquer.The lacquer is the release for he silcone,and it works great(I coat everything a couple times).You will be able to make a bunch of molds with a gallon kit,I leave only a 1/4-3/8" walls for my molds that this is plenty strong.Good luck,Victor
 

pianomanpj

Member
Joined
Sep 24, 2007
Messages
1,147
Location
Augusta, Maine, USA.
If you're using 100% silicone, than it should be an acetic-cure product. When it comes into contact with the oxygen in the air, it will begin to cure. The thicker the mold is, the longer it will take. You may end up waiting a LONG time if little to no air can reach the silicone.

A better way, in my opinion, is to "prep" the silicone by kneading it in a solution of water with dish soap. I believe (again, my opinion) that this introduces oxygen from the water throughout the silicone thereby allowing it to not only cure MUCH faster, but also able to cure in a sealed environment. Whenever I've used this technique, I've been able to remove the final silicone product from the mold the same night. But be warned: once the curing process starts, you need to act fast! I've actually had silicone cure TOO fast to become usable! :wink:

You can find a wealth of information in this article:
http://content.penturners.org/library/techniques/horizontalroundmold.pdf
 
Last edited:

Gilrock

Member
Joined
Oct 18, 2011
Messages
560
Location
Tucson, AZ
Yeah I knew the tutorial said to use an acetic-acid curing product but I can't find that listed on any of the tubes even trying to read the fine print on the back. I was actually trying to search this forum while I was in the store but couldn't find any brand names to use so I figured I'd just pick one and experiment. Worst case I'll still have my wooden mold to use with another product.

I think I'll try to take the bottom plate off tonight and see how its doing....if I can expose that surface it should speed it up. Most of my mold was pressboard except I used some 3/4" Delrin cut in half to create curves at the bottom. Every part is able to be unscrewed and all surfaces were covered with saran wrap....I'll probably end up with the saran wrap bonded to the silicone.

Gil
 
Last edited:

PTownSubbie

Member
Joined
May 15, 2009
Messages
2,229
Location
Chesapeake, VA
Yeah I knew the tutorial said to use an acetic-acid curing product but I can't find that listed on any of the tubes even trying to read the fine print on the back. I was actually trying to search this forum while I was in the store but couldn't find any brand names to use so I figured I'd just pick one and experiment. Worst case I'll still have my wooden mold to use with another product.

I think I'll try to take the bottom plate off tonight and see how its doing....if I can expose that surface it should speed it up. Most of my mold was pressboard except I used some 3/4" Delrin cut in half to create curves at the bottom. Every part is able to be unscrewed and all surfaces were covered with saran wrap....I'll probably end up with the saran wrap bonded to the silicone.

Gil

The saran wrap should come out with little trouble. When you take the bottom off, be careful. The silicone will not be cured and it will be messy!

It took my first mold more than 2 weeks to cure enough that I could pick it up and move it around......

But....once it is cured, it is almost bullet proof!
 

jjudge

Member
Joined
Nov 27, 2004
Messages
252
Location
Centerville, OH, USA
I buy cheap 100% silicon from the dollar store.

I've never done the water/soap prep -- I just caulk it into the saran-wrapped, wooden mold and wait.

This weekend, I'm trying the soap/water and new molds.
 

pianomanpj

Member
Joined
Sep 24, 2007
Messages
1,147
Location
Augusta, Maine, USA.
Yeah I knew the tutorial said to use an acetic-acid curing product but I can't find that listed on any of the tubes even trying to read the fine print on the back. I was actually trying to search this forum while I was in the store but couldn't find any brand names to use so I figured I'd just pick one and experiment. Worst case I'll still have my wooden mold to use with another product.

I think I'll try to take the bottom plate off tonight and see how its doing....if I can expose that surface it should speed it up. Most of my mold was pressboard except I used some 3/4" Delrin cut in half to create curves at the bottom. Every part is able to be unscrewed and all surfaces were covered with saran wrap....I'll probably end up with the saran wrap bonded to the silicone.

Gil

Almost any silicone that is labeled as "100%" will do the job. GE makes a few versions in red and blue tubes. Either will work. You probably will NOT find small print that says "acetic-cure", but you will most likely find the words "acetone fumes" in the warning and hazard labeling. That is the kind you want! If it smells like vinegar, you've got the right stuff! :)
 

Gilrock

Member
Joined
Oct 18, 2011
Messages
560
Location
Tucson, AZ
What I bought was a GE version at Walmart. It said 100% silicone, weatherproof, flexible, shrink/crack proof. But what really sold me was it had the word "Premium" in the name...LOL. I looked on their website but didn't immediately see the one I got...the website shows "white" but I know I bought one that said "clear".

Gil
 

toyotaman

Member
Joined
Jun 24, 2010
Messages
925
Location
NW Georgia (USA)
I would go to Wal-Mart buy one of the 4 dollar cutting boards (about 3/8" thick) and some 1" screws and make your own. Easy to make. These are a few examples of mine. One can be made and ready to use in less than 30 minutes.
 

Attachments

  • 0208122116.jpg
    0208122116.jpg
    93.7 KB · Views: 276
  • 0208122117.jpg
    0208122117.jpg
    104.3 KB · Views: 290

pianomanpj

Member
Joined
Sep 24, 2007
Messages
1,147
Location
Augusta, Maine, USA.
What I bought was a GE version at Walmart. It said 100% silicone, weatherproof, flexible, shrink/crack proof. But what really sold me was it had the word "Premium" in the name...LOL. I looked on their website but didn't immediately see the one I got...the website shows "white" but I know I bought one that said "clear".

Gil

Both white and clear will work just fine. I use clear so I can see if there are any imperfections in my mold by holding it up to the light.

Another clue to watch for when selecting silicone - if it says that it's "paintable", than do NOT buy it! 100% silicone is not paintable. Best of luck! :)
 

sumterdad

Member
Joined
Sep 1, 2011
Messages
1,159
Location
sumter sc
I used the silicone for one but I left the back open so the silicone could get air. I would never box it in completely
 

Gilrock

Member
Joined
Oct 18, 2011
Messages
560
Location
Tucson, AZ
I would go to Wal-Mart buy one of the 4 dollar cutting boards (about 3/8" thick) and some 1" screws and make your own. Easy to make. These are a few examples of mine. One can be made and ready to use in less than 30 minutes.

Actually I'm doing that also but those molds are for pouring a block to mix colors and cutting blanks from it. The mold I was talking about is for suspending tubes when clear casting. And by the way you're photos look like 1/2" plastic cause I was building mine last night with the 3/8" stuff and it's not easy to get the screws in there without some cracking. And for anyone else building one of these I was trying #6 x 3/4" wood screws and I think they weren't working well for the plastic due to not being completely threaded all the way to the head. I guess I could have gotten crazy and drilled a second bit part way down to fit the smooth part of the screw.

Gil
 

pianomanpj

Member
Joined
Sep 24, 2007
Messages
1,147
Location
Augusta, Maine, USA.
I would go to Wal-Mart buy one of the 4 dollar cutting boards (about 3/8" thick) and some 1" screws and make your own. Easy to make. These are a few examples of mine. One can be made and ready to use in less than 30 minutes.

Actually I'm doing that also but those molds are for pouring a block to mix colors and cutting blanks from it. The mold I was talking about is for suspending tubes when clear casting. And by the way you're photos look like 1/2" plastic cause I was building mine last night with the 3/8" stuff and it's not easy to get the screws in there without some cracking. And for anyone else building one of these I was trying #6 x 3/4" wood screws and I think they weren't working well for the plastic due to not being completely threaded all the way to the head. I guess I could have gotten crazy and drilled a second bit part way down to fit the smooth part of the screw.

Gil

I do this as well, but I tap the holes with a 6-32 tap and use machine screws. The parts hold very tight but come apart with ease - repeatedly.
 

Gilrock

Member
Joined
Oct 18, 2011
Messages
560
Location
Tucson, AZ
I do this as well, but I tap the holes with a 6-32 tap and use machine screws. The parts hold very tight but come apart with ease - repeatedly.

That sounds like a great idea....I've made many a poor decision from trying to work with what's in the garage instead of driving 5 minutes down the road to get better materials.

Gil
 

OOPS

Member
Joined
Feb 6, 2010
Messages
674
Location
Spokane, WA
I have made the silicone molds before. The link for the tutorial using my method is below. Use 100% silicone, not mixed with other things. I have not used saran wrap, but instead use baking parchment. My mold hardens in several days (your shop temperature will have something to do with cure rate) but the vinegar smell will last for weeks while it completely exits the mold. Here is the link:

Silicone mold making

One club member suggested using a heat lamp to help speed the curing process. I haven't tried that yet. But saran wrap would be nearly an oxygen barrier, which would really slow the curing process, in my opinion.
 

Gilrock

Member
Joined
Oct 18, 2011
Messages
560
Location
Tucson, AZ
My GE Silicone is Type II but I think it's going to work fine...it's 100 silicone. I removed the bottom piece of wood yesterday and peeled off the saran wrap from that surface so I have it exposed to air now.
 

Padre

Member
Joined
Dec 2, 2009
Messages
1,841
If you use the process where you knead the silicone in a tub of water and dish-soap, it will start to cure in the water after about 10-20 minutes. It will set up pretty fast after that.
 

Autonoz

Member
Joined
Feb 7, 2012
Messages
106
Location
Arizona
I just made a second mold with GE silicone type one. The first I did not use the water and it took about five days to harden. I used the clear silicone and it turned out ok. The second I used GE silicone type one, but this time it was the white. I used the water method this time and it cured by the end of the day, very fast compared to the other. This time the mold is more rubbery and I dont think it is very stable. I used the first one under pressure and obviously the pressure pushed the sides away from the resin. Are these not stable enough to use under pressure and is the clear better to use than the white?
 
Top Bottom