Light box help

Signed-In Members Don't See This Ad

Carl Fisher

Member
Joined
Jun 7, 2011
Messages
2,761
Location
Cape Coral, FL
So I was sent a light box for my birthday. The model can be found HERE

The problem is unless I use the white background and set my aperture to 3.5 or lower, my camera tells me there is not enough light. Forget using one of the color backgrounds. The halogen lamps that are provided barely give you a spot of light on the fabric.

I tried putting my 13W 5k CFL lamps outside the box but the results weren't much better. The only way I can seem to use it is to shine the lights directly into the box, not diffused from the outside. How much lighting is really needed to get reasonable results out of a light box like this?
 
Signed-In Members Don't See This Ad

Haynie

Member
Joined
May 20, 2011
Messages
3,516
Location
Page Arizona
If your aperture is at 3.5 what is your shutter at? Slow the shutter down until you are good to go. Getting bigger watt bulbs will help too.
 

Carl Fisher

Member
Joined
Jun 7, 2011
Messages
2,761
Location
Cape Coral, FL
I had been used to 7.5 to 8.0 settings (my camera maxes out at 8.0) to keep everything in focus when not on the same plane. I also don't want to end up over exposed.

I've been using aperture priority mode which lets me set the aperture and the camera takes care of the shutter speed. I guess I can go to full manual and open it up with a longer shutter speed to see how that does. I'll have to see what speed it's been shooting at with the lower setting.
 

Carl Fisher

Member
Joined
Jun 7, 2011
Messages
2,761
Location
Cape Coral, FL
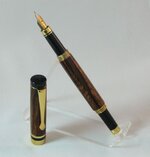
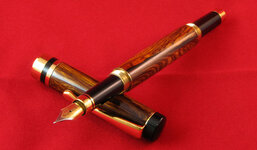
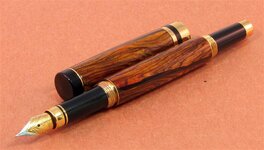
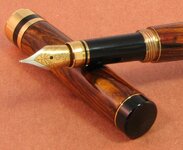
Ok, these 2 pictures were done with the 8.0 aperture and a full 1-second shutter speed. I have not touched them up except to crop them down and resize. To me the metal on the threads looks a bit over-exposed on the red background while the white background looks a bit washed out.

1-second was the first shutter speed setting where it stopped complaining about lack of light.
 

Attachments

  • IMG_1459_1.jpg
    IMG_1459_1.jpg
    21.1 KB · Views: 245
  • IMG_1461_1.jpg
    IMG_1461_1.jpg
    57.6 KB · Views: 233

Carl Fisher

Member
Joined
Jun 7, 2011
Messages
2,761
Location
Cape Coral, FL
As for the other settings, I have the exposure set at +1/3 and custom white balanced against the white backdrop. My color cards are on the way, so the background is the best I had to work with right now.

I'm also waiting on an adapter and hood for the lens. Camera is a Canon S3 IS.
 

Xander

Member
Joined
Feb 11, 2012
Messages
373
Location
Arizona
I have a similar light tent and the supplied 'lights' are a joke. I got 2 cheap desk lamps from Walmart and use highest wattage bulds I can get. You need to pump LOTS of light.

Your pics aren't bad. First one might be a little out of focus (could be my eyes).

I usually end up with 1/2 sec or 1 sec exposure at max F-Stop (which is a crappy 8.0 on my $700 crappy Olympus 4mp.)
 
Last edited:

edstreet

Member
Joined
Aug 12, 2007
Messages
3,684
Location
No longer confused....
Carl, what is the wattage on these bulbs? Sounds like they are horrible. I know for a fact that you can get 2x goose neck lamps and put 200 watt bulbs in each and they are super sweet. dont leave them on for any period of time either!

Xander, the focus is actually DOF due to the camera settings he is having to use.
 

Carl Fisher

Member
Joined
Jun 7, 2011
Messages
2,761
Location
Cape Coral, FL
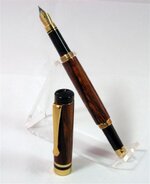
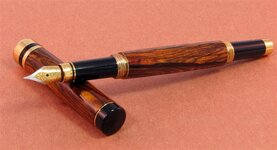
So I added 2 lights shining inside the box with some various white card stock to diffuse and address some of the reflection on the metal. Seems to have made a big difference.

These pictures were tweaked on the levels just a touch in photoshop and resized down for posting. This is also the first batch using the color card to set the white balance properly for a change. What a difference in the colors.
 

Attachments

  • IMG_1464_1 (Custom).jpg
    IMG_1464_1 (Custom).jpg
    22.3 KB · Views: 166
  • IMG_1482_1 (Custom).jpg
    IMG_1482_1 (Custom).jpg
    45.1 KB · Views: 180
  • IMG_1483_1 (Custom).jpg
    IMG_1483_1 (Custom).jpg
    50 KB · Views: 148

Carl Fisher

Member
Joined
Jun 7, 2011
Messages
2,761
Location
Cape Coral, FL
Ok, one more.

This is a straight crop of the untouched image right off the camera. It's not perfect, but I'm still playing and it's getting better.

This pen is also not the best candidate, but I chose it because there are some imperfections that I want to use to judge the quality of the minor details.
 

Attachments

  • IMG_1482_1.jpg
    IMG_1482_1.jpg
    52.3 KB · Views: 173

Carl Fisher

Member
Joined
Jun 7, 2011
Messages
2,761
Location
Cape Coral, FL
Actually what I'm taking issue with now is trying to find a way to get a nice light source to show the finish without carrying it up to the metal and washing out the metal components. It seems that when I diffuse the source to much, the finish on the pen gets washed out.
 

edstreet

Member
Joined
Aug 12, 2007
Messages
3,684
Location
No longer confused....
Things like that is why I post multiple shots of the same pen. You might be able to pull something like that off but you would need to really work the angles of the blank vs the angles of the metal trim and that is going to be a very large problem on many pens. Many photographers will take 3+ shots and put them in the same image to show various little detail like that.
 

azamiryou

Member
Joined
Aug 14, 2010
Messages
1,015
Location
Silver Spring, MD USA
Actually what I'm taking issue with now is trying to find a way to get a nice light source to show the finish without carrying it up to the metal and washing out the metal components. It seems that when I diffuse the source to much, the finish on the pen gets washed out.

"High Dynamic Range" (HDR) can help with this. Essentially, you use a tripod to take multiple exposures of the same scene. For example, when the exposure is set to best show off the barrels, the metal parts are overexposed and blown out. But if you adjust the exposure so the metal parts look good, the barrels are underexposed and dark. With HDR, you take both pictures, then use software to combine them into one photo that shows both. The result can be much closer to what the human eye sees.

There's a long, detailed thread about this here: http://www.penturners.org/forum/f24/my-method-photoing-pen-67214/

If your photo software has this feature, I think it will solve your problem.
 
Top Bottom