
You are using an out of date browser. It may not display this or other websites correctly.
You should upgrade or use an alternative browser.
You should upgrade or use an alternative browser.
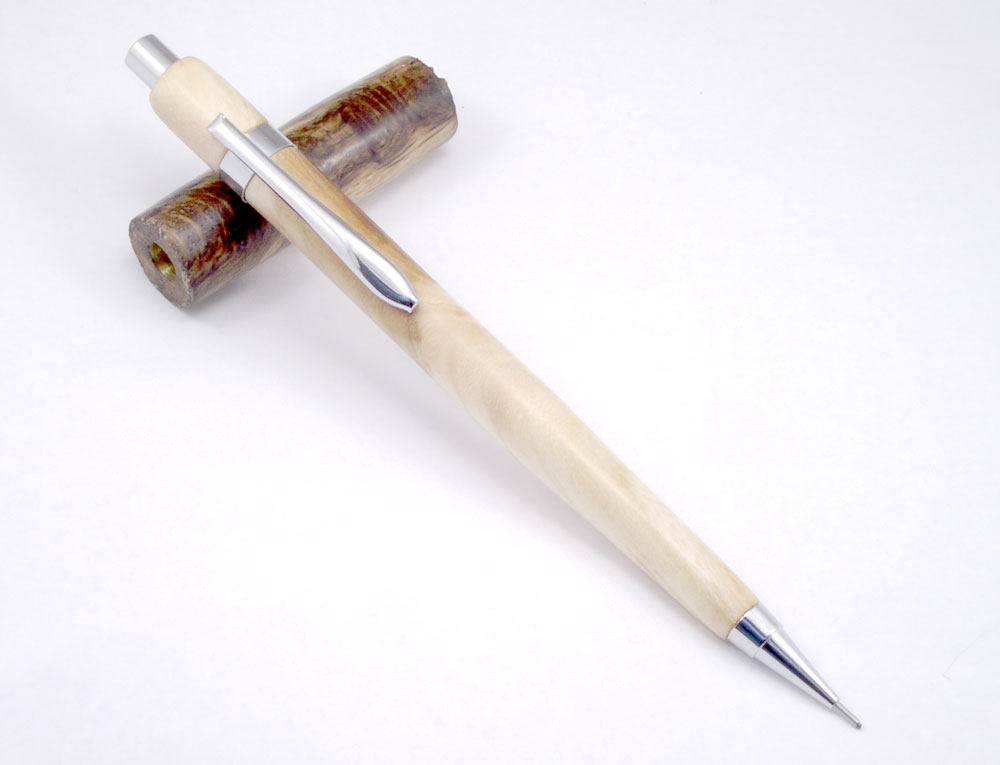
Just another pencil
- Thread starter lwalper
- Start date
Signed-In Members Don't See This Ad
See more from lwalper


You would sell a custom turned pencil for $5-10??

Signed-In Members Don't See This Ad
SteveJ
Member
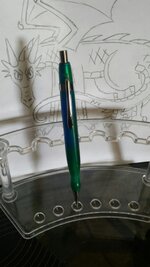
Well done. I think I like the clip of this one better than the clip of the Pentel. What is the model number on the Foray?
lwalper
Member
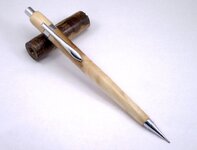
Yes, it's timber. I think it's a piece of Hobhornbeam -- a prevalent species here in middle Tennessee. It's a light colored wood similar to Boxelder and Hackberry, but a bit more dense. Here's a darker shot showing the wood grain a little better.
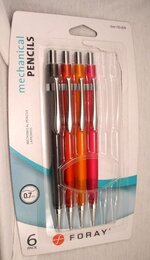
I'm having trouble finding that particular pencil as I look online. I got a six-pack of them at OfficeDepot a few months back for, as I recall, about $5. The 0.7mm pencils I'm seeing now have the clip molded into the top of pencil.
I'm having trouble finding that particular pencil as I look online. I got a six-pack of them at OfficeDepot a few months back for, as I recall, about $5. The 0.7mm pencils I'm seeing now have the clip molded into the top of pencil.
Attachments
That's very nice, well done.
lwalper
Member
Dan Masshardt
Member
Very nice. Difficult learning curve or making these?
wyone
Member
so wondering.. how you get the parts salvaged out of the factory in order to make your own in wood..
lwalper
Member
Getting the parts out is easy -- just unscrew the nib and everything slides out the the opposite end.
Measure the length of the mechanism minus how much you want to expose of the advance button. You'll also want to subtract enough length for thread exposure to reattach the nib. That should add up to about 4.25 inches or a smidge longer. Your total blank length will be about 4.5 inches. Use a 1/4 inch drill bit to drill the 4.25 inches. Now comes the tricky part -- drilling the rest of the way through the blank. You'll need a 5/32 inch hole centered on the 1/4 inch hole.
What I did: Used a 1/4 inch aluminum rod (which I had lying about), chucked that up in the lathe (using the pin chuck), and drilled a 5/32 inch hole in the center of the rod. Then I CA glued the same size drill bit in that hole (sharp end out, of course). That gave me a 5/32 drill bit about 7 inches long -- a home-made step drill. You won't find that item in your local big-box store.
Slide the newly made step drill into the partially drilled blank. The rod should be a nice snug fit which will center the 5/32 bit where it needs to be. Use your three-jaw drill chuck in the headstock and you can probably hand drill that remaining 1/4 inch of material through the end of the blank. You may need to adjust this short length on the nib end. After the nib is screwed on that small step is what actually holds the guts of the pencil in place. It needs to be long enough to allow 4-5 threads to be exposed so you can actually screw the nib on.
Now you can turn between centers to your desired profile. You might want to stabilize the ends of the blank with a little thin CA glue to help minimize the problem of splitting the blank from tailstock pressure.
This particular piece actually snapped in two in the polishing process. It was a fairly clean break so I just glued it back together -- can you find the weld? Working without a brass tube leaves a pretty thin and potentially fragile little twig. If you want you can drill to 7mm and use a tube. Same basic process but you'll need to adjust your step drill size appropriately for the ID of the brass.
Use your parting tool to create a shallow groove for the clip. For this clip that required an OD of about .375 inches -- so your blank obviously needs to be a bit larger than that. I think this one was about .420 in that area. You'll also want to protect your blank from being scratched as you slide on the clip. I slipped the clip onto the butt end of an appropriately sized transfer punch, wrapped the blank in a single layer of paper towel, and the clip slipped right down without a mark. Rotating the clip around released the paper from under the clip.
Then just slip it all together, screw on the nib and voila, you've got a customized pencil. :biggrin: Have fun.
Last edited:
SteveJ
Member
Chuck Key actually sells a step drill for converting the Pentel pencils.
The Perfect Collection
Don't know if it would work with the Foray.
I wonder how they compare to the Pentel since the Foray is 1/6 of the price of the Pentel, If they are the same pencil, it makes the cost of the pencil about the cheapest pencil we can make.
The Perfect Collection
Don't know if it would work with the Foray.
I wonder how they compare to the Pentel since the Foray is 1/6 of the price of the Pentel, If they are the same pencil, it makes the cost of the pencil about the cheapest pencil we can make.
lwalper
Member
Thanks for the Office Depot link. I may have to get a couple more packs of these and put them aside for future use. It's not likely the ink's going to dry out. The mechanism works well. As far as I've been able to tell they look just like the Pentel. They may be Pentel guts rebranded for a different market. That happens all the time.
The dimensions appear to be identical (or at least close enough). That step drill should work fine. That drill bit looks sweet, but I'd still do most of my drilling with a standard 1/4 inch bit and save that high-dollar step drill for the final punch-through on the nib end.
The dimensions appear to be identical (or at least close enough). That step drill should work fine. That drill bit looks sweet, but I'd still do most of my drilling with a standard 1/4 inch bit and save that high-dollar step drill for the final punch-through on the nib end.
Last edited:
sbell111
Member
The local OD is just a few blocks from my office and I needed a couple things from there anyway, so I wandered over yesterday at lunch. I snagged a couple packs of these pencils while I was there.
79spitfire
Member
I got some of the Foray pencils and they work the same as the Pentel pencils. It looks to me like the step drill should work just fine. I paid 4.50 a 6 pack or .75c each. I'm going to try one this weekend. What have I got to loose, if it doesn't work out I'll just use the pencils, at that price I won't get emotional about them getting lost or stolen. If it works out I could easily sell these for 5-10 ea and fund more fun stuff.....
Dan Masshardt
Member
I got some of the Foray pencils and they work the same as the Pentel pencils. It looks to me like the step drill should work just fine. I paid 4.50 a 6 pack or .75c each. I'm going to try one this weekend. What have I got to loose, if it doesn't work out I'll just use the pencils, at that price I won't get emotional about them getting lost or stolen. If it works out I could easily sell these for 5-10 ea and fund more fun stuff.....
You would sell a custom turned pencil for $5-10??
Chatham PenWorks
Member
......You would sell a custom turned pencil for $5-10??
Last edited:
79spitfire
Member
lwalper
Member
$25-30 easy. The price of the components is irrelevant. You've got at least a couple hours labor in that, to say nothing of the art. My customers aren't just buying cheap pencils.