Hello
I tried to look for the thread where I explain this before but could not find it quickly so I will try to explain.
I usually make a few blanks at a time so I mix a small batch of Silmar41 resin with the 3 drops per ounce catalyst. I usually use a small dixie cup. This gives me enough resin to both glue the blank and also coat the blank to get ready for casting after at least 24 hours.
It is very simple procedure. I will show you the jig I made to support the blanks for drying and for coating. I first went to Home Depot and bought a bunch of those fiberglass property marker sticks. I then cut them into workable lengths. I then wax them with a car wax so it makes the resin easier to release if they get stuck. (Warning, fiberglass has thin clear strands so be careful not to get them stuck in your hand if you wipe the rods or clean the rods. Wear gloves)
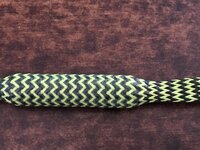
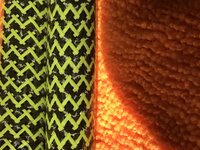
I cut the CF or braiding if doing braiding blanks to size. I mark the inside of the tube with some sort of code so that I know what tube is for what kit. Need to do this if you are mixing kits. I slide the CF sleeve over a rod. I then slide a tube over the rod. I hold the edge of the tube with my thumb and spread the resin all around the tube using one of those flux brushes you buy in bulk from HF or wherever. Always brushing the resin away from the ends of the tube so that none gets inside the tube. (if some does it is always easy to scrape out with a exacto knife later. No big deal) I then slide the tube into the CF sleeve as I am expanding the sleeve. Now I use small tie wraps to sinch the ends to the rod. I keep the tie wraps to the farthest part of the sleeve and not up close to the tube. This lets the sleeve material stretch nicely around the tube. I then put the sleeve tight on the other end and cinch it as well.
After I have those done and set on my rack, I take the same mixed resin and spread an even coat all around these tubes. I keep an eye on them for a few minutes so that there is no big drops forming on the bottom as the resin self levels itself. I keep rotating a little bit till the resin starts to set up. That is all there is to it.
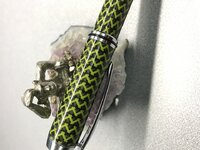
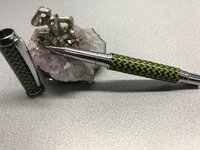
After all set in 24 hours, I prepare to cast. To do this I cut the tie wraps and pull the tubes off the rods. If they do not come free, a slight twist will break them free because of the wax on the rod. I then trim the ends to almost flush with the tube ends, making sure I do not force the sleeve off the ends of the tubes. I then do my vertical casting procedure.
I hope this helps. It is alot more typing than actually doing once you do it. I have been doing this for years and have had no failures. I do not do videos or tutorials so if any questions ask here.