Finishing a woods ring on a metal core

Signed-In Members Don't See This Ad

endacoz

Member
Joined
Feb 5, 2014
Messages
716
Location
Brookfield, NY
I have almost finished shaping this lilac ring that is on a stainless steel core. does anyone have any suggestions or comments on the best way to put a CA finish on the wood without it covering the stainless steel? is there another possible finish for the wood?
 

Attachments

  • 20150608_143902.jpg
    20150608_143902.jpg
    161.6 KB · Views: 252
  • 20150608_143909.jpg
    20150608_143909.jpg
    185.5 KB · Views: 189
  • 20150608_132724.jpg
    20150608_132724.jpg
    197.1 KB · Views: 205
  • IMG_20150608_151226:nopm:.jpg
    IMG_20150608_151226:nopm:.jpg
    130.8 KB · Views: 261
Signed-In Members Don't See This Ad

Charlie_W

Member
Joined
Nov 16, 2011
Messages
5,918
Location
Sterling, VA USA
Ethan, I would just turn a piece of scrap wood or dowel for the wood ring to slip onto just snug enough to sand and apply finish. Then mount the ring onto the core.
 

Dan Masshardt

Member
Joined
Jan 30, 2013
Messages
4,806
Location
Mechanicsburg, PA
Ethan, I would just turn a piece of scrap wood or dowel for the wood ring to slip onto just snug enough to sand and apply finish. Then mount the ring onto the core.
its extremely thin when to size and right down flush with the core. I don't think it would work.


To the original question - use ca. I don't worry about getting some on the core.

Probably too late either way, but I'd def recommend using a stabilized wood for the ring.
 

endacoz

Member
Joined
Feb 5, 2014
Messages
716
Location
Brookfield, NY
I would say an acrylic might be easier to finish but I slowly got a nice CA finish on it. Since this was my first ring on a metal core it took multiple attempts... I had multiple lilac break and shatter on my (unstabalized). This one worked because I went really slow and kept applying thin CA over and over as I went along.

This was my finish.
4 coats of thin.
5 coats of medium
1 cost of thin
I then used a square carbide cutter and slowly turned the lathe by hand while scraping away the CA that got on the stainless.
I then sanded with 600 abranet with the lathe on then lateral.
Then used the 2 part stick-fast finish polishes, (satin then gloss)

I am surprised because once I got one all the way done it looks as good as I hoped.
 

Attachments

  • IMG_2451.jpg
    IMG_2451.jpg
    130.4 KB · Views: 195
  • IMG_2454.jpg
    IMG_2454.jpg
    132.1 KB · Views: 224
  • IMG_2455.jpg
    IMG_2455.jpg
    134.1 KB · Views: 201
  • IMG_2450.jpg
    IMG_2450.jpg
    131.6 KB · Views: 200
  • IMG_2449.jpg
    IMG_2449.jpg
    121.4 KB · Views: 209

farmer

Member
Joined
Jun 16, 2012
Messages
807
Location
NV
Finish

What about putting a finish on it before you install the wooden ring on the metal ring.

Just a thought.
 

Charlie_W

Member
Joined
Nov 16, 2011
Messages
5,918
Location
Sterling, VA USA
Nice job on the ring Ethan! Your perseverance paid off!
Good to hear you cleaned the CA off the ring core. I have heard that when coating the whole ring with CA, the CA will eventually begin to chip off the metal and look unsightly. This goes for the bracelets too.
 

SteveG

Member
Joined
Dec 21, 2009
Messages
2,989
Location
Eugene, Oregon 97404
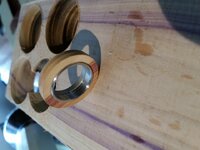
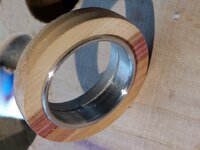
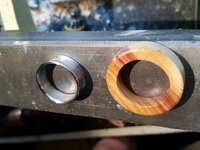
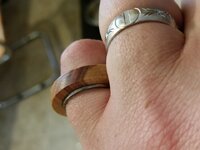
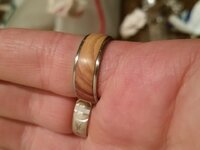
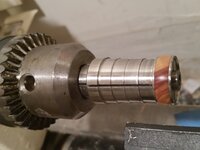
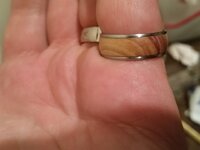
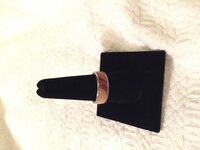
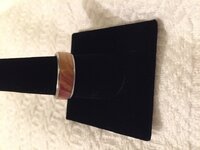
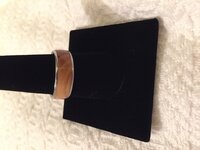
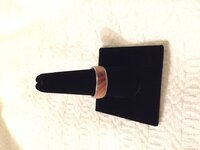
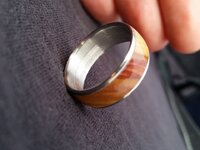
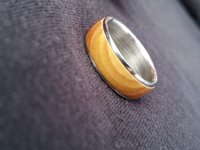
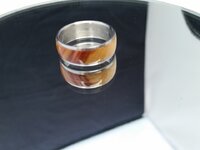
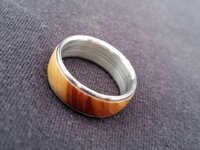
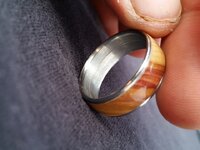
I have made some of the rings and bangles from Wildwood. The supporting videos found on the site suggest mounting the wood material, then turning the wood. You also cut right into the metal core, resulting in a smooth transition from core to wood. The CA is applied and finished to the desired appearance, coating all of it, wood and metal. After that, you carefully remove the CA from the metal part, and again carefully fine sand the metal only(stainless or titanium), bringing it up to a nice shine. It sounds difficult, but is not that hard to do after trying a few. The result is a nice finish product. I am in the process of making an inventory of these to sell along side my pen offerings. The ring shown here in the thread is nicely done.
 

endacoz

Member
Joined
Feb 5, 2014
Messages
716
Location
Brookfield, NY
Better pictures

Took some better photos.
 

Attachments

  • 20150609_142617.jpg
    20150609_142617.jpg
    184.7 KB · Views: 99
  • 20150609_142457.jpg
    20150609_142457.jpg
    172.8 KB · Views: 98
  • 20150609_142246.jpg
    20150609_142246.jpg
    104 KB · Views: 94
  • 20150609_142644.jpg
    20150609_142644.jpg
    199.3 KB · Views: 92
  • 20150609_142612.jpg
    20150609_142612.jpg
    183.9 KB · Views: 91
Top Bottom