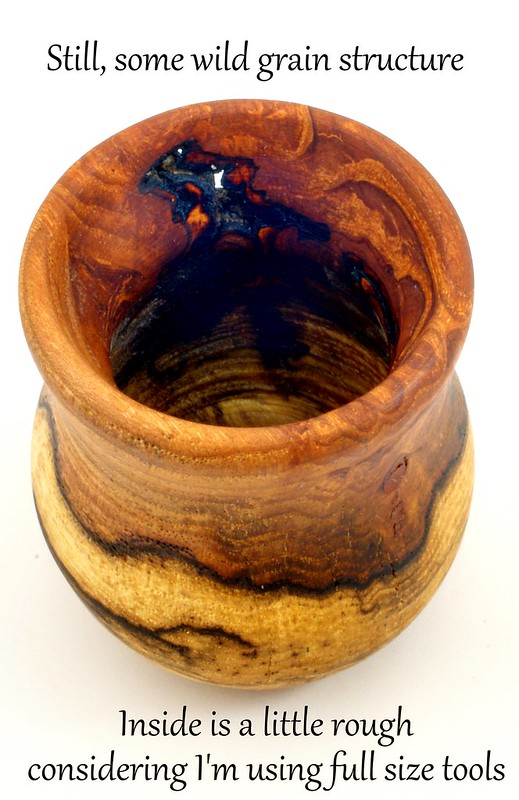
I know how difficult mini turnings are to do with large tools, particularly on the inside of the pieces, the good news is that, you can get a fair quality set of mini tools for a "fair" price, and if you want to make lots of them, if pays to get those fancy curved and weird looking hollower's that make the job a "simpler" affair.
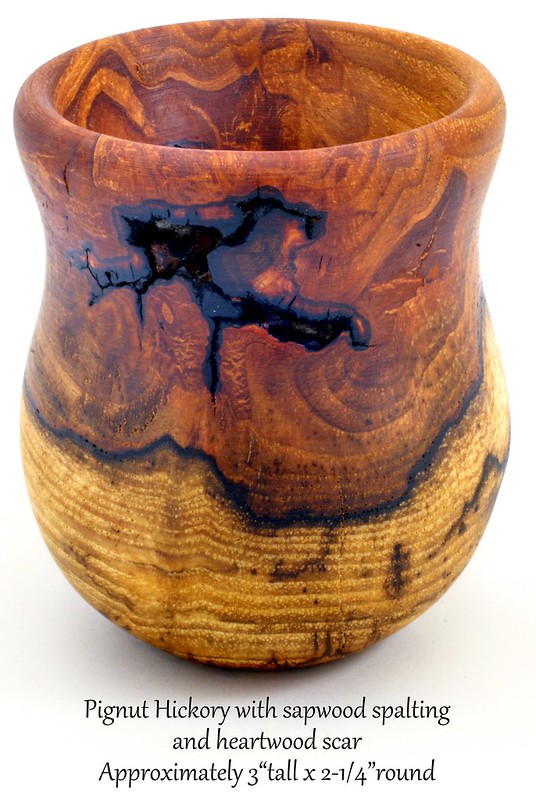
The wood has plenty of character and I only wish that I could find a "big" tree, made 100% of that sort of character, maybe in my next life when I'm sent to Mars...!

Flaws are a great asset in these type pieces, something like the one you have there, can be worked to provide 3 types of effect, the natural one (as is), the matching fill, where the whole is filled with a matching colour material, and as in this case, 90% of natural flaws are surrounded with a dark/black stain and the best match material I ever found is grind coffee beans with some epoxy.
The third effect type is the "contrast" fill, where the hole is filled with a colour that will jump out, when looked at, the Turquoise stone crashed is one of my preferences...!
As for the wall thickness of the piece, is better thicker than destroyed however, there are techniques that can be used to minimise and assist while the wood is under the hollowing process there is, with the outside done first, wrapping the piece with a good masking tape, really tight and half a dozen runs all around, will maintain the surface of the flaw quite firm and together while working the inside, right to the final size.
The piece is ten finished from the inside out, removing the tape from the outside will allow the sanding and coating to be done. Sometimes, the piece is hollowed so thin that, around the whole/flaw there are pieces that broke but are still attached to the tape so, and if you want those pieces glued back, before you remove the outer tape, put some tape on the inside to cover well the flaw area then, before removing the outer tape, grab a Stanley knife, identify where the flaw is and score/cut a circle/square on the tape where the wood underneath is solid (about 1" all around from the flaw).
Remove all the other tape, leaving that "patch" behind, remove the extra layers of the tape until you get to the last one, at this point the tape should allow you to see the wood underneath so, you can identify where the loose bits are so, with the point of the sharp Stanley knife you make a cut in the tape right above the crack/breakage and pour some thin CA on it, use accelerator to get the CA set or, just wait a little.
When you have done the same to all the cracks or the joins where the broken bits were and you know the CA is dry/set properly, simple turn the repair area until it gets flush with the rest and the repair in done from the outside. There is the tape on the inside that will be stuck to the wood because of the CA, you can then do the same on the inside or simply finish it manually until the tape and excess CA are gone, and everything is smooth.
Not every piece worth the time and effort to put back, bits that break off, sometimes it doesn't matter however, other times it will make the difference between finishing a great piece or throwing it in the bin or firewood pile...!:frown:
Sometimes, the "repairs" are what show/demonstrate the turner's experience and ability, particularly to the eyes of other experience turners, that has been proven, time and time again...!
So Scott, you have options that become "easier" as you go...!
You done well...!
Cheers
George