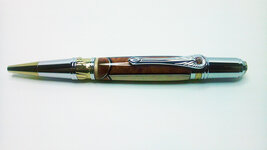
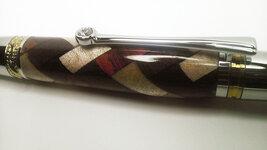
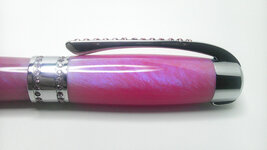
NIce pens. The first one would be my choice too. I guess it took some time to do the segmented work on it. You care to explain the process??
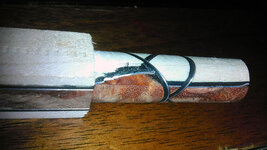
I just basically laminated a 3/8" strip of Cambodian Burl with aluminum flashing, dyed black veneer, and maple. Glued with CA and clamped a couple minutes until dry.
I took a second piece of the burl and laminated the aluminum and veneer on one side only and then cut it into 5/8" or so squares.
I marked the first laminated blank in the center on all four sides the used my disc sander to put a 45° miter on one side to the center mark. Then I CA glued one of the squares on. Flip it over and then do the corosponding side the same way. Then I cut the glued on square excess off with a bandsaw and smothed it out with the belt sander.
Then do the same on the other two sides. Once I had all four scallops in, I CA glued veneer to all four sides to hold it all together while I drilled the hole.
Sounds more complex than it actually is. I have to make another blank so I'll take pictures of the process and make a PDF tutorial of it all.
If you have a belt/disc combo sander, you can knock out the blank fairly quickly. The sketchy part is turning it...I use a freshly sharpened bowl gouge with a fingernail grind or a 3/4" roughing gouge used like a skew. I stop the cutting regularly to ensure I have nothing about to come apart. I'll also take the time to coat the entire blank with CA. If you hang a piece of that aluminum with a tool, it will instantly ruin your blank.

") B
B