Cigar "Prototype"

Signed-In Members Don't See This Ad
See more from RAdams

RAdams

Banned
Joined
Apr 5, 2009
Messages
2,983
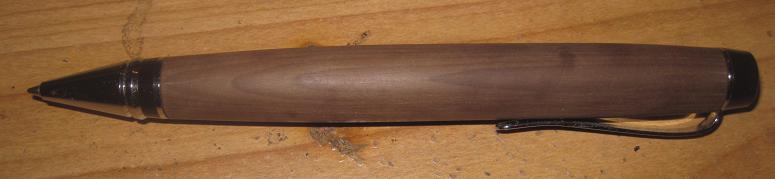
This was my first attempt at a one piece cigar pen. I thought i had all the bugs worked out, so i went for it with the Irish Bog Yew. There are fine cracks at each end of the blank, and the transmission is in the wrong tube, so it extends WAY too far out. I had to stop at 400 grit because i ran out of 600, so it isnt finished yet. I have to figure out how to fix the cracks, and finish sanding. I had to put it together though. Another issue i ran into was the twist action. At first, i thought it would work out to be a finial twist, but the nib twists instead. back to the drawing board i guess. Good mind consuming work for sure!


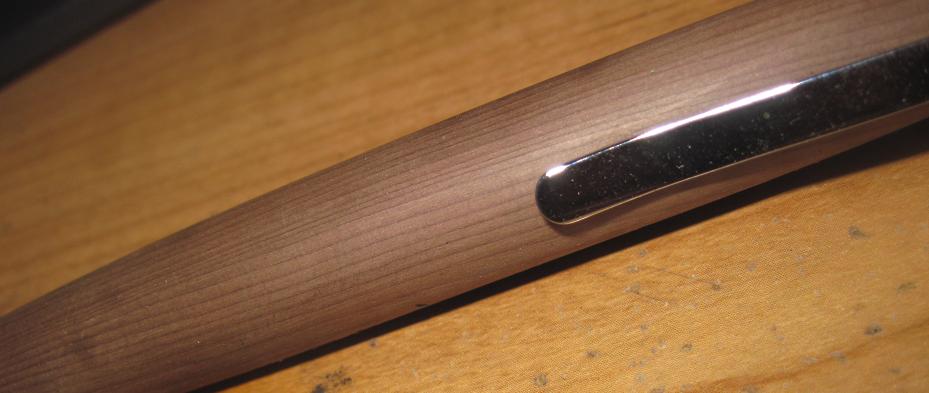
The second picture is a closeup of the growth rings in the Yew.


http://www.penturners.org/photos/images/8062/1_one_piece_cigar.JPG


http://www.penturners.org/photos/images/8062/1_cigar_closeup.JPG


thanks for looking.

pointers, critiques, and general bad mouthing is encouraged!
 
Signed-In Members Don't See This Ad

ldb2000

Member
Joined
Sep 11, 2007
Messages
5,381
Location
Laurence Harbor, NJ, USA.
Good start Ron . A quick way to fix the cracks , if they aren't tpoo big is to use Thin CA and apply it with a piece of 320 grit sandpaper . Give the blank a light sanding to build up a little sanding dust , then drip a couple of drops of thin CA on the blank while sperading it with the sandpaper . The sanding dust slurry will fill the cracks and give a fill coat of CA . Then just finish as normal .
 

RAdams

Banned
Joined
Apr 5, 2009
Messages
2,983
Butch, Thank you so much for the tips! I have an extremely limited amount of this wood (You are lookin at it) and really wanted to save it bad. I have had it sitting in the shop for a while just trying to figure out what to do about the situation. I was going to just part off the cracked sections, and replace them with acrylic or something, but that would break the appearance, so i hesitated. Not to mention, only half of the blank is "tubed", the other half is not glued in.
 

keithkarl2007

Member
Joined
Apr 22, 2008
Messages
1,727
Location
Ireland
Bummer dude, didn't realise the ends were checked. I'll send a few more pieces your way soon. I have a block of it dry but i have to bring it to work to use their bandsaw. The thing with Yew or Bog Yew, if you generate too much heat while sanding it will cause heat checks.
 

RAdams

Banned
Joined
Apr 5, 2009
Messages
2,983
You don't have to send me any more. You sent me this for free, and i am going to make it work! I am thankfull to have what i do have!


I bet money that is what happened (heat checks from sanding). This stuff is more like sanding acrylic than wood. It INSTANTLY clogs the sandpaper so bad that you are doing little good. I wonder if i could "wet" it with some BLO. I will be putting a BLO CA finish on it anyway. That might help.

PS. I will be turning that Bog Oak burl very soon. I think i will make my wife a modded something or the other.
 

keithkarl2007

Member
Joined
Apr 22, 2008
Messages
1,727
Location
Ireland
I insist bud. I'll check if I still have your address. I've got another neat blank for you anyway

Found your address.
 
Last edited:

RAdams

Banned
Joined
Apr 5, 2009
Messages
2,983
Well allrightey then. Hard to argue with someone so insistant!

I surely do appreciate it! I need to make you some of my special "Fear and Loathing" blanks!
 

workinforwood

Member
Joined
Mar 1, 2007
Messages
8,173
Location
Eaton Rapids, Michigan, USA.
Maybe you have an extra cigar nib laying around, or at least another of the threaded piece that the nib screws on to. Unscrew the existing nib. Grab the threads with some pliers and very gently wiggle on it as you pull real hard to get that piece out. Now that one is surely trashed in removing it. Grab a new one and unscrew the black ring. Mount it into a collet chuck and with a parting tool, shear off the metal collar. Now you have a collar less threaded adapter that technically you could push all the way into the pen...but don't do that. Put the refill into the pen and retract the tranny. This is the closed position. Screw the nib into the fitting but only 1/2-2/3 in, instead of all the way. The pen with refill in closed position is on the bench. Set the nib beside the refill ..this is just a visual thing, the have the end of the nib just beyond the refill, and hopefully the press fit area reaches to be at least 3/16 beyond the pen barrel. If almost, but not quite, unscrew the nib just a touch. Now you have a big gap between the pen and the nib. Remember that black ring you took off in the beginning. Well, just spin a new ring that is extra wide to fill in the gap. Rough up inside the tube, a touch of 5 min epoxy..press in the new fitting with ring and nib on it and now you have a longer nib section. All easily done on a wood lathe..I've done it several times. The parts on a pen are just nickle..spins off easy. Heck..you can just grind that collar off if you want..it's not like it has to be pretty..it will be inside the pen anyhow. And that is how you fix a backwards cigar pen.
 

RAdams

Banned
Joined
Apr 5, 2009
Messages
2,983
Man, thanks for the help! That is some technical stuff going on there. I will read it later tonight when i take this thing apart. Thanks for the help Jeff! I will be sure to post pics of the pen if and when i am able to fix it.
 

RAdams

Banned
Joined
Apr 5, 2009
Messages
2,983
OK. When i read this earlier, My mind was going too slow to understand. I understand the process now!

I just have a couple of quick questions.

On the black nib trim ring,,, Is it feasable to use wood to make the new one? Or should i stick with acrylics?

I have to completely disassemble this pen so i can mount it on the lathe to re-sand. Would this technique remove the finial components too? I dont know how else i would remove the internals without first removing the finial components. Also, I don't remember off hand if it is the top or bottom, but one tube is not glued in, so that should pull right out yeah? I think it is the finial end.


I got some professional level directions for getting the twist right, now i just gotta step up my modding, and fundamentals.

Thanks again fellas!
 
Top Bottom