
Haynie
Member
I've looked for this answer, as I am sure it has been brought up but can't find anything.
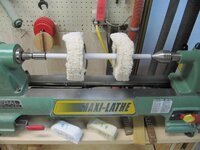
What is the difference between the beall buffing system and the harbor freight 6 inch? I know one is a motor the other fits on the lathe. I also know the beall comes with the buffs and if gotten at Wood craft would come with red white and wax. I plan on up grading the buffs no matter what I get. A guy I know swears by Canton flannel buffs. These were also recommended by George so That is the direction I am going.
If someone knows of a way to just make a beall type buffing system I am all ears.
I have never been able to get the flawless finish people talk about with the MM pads and frankly, being somewhat color blind, I am tired of asking people to sort them out for me if they get mixed up.
")
