Many will say light grey as some already have and your mom or other relative will probably have some cast off material. A grey T-shirt works.
On the other hand you can start to get creative. Since you don't say what this is for, start playing with different backgrounds and lighting. Use whatever you can get your hands on. You will learn a lot more by playing than you will by asking for suggestions on a forum. When you find something you like post it and see what others think. Then people's advice will be much more meaningful. The only rule is to have fun.
I agree with the premiss of this as you want to be creative and try different things.
What you want to keep in mind about working with a gray background is that the camera's light meter reads and tries to adjust the overall picture's exposure to what it considers a balanced lighting. That balanced lighting it's targeting is 18% gray (if I recall correctly). So if you have a lot of black in the background, the camera is going to over-expose in attempt to achieve that 18% overall exposure. And if you have a white background, it's going to under-expose to achieve it.
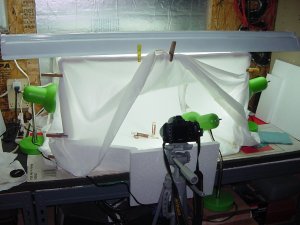
What the gray background helps you do is dial in your camera to your photo taking area, where everything is controlled, i.e. same location (photo booth), same lighting, and manual settings on your camera. With all these factors controlled and the same for each photo session, you can then determine the optimal white balance, aperture setting and shutter speed for your given "picture taking spot".
With all this stuff controlled, you can pretty easily reproduce your results time and time again and discover you're using the same white-balance settings, F-stop and shutter speed for every photo session.
For instance:
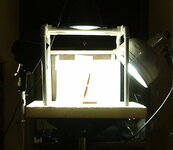
For my own photographing conditions and 6500k flourecant lighting, these end up being
- White balance set for Flourescant with -3 fine tuning
- Aperture set at f18 and
- Shutter at 1/8th second
- your mileage may vary...
Now, with all these set factors set and controlled, it would pretty easy to swap backgrounds around and experiment and know the camera settings aren't going to change much because the lighting and other conditions are still the same (controlled environment) as with the gray background. Thus the pens exposure is going to remain constant and the various backgrounds will then only affect the final appearance of the photo (artistic effect). The one slight exception being that different colored backgrounds will produce some variations due to their reflected light causing some minor color shifts that may need compensating. Regardless you have the basic settings and background to fall back on for consistency.
Sure, you want to experiment and try different things for the purpose of artistic expression, but you want to develop that "ground zero" as a starting point and the gray gives you that to work outward from. If you don't have this, you'll spend a LOT of time figuring out the optimal blend of settings that is for each photo session, especially if you do something different every time.
And the same applies for natural lighting - Yes it's great and well balanced, but you'll have a different intensity and color balance to deal with every day based on time of day and weather conditions. And you either switch to auto settings and hope the camera figures it out, or you do a lot of quick bracketing and experimenting trying to get some good results in before the lighting conditions change on you.
My own goal is control the photo environment for consistent results and to minimize the amount of time taking photos and cleaning them up in post-processing. Then you can branch and experiment for the artistic flair once you have your foundation.
Good luck and happy shooting!

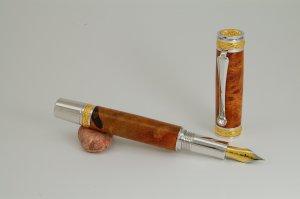
![African Blackwood Burl 6-9-2010 5-54-59 [].JPG](/data/attachments/62/62090-10d336401bc979b8548a709baad54e38.jpg)
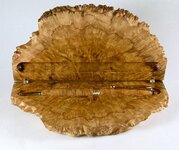
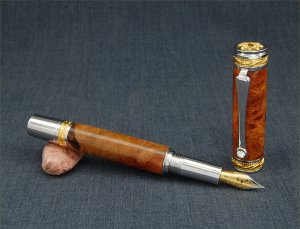
![DSCF0007 [].JPG](/data/attachments/62/62093-c1c19f851fbe4abe3426e0ed5566761a.jpg)