pmpartain
Member
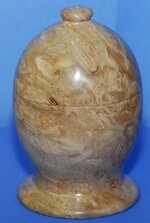
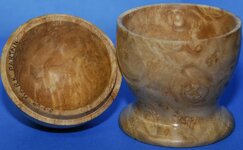
This is Big Leaf Maple Burl. It's about 4 1/2 inches tall. First one I did was plain red oak shaped like a cylinder. I used scrap usually reserved for jam chucks. Any suggestions to improve the shape of the form? Do you like the button on top and the shape of the base? Are there techniques to further mask the seam of the lid and the body?
Thanks
Thanks