Dark stains on light wood

Signed-In Members Don't See This Ad

JackTheSquid

Member
Joined
Mar 20, 2009
Messages
30
Location
Charleston, SC
I have been working with some lighter woods recently such as maple and ash, and have noticed that I am getting some blackish, greyish staining at either end of the turning. I am convinced that the staining is cross contamination from the bushings during the sanding/finishing process, and am wondering how to combat this. I could use delrin bushings during finishing...but it shouldn't be that hard...or is it? And, would applying a sanding sealer help on lighter woods prior to doing any finishing work??? It really is maddening because I have some nice maple pen blanks that I keep screwing up!! Thanks in advance for nurturing a nub.

Jack
 
Signed-In Members Don't See This Ad

leehljp

Member Liaison
Joined
Feb 6, 2005
Messages
9,330
Location
Tunica, Mississippi,
Sanding/bushing dust is inevitable in many cases. Delrin bushings, refined techniques, mandrel-less turning and finishing without the bushings - all help. Another thing that can be done is get a tupperware type of lid and make a washer/spacer to put between the bushing and blank. That will give you a miniscule amount of play to keep the sandpaper from reaching the bushing.

Some people have refined the technique of cleaning a blank after getting bushing dust on the lighter wood, but I never did. I basically use mandrel-less and when I do use a mandrel on a rare occasion, I use the spacers.
 

artistwood

Member
Joined
Nov 13, 2008
Messages
177
Location
bloomington, in
ok, here goes. i put thin CA on the ends of light colored blanks. as long as i don't sand ON the bushings things usualy go pretty well. having said that, when i do get some discoloration on the SURFACE of light woods, i use a fine scotchbright with the lathe OFF to remove it. so far this has worked for me even on holly. as soon as i can get the money, i'm going to switch to the delrin bushings just to make my life easier. johnnyCNC sells them i think........bear
 
Last edited:

JackTheSquid

Member
Joined
Mar 20, 2009
Messages
30
Location
Charleston, SC
It looks like I wasn't the only one having this problem. Thanks for the input. It looks like delrin or some other inert bushing material is the way to go.
 

ngeb528

Member
Joined
Mar 4, 2009
Messages
808
Location
Deland, FL
Going low tech, I put blue painters tape around the bushings when I sand light colored woods. Just a single round with a little overlap.

I turn the ends down and use a very sharp skew, first, so any sanding that I do isn't to get it down to size.

Works for me anyway.
 

Randy_

Member
Joined
Nov 29, 2004
Messages
5,701
Location
Dallas suburb, Texas, USA.
Sanding/bushing dust is inevitable in many cases. Delrin bushings, refined techniques, mandrel-less turning and finishing without the bushings - all help. Another thing that can be done is get a tupperware type of lid and make a washer/spacer to put between the bushing and blank. That will give you a miniscule amount of play to keep the sandpaper from reaching the bushing.

Some people have refined the technique of cleaning a blank after getting bushing dust on the lighter wood, but I never did. I basically use mandrel-less and when I do use a mandrel on a rare occasion, I use the spacers.

If you make that washer about a half inch larger than the diameter of the bushing, you create a little fence that prevents the sandpaper from sliding over onto the bushings.

I haven't tried this out yet; but I think it should work well also. I tuned a sort of dead center out of a scrap of wood to fit in the HS MT pocket. Am going to try sanding and finishing with the blank between the wood dead center and the live center in the TS. With the taper of the two centers, it should be easy to keep the sandpaper clear of anything but the blank.

The second picture (not the best; but I was in a hurry) shows the setup in turning mode. For sanding and finishing, the bushings would be removed and the blank would be between the centers, only.
 

Attachments

  • Completed Dead Center.jpg
    Completed Dead Center.jpg
    40.8 KB · Views: 296
  • DC In Use.jpg
    DC In Use.jpg
    66.1 KB · Views: 320
Last edited:

george

Member
Joined
Jan 17, 2006
Messages
458
Location
Ljubljana, Slovenia.
I've had a similar problem when working with maple wood; metal dust have made ugly spots.
Since then I do not clean the CA from bushings, exept when I do dark wood blanks, like walnut or similar. The CA prevents from getting metal on the wood and the layers on the bushings are quite thin, so the final diameter of the pen is OK.
 

Rick_G

Member
Joined
Nov 30, 2007
Messages
1,994
Location
Bothwell, Ontario, Canada.
For 7mm pens I replace the bushings on the mandrel with short pieces of brass tube and use a micrometer for exact sizing. For others I'll hold the tube between a live center and a dead center to do my sizing.
 

RussFairfield

Passed Away 2011
In Memoriam
Joined
Feb 10, 2004
Messages
1,522
Location
Post Falls, Idaho.
Getting plastic bushings is covering up a problem and not solving it.

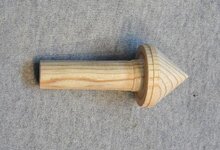
You shouldn't be sanding the bushings, and the simple solution to the problem is to not sand them. This is easier to say than do, but there is a good possibility that the pen barrels will be smaller than the metal fittings on the pen when the bushing are sanded. Try sanding just down to the bushings, but NOT on the bushings themselves. This will make the pen barrels a wee bit oversized by a few 1/1000ths, but in most cases that will make for a better looking pen and nobody will know the difference.

There are several other things you can do with your sanding technique to avoid sanding the bushings.

Practice your turning tool techniques. The better the finish from the tool, the less sanding will be required, and the finer the grit you can start with. It will take some time and practice, but there really are some benefits from learning to use a skew chisel for making those finishintg cuts. Less sanding and with a finer grit is one of them.

Sand from the wood over the bushing, releasing the pressure on the sandpaper as you leave the wood, and not applying pressure again until you are back over the wood again. This will be applying finger pressure to the sandpaper in a figure-8 pattern, rather than a constant pressure on the paper. Do the same sanding pattern with the lathe OFF as when it is running.

Use less pressure on the sandpaper. The sandpaper will cut with just barely enough pressure to keep it in contact with the wood. This will remove less metal from the bushings when you do get the sandpaper on them. Always use fresh sandpaper, and don't try to extend the life of worn out sandpaper.

Start sanding with a finer grit. You didn't say, but there is less chance of getting metal dust on the wood if you start sanding with 240 than there is with 150-grit.

Now that your bushings are already sanded to a smaller size, finish them with a coat of CA glue the next time you finish a pen. Score the break line at the end of the pen barrel with a skew or the tip of a knife to make a clean break. Now when you make a pen, just sand down to the bushing, and if you sand over onto the glue, there will be no metal particles to contaminate the wood. Your bushings will last for years this way.

Even after doing all of these things, there will be some species of wood that just wants to get dirty. Yellowheart, Pau Amarillo, and Osage Orange are that way for me. The simple solution for me was to quit using them. There are too many attractive species available to waste time with those that are a problem.
 
Last edited:

kirkfranks

Member
Joined
Nov 23, 2006
Messages
689
Location
Salisbury, MD, USA.
A couple other thoughts.
1 Yes using a sealer coat (I use thin CA) will help a lot. After finishing up with the skew a sealer coat goes on before sanding. This also helps if doing segmenting with woods that stain like bloodwood and maple.

2 I also use an air hose to blow off any sanding dust and that seems to help.

3 Only sand in the direction of the wood onto the bushing and then use a clean spot on the sandpaper for the next pass. This way you only put the wood dust on the bushing and not the other way around. This should probably be #1 instead of #3:)
 

leehljp

Member Liaison
Joined
Feb 6, 2005
Messages
9,330
Location
Tunica, Mississippi,
3 Only sand in the direction of the wood onto the bushing and then use a clean spot on the sandpaper for the next pass. This way you only put the wood dust on the bushing and not the other way around. This should probably be #1 instead of #3:)

Until I went mandrel-less, # 3 above is the one I used to do - and just forgot. It became habitual and I just automatically did that. It was the most helpful of all. Sorry for not mentioning that.

Hey Kirk - you are younger so your memory is better! Thanks for "remembering that! :biggrin:
 

JackTheSquid

Member
Joined
Mar 20, 2009
Messages
30
Location
Charleston, SC
Wow, Russ! You really know how to 'school' a guy!! It's like the first time my chief jumped my s***!! You are absolutely correct, though. It obviously takes a thoughtfully executed technique to pull off light wood finishing without any discrepancies.

Thanks for the fantastic input, all. I'll try to adjust my style accordingly.
 

wdcav1952

Activities Manager Emeritus
Joined
Mar 18, 2004
Messages
8,955
Location
Montgomery, Pennsylvania, USA.
Wow, Russ! You really know how to 'school' a guy!! It's like the first time my chief jumped my s***!! You are absolutely correct, though. It obviously takes a thoughtfully executed technique to pull off light wood finishing without any discrepancies.

Thanks for the fantastic input, all. I'll try to adjust my style accordingly.

Jack, trust me shipmate, since my wife is a retired Sr Chief, I understand about jumped on, well you know.

Russ is an incredible source of knowledge, and it is always informative to read his posts.
 
Top Bottom