Need antler advice

Signed-In Members Don't See This Ad

qquake

Member
Joined
Feb 8, 2004
Messages
5,015
Location
Northern California
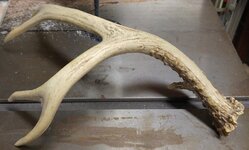
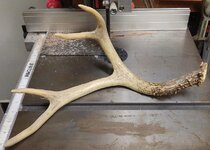
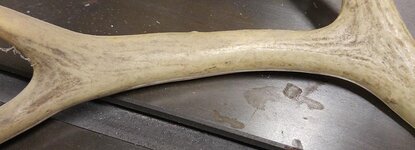
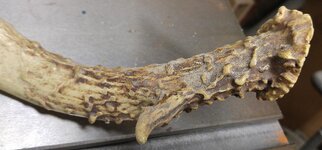
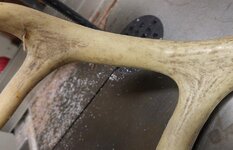
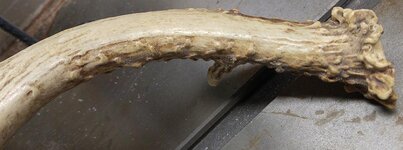
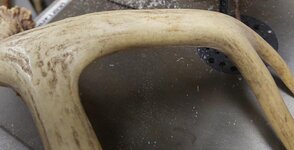
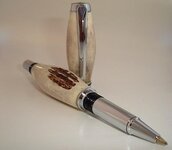
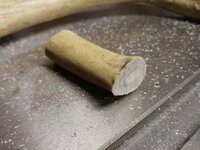
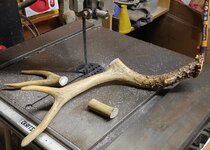
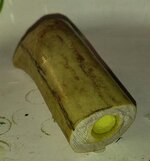
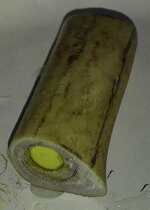
I'll be turning my first deer antler soon, and I thought I'd ask for advice. It will be for a bolt action pen, so the blank will be 2" long with a 3/8" hole. I'm looking for advice on cutting, drilling, turning, and finishing it. I think I've read about using a CA finish on antler, is that the best option? This particular antler was given to me by my brother-in-law many years ago. As far as I know it's a shed, and don't know what kind of deer it came from. The pen will be for my b-in-law, so this seems appropriate. I would love to see any photos you have of the process, as well as photos of finished pens.
 

Attachments

  • antler02.jpg
    antler02.jpg
    89.3 KB · Views: 148
  • antler01.jpg
    antler01.jpg
    113.4 KB · Views: 205
  • antler05.jpg
    antler05.jpg
    74.8 KB · Views: 148
  • antler03.jpg
    antler03.jpg
    85.3 KB · Views: 127
  • antler04.jpg
    antler04.jpg
    89.9 KB · Views: 140
  • antler06.jpg
    antler06.jpg
    74.9 KB · Views: 133
  • antler07.jpg
    antler07.jpg
    47.8 KB · Views: 145
  • antler08.jpg
    antler08.jpg
    66.1 KB · Views: 152
Signed-In Members Don't See This Ad

Ambidex

Member
Joined
Nov 2, 2011
Messages
1,108
Location
Bristol NH 03222
Hey Jim...as an avid antler turner I can help but the response would take up several pages. Look in the library under antler pens and there's a ton of knowledge and advice there. If there is a specific question you have I can help a little at a time but to answer all the specifics at one time would take me hours on end...(I'm a hunt and peck typer:}) First find the part of the antler that appeals to you most keeping in mind whether you want a little bark left or to be pure inner antler. Both appeal to me. And make sure you lay the bit on the antler making sure you have room to drill without leaving too little meat to turn to the bushings. Cut the blank at least 1/2" long...I prefer 3/4 to an inch so you don't have to drill all the way through. They splinter pretty easily when the drill exits. Very sharp tools and a light touch etc.etc...as far as the ca...I only use a coat or two very near the end of the turning basically to seal the antler. I usually sand the majority back off but some does get absorbed and seals very nicely..I like to mm and finish with several coats of Rennaisance wax...they seem to be holding up well after several years...any q's im me but be patient...not on this site nearly as much as I'd like to be...life getting in the way:frown:..
 

Sabaharr

Member
Joined
Mar 7, 2009
Messages
598
Location
Slidell, LA
Thanks for this question. I am about to take the dive into my first antler/bullet hybrid and need this info too. I read the library info a few years ago but need to hit it again. A hunter supplied an antler for me and wants the pen and there is enough there for many pens. I get to keep the cutoffs so score there. Just hope I don't use them all up of the learning curve. It is my understanding that it has a disagreeable odor when drilled (sounds better than down right stinks) so I need to prep for that. Shop is in spare bedroom. Will have to do it when LOML is at work and take the hit when she gets home wondering who spilled all the air freshener everywhere. Cats will suffer but it might save my bacon.
 

SteveG

Member
Joined
Dec 21, 2009
Messages
2,989
Location
Eugene, Oregon 97404
Aloha Jim,
I will give you my approach. You have plenty of antler there, so can experiment with different suggestions, if desired. My end result is the antler being completely finished with a gloss CA finish. LUNG PROTECTION REQUIRED FOR ALL STEPS LISTED, INCLUDING DURING GOOD CLEAN UP AFTER ALL STEPS ARE COMPLETE.

This is it:
1.Cut a piece about .25 inch extra length
2. Make an indent on each end using a center punch, small drill bit, or center drill. This is in preparation for turning the ruff blank to round between centers. If blank is significantly larger than the final diameter, you can offset these turning points to get more or less of the center portion of the blank showing in the final turning, which will provide a variation in appearance. (The center is more porous than the outer portion, hence appearance variation.) If tou are using portion of antler with the natural hole running thru it, try using that as your mounting hole for TBC turning.
3. Mount turned cylindrical blank in penturners jaws or collet chuck(either of these preferred), or in regular chuck jaws, for drilling on lathe...or in vise for drill press drilling.
4. Drill for the tube. After drilling, remove blank from lathe (or DP), and drip plenty thin CA into hole, completely coating inside of hole. This is important as it stabilizes the inner portion of the antler i.e. the part hat will remain after you turn away all the rest of the antler. Re-drill, off the lathe, holding blank with pliers. This removes excess CA.
5.Cut blank to desired length, and glue in the tube.
6. Trim and square ends, and turn desired profile. When close to final turned diameter, coat with thin CA. Turn some more. Thin CA again. Turn some more. This step is effectively stabilizing the blank during final turning steps, avoiding tear out.
7. Finish using CA finish.

If you follow these steps closely, you will have experienced one of many possible approaches to antler work. Try this and others to see what you like and/or do not like. Avoid breathing antler dust and live long and well!:biggrin::eek:
 

Skie_M

Member
Joined
Aug 7, 2015
Messages
2,737
Location
Lawton, Ok
You'll need a section long enough and large enough around to achieve getting the blank you want.

The section needs to be straight enough that you won"t reveal the brass tube inside.

Keep in mind that antler has a "pith" to it, where you'll see the tiny marrow chambers. If you are turning a perfectly round and straight section of bone, you may likely not see any at all, especially at first, but if you keep going, you're going to get all pith and no bone.

Choosing a thinner section has it's own advantages ... MUCH less likely to hit pith, and better chance of the finished pen getting to show off the "bark", meaning the outer shape/features of the bone. Just under the outer layers of the antler the bone is a light greyish color, and under that it goes to a purer cream/white color.

Thinner sections also have their own disadvantages .... MUCH greater chance of your bit wandering, especially through a curved section of bone, and popping out the side.


You have 2 options for sourcing the antler ... getting a whole or partial antler from a friend or as a "shed" or from a hunt that resulted in a kill. Or you can buy some online ... I do know that there is a vendor here that offers a pre-drilled section of antler for only around 7 dollars. PSI offers 1 pound of antlers/sections that may or may not have 3 or 4 pens worth of blanks in them, but they want nearly 40 dollars.


What I generally do .... is make antler pens from as many sections as I can from an antler. I use a tube to do the measuring, and I mark right on the antler with a felt tip marker. I leave a good half inch to an inch, depending on the curvature, between each section that I plan to cut, to allow me to sand it back flush and parallel at both ends in preparation for drilling. I also sand off any major knobs or protrusions to make it as generally round as possible. At this stage, making it as regular as you can around the exterior is the key, to allow you to drill as straight as possible directly down the center of your blank.


If you can chuck it on the lathe and have a hope of hitting your center line, go for it. I haven't seen enough bone that straight yet. :p I use a drill press and a drill press vice that I have modified for my drilling needs using bone and irregular blanks. The steel jaws were replace with vinyl plates, and the original screws used, countersunk to keep them out of the way.

Drilling is fairly simple ... use a sharp bit, line your blank up as perfectly as you can, tighten down the vice and clamp the vice to the table, and clear the flutes (raise the bit back up out of the hole) often.

Clean your blank out with a blast of compressed air, glue your brass tube in and center it where you'ld like. Turn as normal with very sharp steel tools or go to carbide (I use carbide).

If you don't seal the pith before sanding, it WILL collect some unsightly grey/black dust from the sanding process ... it's nearly impossible to clean out. To seal, dribble some thin and medium CA over the slow spinning blank while you spread it with some kind of applicator (I use folded pieces of blue shop towels). DO THIS FIRST BEFORE YOU PROCEED WITH FINISH SANDING. Once it's good and sealed, sand it back so that you're sanding the bone again, and double check to ensure that all the pores in the bone are sealed. Proceed with finish sanding the bare antler to whatever shine/gloss you prefer to show off, and then either leave it as is for the natural finish, or go with a half dozen or more coats of CA for the protected finish.


Here is where your artistry meets God's hands. You have the power and the means to determine how much of God's work gets to be seen in that pen. Some people prefer to have perfect smooth sides around their pen, while some prefer a rougher, more natural shape to the pen that shows off where that bone came from. Some people like to see some of the pith showing, while others don't like it's appearance and will pass over one that has it. Some people like a more natural finish or even no finish at all, which will slowly yellow as it ages, while others want theirs to stay perfectly bone white (and gray) the same as the day they got it (CA finished). Some people like a matte finish, while others want a glossy finish that feels like running their hand across glass. Some people like a bulbous or more rounded appearance to the barrels, while others prefer a much straighter profile. Your choice determines if the pen sells or not, but if you're taking a consignment order, it may be best to present a variety of choices for the end result.


I like to just make a variety of results by taking from all parts of the antler, as much as possible. The barrels all end up looking slightly different from each other, even from the same exact antler, as some sections ended up being very big around and got turned down perfectly round, and some being thinner, ended up showing off a lot of the antler's character. You can never tell which one will end up in a random buyer's hands .... some just like what they like. I generally prefer to CA finish my antler pens, but I've had people request natural, which is CA sealed/filled in any of the pith, and then sanded back smooth and polished with micromesh/PlastX for the finish.


Some of my first pens were the "Deer Hunter" 30 cal bolt action pens from PSI .... I love those things, they're gorgeous. I went with the antique brass with rose gold accents. I don't mind the smell of the antler as I'm working on it .... sort of a "burn bone" acrid scent, at times. If you don't like it, use a respirator and dust collection for sure. Breathing in bone dust can't be any good for you! If the wife and family don't like the smell either, then working in mild weather so you can prop a door open with a fan is a great idea.


Most of all, have fun working with bone! I have heard that Moose antler have almost no pith, and the same with Elk and Caribou. I'm going to see about getting some Elk antler to play with soon ... Elk and Caribou are much bigger cross sections of bone. Some may be large enough that it would be possible to split the antler sections into MULTIPLE pen blanks, like splitting a log into quarters.
 

Akula

Member
Joined
May 27, 2007
Messages
1,036
Location
seabrook, texas, USA.
I do a lot of antler. The bad smell is from getting the piece too hot. If you let the tools do the work, it will not/should not be a problem. Do wear a mask as with any turnings so you don't breath in particulates. All of the antler can be used, so waste not, want not.
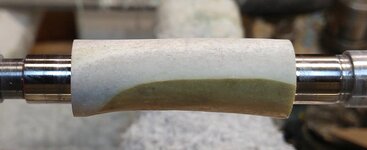
Good advise given in the thread and more info in the library. The CA finish is not required but is useful. To each their own.

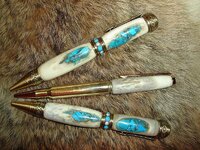
I like to let the antler be the start, then use other fill material to make it stand out. Nothing wrong with a antler only pen, they are popular.
 

Attachments

  • 1.jpg
    1.jpg
    17.8 KB · Views: 214
  • 2.jpg
    2.jpg
    263 KB · Views: 194
  • 3.jpg
    3.jpg
    80.3 KB · Views: 224
  • 6.jpg
    6.jpg
    146.8 KB · Views: 246
  • 5.jpg
    5.jpg
    114.5 KB · Views: 216

stuckinohio

Member
Joined
May 3, 2015
Messages
1,695
Location
Columbus Ohio
Once you start turning antler, your main problem will be getting enough antler to keep up with demand!

Apparently I drill the antler differently than everyone else so far. I simply place the drill bit in a chuck on the drive end of the lathe. Place a live center on the opposite end. I line up the antler the way I want, being sure to check all angles and ensure there is proper clearance after drilling for the bushings.

Next I hold the antler with pliers and turn the lathe on. Hold the antler with your left hand and turn the quill slowly, forcing the bit through the antler. Once you get close to the end, retract the tail stock some. I place a piece of wood between the antler and the tail stock then start advancing the quill again. I still hold the antler with the pliers and finish the drilling.

Personally I get less errors this way because I can see exactly where the drill will travel. I messed up a lot of antler with the drill press cause I couldn't see the travel of the bit very good.

I also use CA, but If you are able to use the tines, most of the time you won't need to seal at all since there is less marrow.
 

Fish30114

Member
Joined
Oct 18, 2014
Messages
484
Location
Burbs of Atlanta,Georgia
I've turned a bunch of antler--sharp tools or super sharp tools and it still stinks to high heaven. I use all the finishes I use on wood on it--CA, friction polish and wax, sanding sealer and wax. Here is a link to a guy drilling it like stuckinohio talked about: https://www.youtube.com/watch?v=SAEEaF8z2jM

If you drill with that method you can pick a side to favor and have a better chance of leaving some of the outer layer of antler on the finished blank. IME antler turns out all different kinds of ways, which emphasizes it being a natural material--which is probably why I prefer a more natural finish, I sand with walnut oil, and then polish with a walnut oil based friction polish--they come out gleaming!

Good luck!
 

stuckinohio

Member
Joined
May 3, 2015
Messages
1,695
Location
Columbus Ohio
FISH30114,

When you use the walnut finish, is it after the CA is applied, or do you use it only when not applying a CA finish?

I'm up for experimenting!
 

qquake

Member
Joined
Feb 8, 2004
Messages
5,015
Location
Northern California
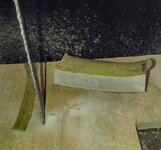
Thanks for all the advice, guys, I really appreciate it. I went ahead and cut a suitable piece of the antler that looked thick and straight enough for the Bolt Action pen. I marked each end where I wanted to drill with a transfer punch and one of the bushings.
 

Attachments

  • 011.jpg
    011.jpg
    124.5 KB · Views: 131
  • 027.jpg
    027.jpg
    96.4 KB · Views: 128
  • 026.jpg
    026.jpg
    96.6 KB · Views: 115
  • 019.jpg
    019.jpg
    17.4 KB · Views: 112
  • 010.jpg
    010.jpg
    165.5 KB · Views: 117

qquake

Member
Joined
Feb 8, 2004
Messages
5,015
Location
Northern California
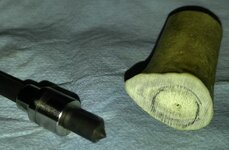
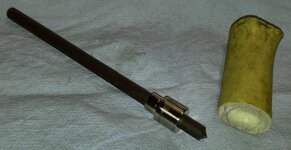
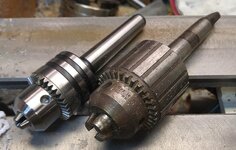
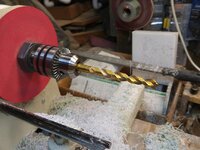
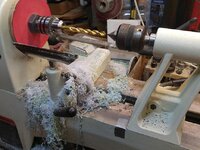
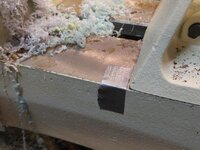
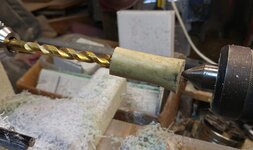
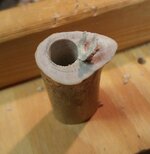
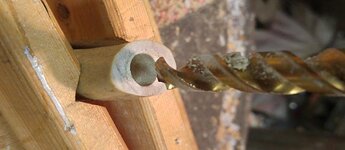
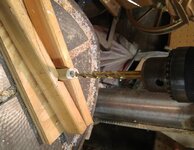
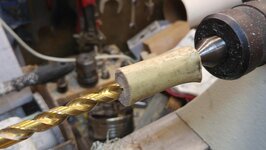
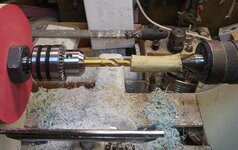
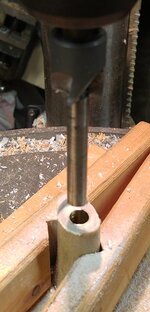
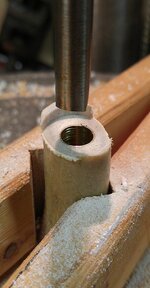
I decided to drill it on the lathe, like in the video shared by Fish30114. I have a big 5/8" chuck with an MT2 on it, but while it fits in the tailstock of my Jet lathe, it won't fit in the headstock. I'm guessing because of the tang on the Morse taper, it can't go in far enough. So I got a cheap 1/2" MT2 drill chuck from Harbor Freight. It fits in the headstock just fine. I marked the bed with a piece of tape so I wouldn't push the live center point into the bit. Drilling it was very easy, and I finished it on the drill press.
 

Attachments

  • 028.jpg
    028.jpg
    112.2 KB · Views: 120
  • 029.jpg
    029.jpg
    104.3 KB · Views: 124
  • 030.jpg
    030.jpg
    145.2 KB · Views: 134
  • 031.jpg
    031.jpg
    114 KB · Views: 125
  • 032.jpg
    032.jpg
    76.9 KB · Views: 124
  • 037.jpg
    037.jpg
    49.5 KB · Views: 130
  • 036.jpg
    036.jpg
    35.2 KB · Views: 118
  • 035.jpg
    035.jpg
    75 KB · Views: 142
  • 033.jpg
    033.jpg
    71.2 KB · Views: 128
  • 034.jpg
    034.jpg
    123.7 KB · Views: 112

qquake

Member
Joined
Feb 8, 2004
Messages
5,015
Location
Northern California
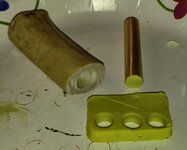
I glued the tube in the blank with epoxy, like I do all my pens. When I get home from work today, I'll trim it and start turning it.
 

Attachments

  • 044.jpg
    044.jpg
    56 KB · Views: 120
  • 045.jpg
    045.jpg
    80.6 KB · Views: 128
  • 046.jpg
    046.jpg
    66.4 KB · Views: 123
  • 048.jpg
    048.jpg
    54.4 KB · Views: 110

StephenM

Member
Joined
Apr 16, 2011
Messages
535
Location
Webster Groves, MO
It was mentioned once but can't be stressed enough - WEAR A GOOD MASK. The dust is like asbestos and made up of little hooks and once they get inside your lungs, they don't come back out.
 

qquake

Member
Joined
Feb 8, 2004
Messages
5,015
Location
Northern California
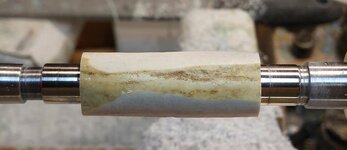
Trimming the blank was uneventful.
 

Attachments

  • 050.jpg
    050.jpg
    78.7 KB · Views: 127
  • 051.jpg
    051.jpg
    70.4 KB · Views: 122
  • 054.jpg
    054.jpg
    119.4 KB · Views: 117
  • 055.jpg
    055.jpg
    77.9 KB · Views: 110
  • 057.jpg
    057.jpg
    50 KB · Views: 114

qquake

Member
Joined
Feb 8, 2004
Messages
5,015
Location
Northern California
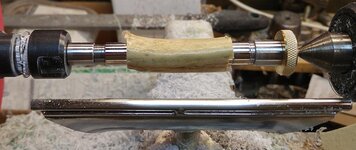
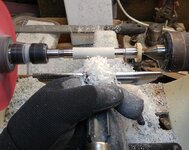
Roughing and turning it was uneventful too.
 

Attachments

  • 062.jpg
    062.jpg
    48.5 KB · Views: 109
  • 071.jpg
    071.jpg
    60.2 KB · Views: 105
  • 069.jpg
    069.jpg
    50.9 KB · Views: 115
  • 068.jpg
    068.jpg
    121 KB · Views: 102
  • 060.jpg
    060.jpg
    55.6 KB · Views: 99

qquake

Member
Joined
Feb 8, 2004
Messages
5,015
Location
Northern California
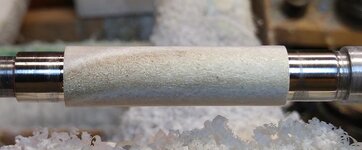
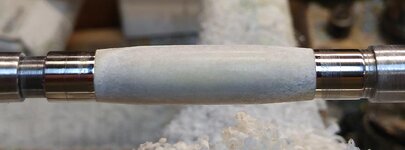
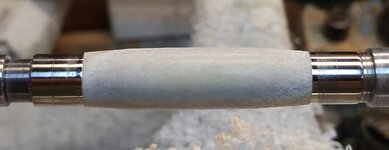
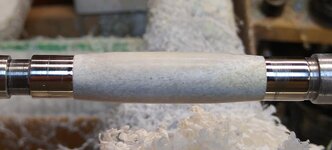
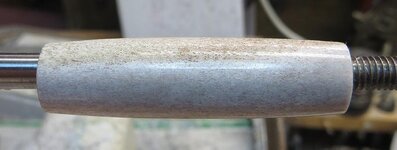
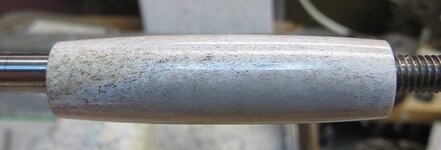
And shaping and sanding also went well. I used 320 grit dry, then all 9 grades of Micromesh, also dry. Now I have to decide what finish to use. I'm leaning towards CA (which I haven't done before), or just some sort of oil (BLO, walnut, etc.). Parts of the antler polished out like acrylic.
 

Attachments

  • 072.jpg
    072.jpg
    46.4 KB · Views: 102
  • 073.jpg
    073.jpg
    50.4 KB · Views: 98
  • 075.jpg
    075.jpg
    46.6 KB · Views: 104
  • 077.jpg
    077.jpg
    57.7 KB · Views: 94
  • 081.jpg
    081.jpg
    49.8 KB · Views: 104

Skie_M

Member
Joined
Aug 7, 2015
Messages
2,737
Location
Lawton, Ok
Should have sealed it before the sanding stage, to keep the pith cleaner (the part that didn't get shiny when you sanded).

Micromesh should always be done wet ... at the very least damp. If that pad heats up any, it ruins the pad's surface by melting the glue and carrying the abrasive away (usually onto your work piece).

If the pith isn't too badly filled in by junk, you could try cleaning it with an old toothbrush, and then sealing the entire surface with CA. Once you've done that, you can cut through the CA to reveal bare bone again in the solid surface area (shiny area) while you sand it back to 12,000 grit micromesh (do it wet or damp) and then go for polish. I use PlastX ... while it's made for automotive plastics, it will leave a gleaming polish on bone and acrylics, as well as aluminum and brass.
 

qquake

Member
Joined
Feb 8, 2004
Messages
5,015
Location
Northern California
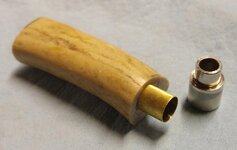
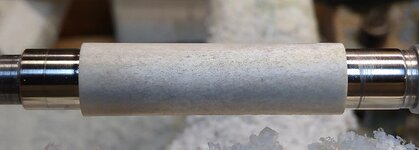
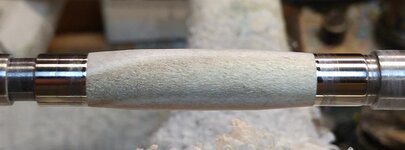
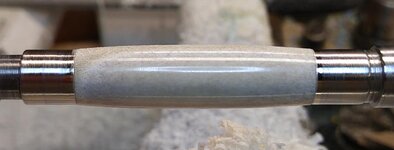
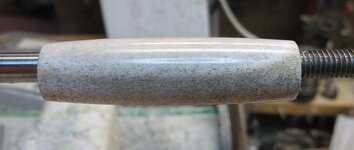
I cleaned it with DNA and blew it off with compressed air. After that, I put several coats of CA on it, let it set, then went through all 9 grades of Micromesh. I'm very happy with how it turned out. I wanted the rough spots to stay rough, and they did. To me, it gives it a more "antler like feel". I'll post photos of the completed pen in the Show Off Your Pens! forum.
 

Attachments

  • 082.jpg
    082.jpg
    51.2 KB · Views: 124
  • 090.jpg
    090.jpg
    54.4 KB · Views: 124
  • 091.jpg
    091.jpg
    56.8 KB · Views: 116
  • 092.jpg
    092.jpg
    53.1 KB · Views: 104
Top Bottom