This is very interesting, I started printing pens with the thought of doing an abalone warp. I have printed in blue PLA and various wood infused PLA. It was fun using TINKERCAD to generate the designs, lengths and size for the "turnings" for each type of pen ( slimline, K9, Patriot, Baseball etc) . One the design were done I printed them on an Ender 2 Pro ($199) with a wood infused (30%) PLA filament. I tried various sizes of Abalone inlay areas from 20 mm to 35 mm long. My worst problem was get the ends to a size equal to the diameter of the items being pressed
into it. Like you I found that with proper specifications the brass tubes could be inserted so tightly that glue or adhesive was not required.
I would then take Abalone sheets that would match well with the shades of the "printed barrels" and cut them on my laser. I used a stitching cut to "cut" the line, 1mm cut skip 2mm and repeat (it is a setting in printing software LightBurn). Power was adjusted so as to cut the abalone without cutting through the backing . Once Abalone was cut, I wrapped it in the insert area of the printed barrel. Unlike Mark I would then add a layer of UV resin and cure it in a Resin Printer Washer/Curing station for 20 min. I would then wet sand using the micro pads from 320 to 3500.
I would repeat this process until I had covered the Abalone and sanded 3D printed barrel. Once it was Smoothed and Sized I added 2 light coats of Gluboost filler CA and then followed by 2 coats of thin CA. This last step caused me a lot of grief until I learned not to use excessive accelerator.
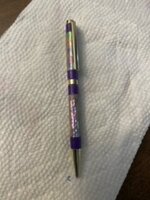
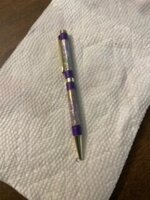
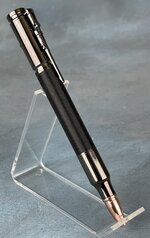
K9 pen shown below (brown is the 3D printed part and green is Abalone)

")