Great work. Where did you find the "wire hangers" or did you create them yourself?
My wife found them last year in an after-holiday sale. Sadly, she doesn't remember where.
Did you drill the side hols before or after turning?
wow, those are nice.
Any chance someone has a tutorial on how to make these?
Thanks! I found youTube videos on how to make them. Just search "turned bird house ornaments".
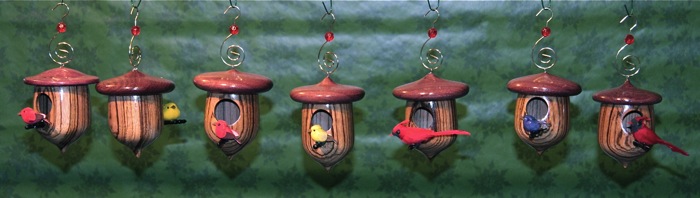
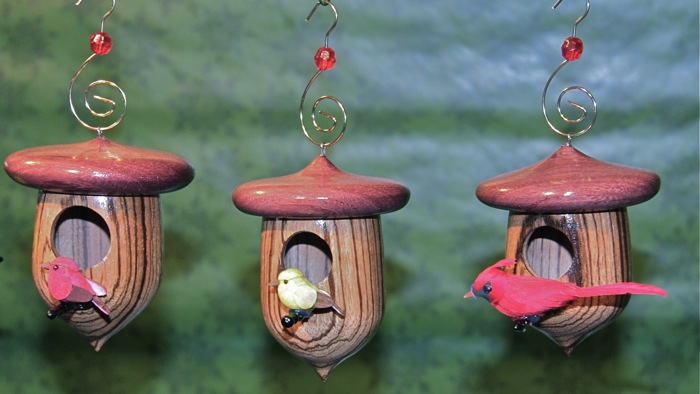
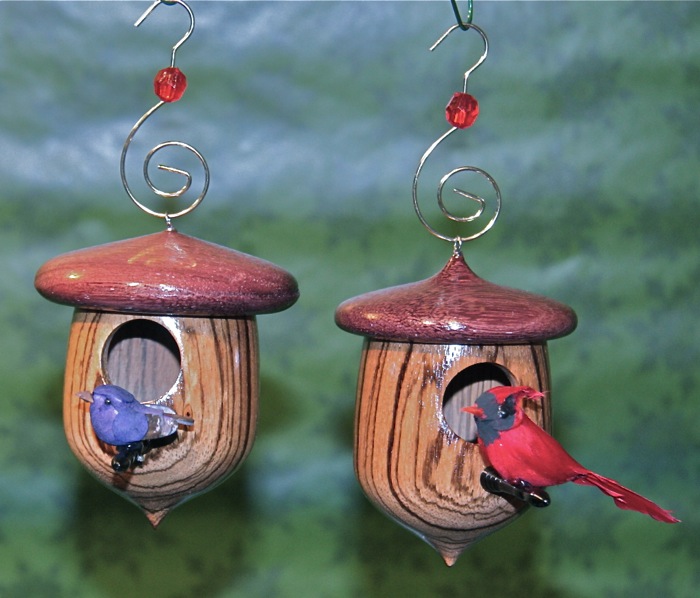
The short version: Mount a 2"x2"xwhatever-length-you-have body stock in your lathe. I used a 2' stick from Woodcraft.
Round it into a dowel and square off the end.
Decide approximately how long you want your birdhouse body to be and put a mark on the dowel.
Start your shaping of the body leaving the top at the end of the stick and the bottom at the mark. At this point you just want to shape until you know where the bottom curve starts.
Use a 5/32" drill bit and drill the mounting hole for the perch on the flat just above where your curve starts. Use a 3/4" forstner bit to drill the nest opening just above the perch hole. Drill both so that you have about 3/16" of solid wood showing at the thinnest area.
Mount a drill chuck in the tail stock and mount up the biggest forstner bit you have that will fit within the body of the bird house leaving you 1/8" or so of wall thickness. With your lathe on slow, drill down the length of the ornament until you see the bit through the perch hole making sure the perch hole is completely clear. Now, if you are so inclined, you can hollow out the bottom of the ornament more using your turning tools. I didn't.
Turn the outside bottom of the ornament more and then part it off when you have about 1/4" of material left at the point.
Square up the end of your stick and repeat. I got 7 bodies out of the one stick of Zebra-wood.
Mount your smallest chuck on the lathe and reverse chuck each bird house expanding the jaws from the inside so you don't mar the outside. Finish turning the bottom of the ornament. Sand through 400 grit.
At this point I was planning to use lacquer so I sprayed the ornament (yes, on the lathe) with sanding sealer and then friction polished it dry. Repeat with next bird house.
Decide how big your roof will be and cut squares of your wood-of-choice slightly bigger than that.
Create a flat mounting plate on the lathe and mark an accurate, 90-degree X across the face of it. Put some turners-mounting-tape on the "top" of your roof block. Align its corners on the lines of the X and press it into place.
Use your calipers to figure out the inner diameter of your birdhouse and turn a small tenon in the roof to fit. Turn any inside designs you want people to see when they look through the hole into the ornament. Mine was basically the pagoda style of the roof upside down. Turn the outside of the block round. Turn the underside edge of the roof. Sand and friction polish the finished surfaces. Repeat with each birdhouse being sure to keep your roofs and bodies paired up until the next step.
Reverse chuck the roof using either the tenon or a vacuum chuck rig(*). Turn the top of your roof to whatever shape you want. You can see I kept trying to find a shape I liked. Sand and seal the top. Use a micro drill to make a hole for the hanger.
((*) On the really thin roof I used a full tenon so could reverse chuck it. On the thicker ones I cut a groove in the wood to make my tenon and lower-edge of the roof at the same height. I had to vacuum chuck these because the groove was too small for my chuck jaws to get into.)
Glue the roof onto the ornament. I used 4 drops of thick CA against the tenon on the roof then spun the body onto the roof. Set aside on its roof to dry. Repeat.
Mount up a small stick of whatever scraps you have laying around to make the perch. For mine we made them about 1-1/8" total length. Turn them round leaving it about 1/8" thick with a 7/32" "ball" on the inside edge and put on whatever decorations you want. The tip of your stick is the visible end of the perch so round it off. Sand it and seal it. Part the ball down to a measured 5/32" at the very end leaving a 1/32" shelf all the way around. Part the perch off leaving about 1/16" to 1/8" of the 5/16" shaft. Repeat.
Glue the perch into its hole on the ornament and "hold" it until the glue sets up.
Hang your ornaments and spray your top coats of finish. Let dry and admire.
If you choose to, go buy some mini birds from your local craft store and hot-glue them onto the perches.
I hope this helps someone!