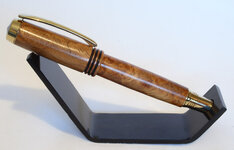
Jr Gent II centerband removal

Signed-In Members Don't See This Ad

workinforwood

Member
Joined
Mar 1, 2007
Messages
8,173
Location
Eaton Rapids, Michigan, USA.
No doubt this probably has been discussed before, but I likely missed it. I do not have a tap and die. I would like to remove the centerband on the JR gent kit so that the cap blank can be built to be the extra 1/4 inch longer or whatever it is the band is and the kit can just be pushed all the way in so I can use the threads but the band would be my own. Seems to me that I've been here long enough to know that anything is possible! So has anyone done it and if so, how?
 
Signed-In Members Don't See This Ad

rherrell

Member
Joined
Aug 22, 2006
Messages
6,334
Location
Pilot Mountain, NC
Jeff, I went out to the shop to take these so I could SHOW you instead of trying to explain it.
attachment.jpg

This is a piece of maple with some 3/16" plex glued on top. The trick is to drill a hole just a hair smaller than the first ring on the CB and then file it until it fits snug and won't let the little gold ring through.
attachment.jpg

Here's a shot of the CB in the hole. The gold ring is resting on the plex. I tried just using wood but it's too soft and the gold ring kept getting stuck.
attachment.jpg

I use a piece of oak for protection against the hammer.
attachment.jpg

Rings off and CB is punched through.
attachment.jpg

Finished! Took all of 30 seconds, hope this helps.:wink:
 

Attachments

  • a.jpg
    a.jpg
    92.9 KB · Views: 2,146
  • b.jpg
    b.jpg
    88.1 KB · Views: 2,143
  • c.jpg
    c.jpg
    83.5 KB · Views: 2,185
  • d.jpg
    d.jpg
    88.5 KB · Views: 2,137
  • e.jpg
    e.jpg
    79.3 KB · Views: 2,151

workinforwood

Member
Joined
Mar 1, 2007
Messages
8,173
Location
Eaton Rapids, Michigan, USA.
And...what about that remaining piece of centerband that won't punch out, how can I get rid of that so that I have no showing metal at all? That's my ultimate goal. I don't know how hard the metal is, if I can spin it between centers and knock off that last part with my skew or parting tool.
 

jskeen

Member
Joined
Oct 11, 2007
Messages
1,754
Location
Crosby, Texas, USA.
I would guess that even if the metal for that last visible ring is too hard to remove with a turning tool, you could do it with a file.

Just as a FYI
Once you get those rings separated, it's fairly easy to turn a centerband from your leftover blank and reassemble it.
 

rherrell

Member
Joined
Aug 22, 2006
Messages
6,334
Location
Pilot Mountain, NC
Jeff, I haven't tried turning a JG CB but all the other ones I've done have been brass. If that's the case then you can do as James suggests and use a file or what I do is use an old 1/2" skew that I use just for brass.
 

desertyellow

Member
Joined
Apr 28, 2008
Messages
1,260
Location
Las Vegas, NV, USA.
Rick,
Thank you for the show and tell.
I'm a visual learner and very much appreciated the extra time it took to add the pictures.
I could not be any more clear to me.
Thanks again.
 

scubaman

Passed Away Jun 20, 2018
In Memoriam
Joined
Dec 30, 2004
Messages
414
Location
Wappingers Falls. NY
And...what about that remaining piece of centerband that won't punch out, how can I get rid of that so that I have no showing metal at all? That's my ultimate goal. I don't know how hard the metal is, if I can spin it between centers and knock off that last part with my skew or parting tool.
That last ring can't be knocked off - you are looking at 1 piece of metal and 1 piece of plastic (the threads). You CAN remove the plastic from the metal, but then the threads are not supported near the front.

If you do want to do that: Use the same sort of block described above, catching the front ring this time. Unscrew the nib from a FP section. Screw the section into the CB threads and back out a little. *GENTLY* tap the section to drive the threads back. Once you get going just push by hand. Then you have to fill that gap (the step in the plastic threads) with something - might consider epoxy.

If you have a collet chuck: The better way is to grab the metal in a collet and use your parting tool to turn down the ridge. It's soft metal and you can turn it easily with a sharp parting tool. Once you get down to the same diameter of the rear extension you can push the whole thing in all the way.

If you don't have a collet chuck... get one ;-) You'll not regret it. The PSI one is not terribly expensive and actually quite nice - too bad they package collets with it. Too far apart to be useful...
 

rherrell

Member
Joined
Aug 22, 2006
Messages
6,334
Location
Pilot Mountain, NC
The black center band coupler isn't in there very tight, just pull and it'll come out.
I have no idea what's wrong with the photos, they work for me.:confused:
 

bananajeep

Member
Joined
Oct 11, 2006
Messages
185
Location
Sacramento, CA, USA.
Thanks for the visual. I was able to follow your description, but pictures are worth a thousand words. Have you ever tried to get the centerband off of the Jr Retros. I had to gently pry with a pocket knife and still had tiny marks on the center metal band. If you can come up with a solution let me know.

Thanks

Mike
 

RAdams

Banned
Joined
Apr 5, 2009
Messages
2,983
awesome tutorial man! Thanks for sharing! Now to find a similar one for the clip end and i will be set!
 

NewLondon88

Local Chapter Leader
Joined
May 15, 2008
Messages
5,077
Location
Claremont NH
awesome tutorial man! Thanks for sharing! Now to find a similar one for the clip end and i will be set!

I think the center of the finial on the cap is just pressed in. If your hole
is just larger than the black, silver or gold insert in the finial, you can knock
it out with a center punch.

OR

if you're too aggressive when disassembling the pen, it will come out whether
you want it to or not.
.. or so I've heard. :redface:
 

RAdams

Banned
Joined
Apr 5, 2009
Messages
2,983
yeah that is kinda my fault. I wanted these pics to be findable, so i upped the thread. I will be building the jig soon and wanted to use the pics for ref. lol.
 

gketell

Local Chapter Leader
Joined
Dec 15, 2006
Messages
2,772
Location
Pleasanton, CA, USA.
Since this long dead thread is once again alive... Since I've read it I want to try it but I have one question: do you have to do anything to modify the upper tube to work once you shorten the thread adapter? Or does it just work with no changes?

GK
 

workinforwood

Member
Joined
Mar 1, 2007
Messages
8,173
Location
Eaton Rapids, Michigan, USA.
You do not barrel trim the CB side of the pen all the way to the tube. Lets just say the with the ring removed, it makes the centerband 1/8" shorter just to make the math easy. So the barrel should be an 1/8" longer. So you trim it, but leave it an 8th longer and the fact that there is no tube for such a short distance will not matter. The CB will still press in just fine and you'll still have plenty of strength. You can also split the difference, so you are 1/16th longer on each end past the tube.
 

hewunch

Member
Joined
Aug 5, 2008
Messages
4,661
Location
Albany, GA
Since this long dead thread is once again alive... Since I've read it I want to try it but I have one question: do you have to do anything to modify the upper tube to work once you shorten the thread adapter? Or does it just work with no changes?

GK

Actually you can trim the CB side all the way to the tube with no problem. I have shaved many a CB and always trimmed all the way up to the tube.
 
Top Bottom