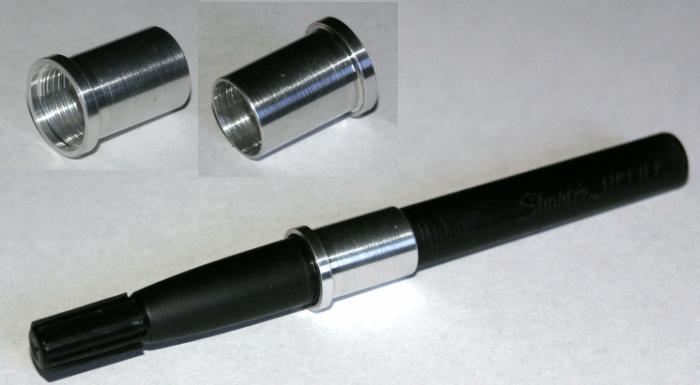
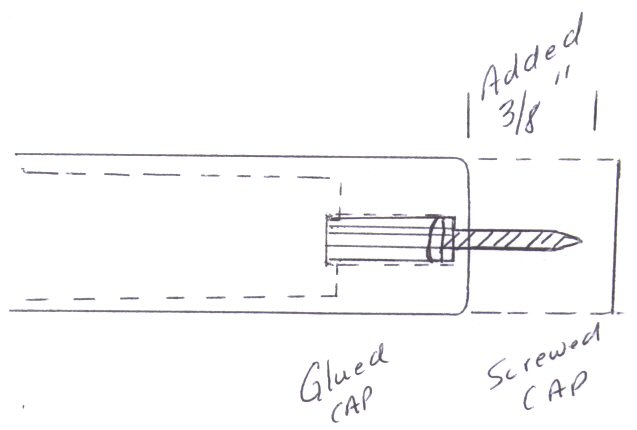
I just bought a refill and I think I see one POSSIBLE problem. The barrel on my refill is all over the place but generally in the .420-.424 range. The closest bit is a 27/64 which is .4219. That should work, as twist drills always drill a tad large. The potential problem I see is how much meat is left for threads.
The tap is .450, minus approx. .422-.423 for the drilled hole leaves approx. .027, divided by two, leaves .0135 on the sides for threads. While this MIGHT be OK in metal or hard plastic, it may not be enough for wood.
What do you think??