
cool44
Member
Redux. I previewed the previous one and it looked fine. Please delete the previous version of this thread. I couldn't figure out how to edit the original without making it longer. Anyway...
I posted in another area that I was having concentricity issues. Click here for more on that. I figured out what they were and I said I'd post a small chronicle of my journey from first kitless pen to finally something worth showing to everyone. It took me 8 tries so I will post a pic or two of each step along the way. Here we go...


It's obvious what happened here. It was a functional pen for a short time. I tried to do too much with my first try. It's all stabilized wood except for the black parts. I was trying to mimic a Broadwell kit from PSI using wood/ plastic. This, despite what it looks like now, gave me hope. I realize the file size is too big but I want to get these posted.
Here is #2...

A perfectly functional pen but slightly off contrentricly. There is also the nick on the threads as well as the ugly section (I just wanted to finish it one late night but didn't have any ebonite yet and it was on the previous pen where it matched).
#3...

Not a horrible pen if it wasn't off so horribly (it feels worse than it looks). And another...
Also a success since I added some aluminum and it doesn't look that bad.
#4...

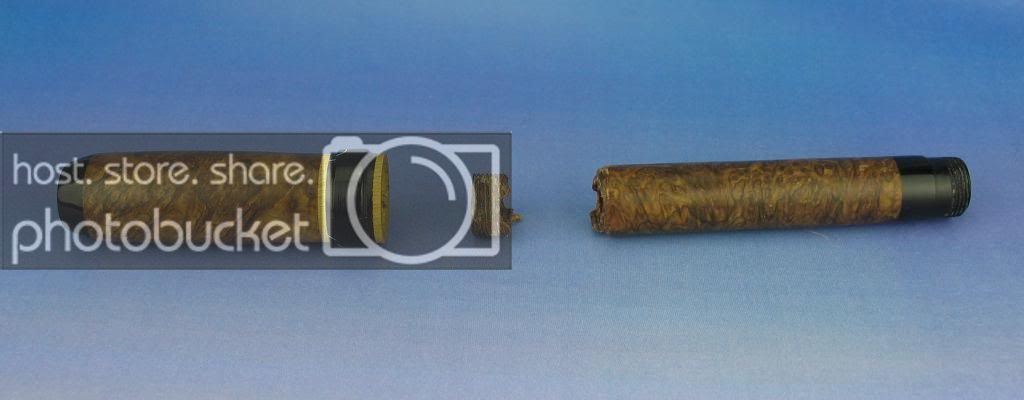
Got a catch and boom. Still haven't found the piece that went flying... Eugene at Mutt Blanks very kindly sent me a replacement and unfortunately this happened...
#5...

Such a rookie mistake. Again, late night and turned the die just that extra little quarter turn and ugh! For whatever reason I wasn't that mad since I figured out how to turn the alumilite without it exploding on me.
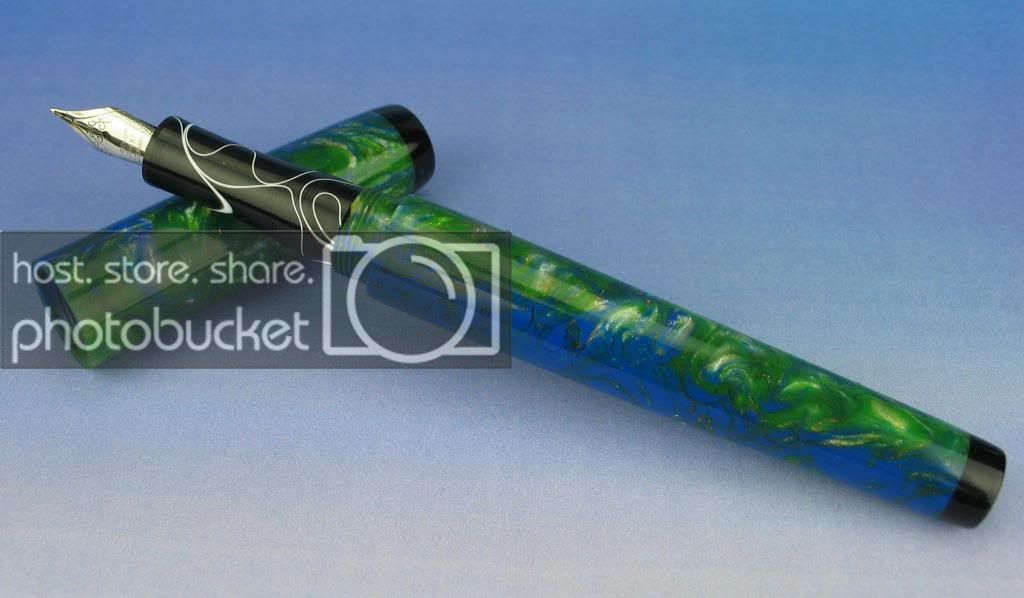
#6...

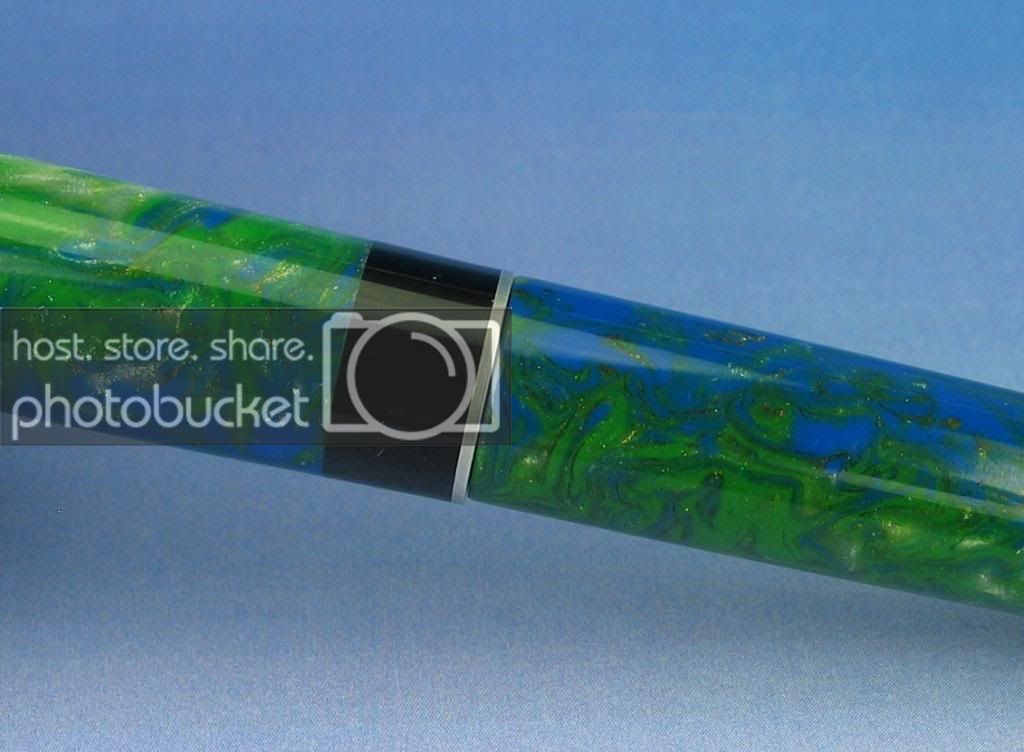
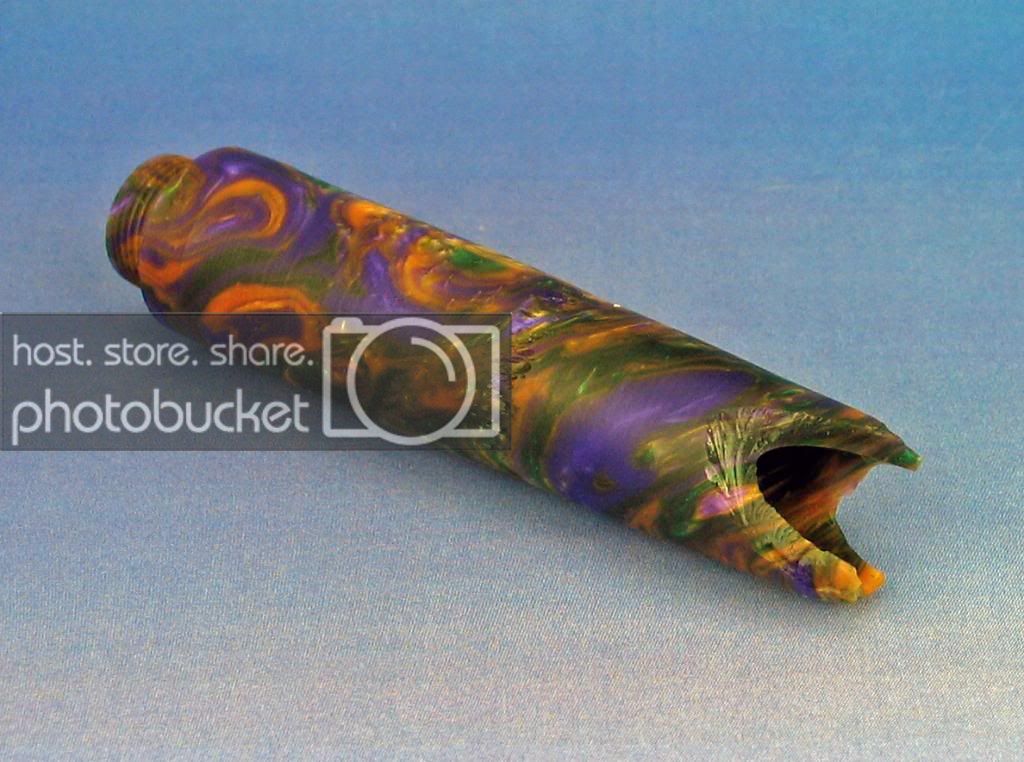
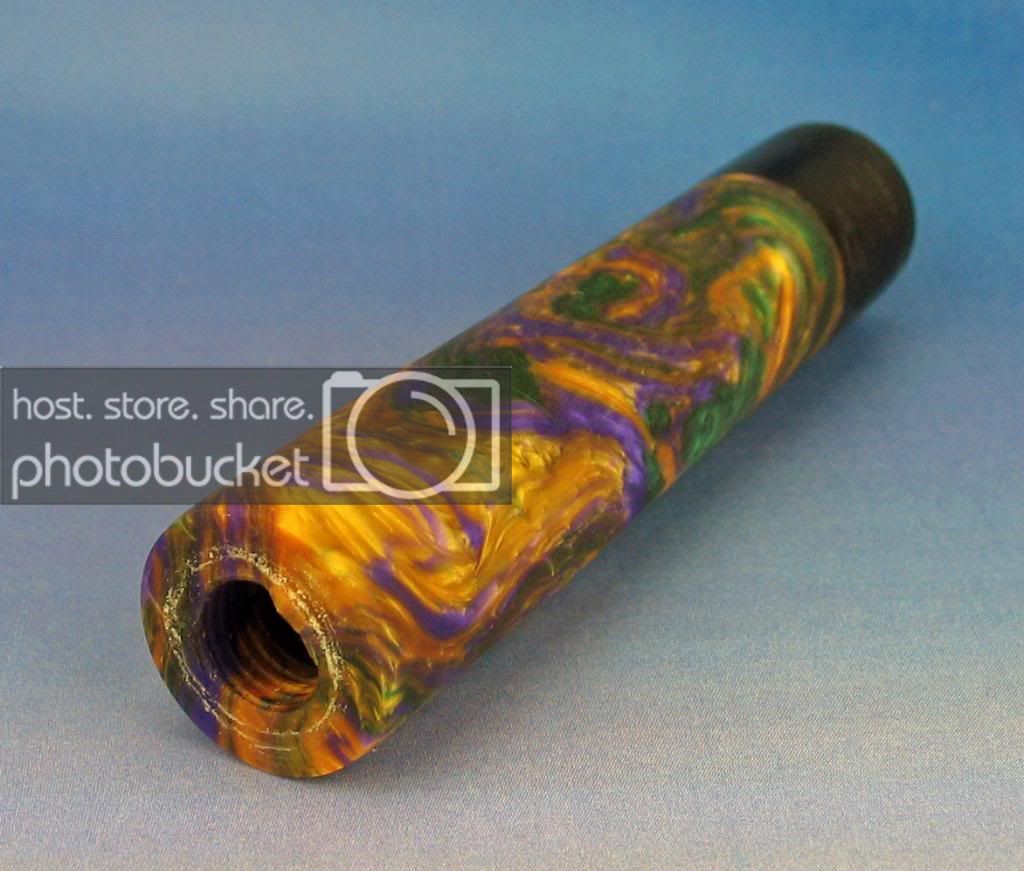
I actually carry this pen around. I love the colors and the #5 Meister is just great. It is off concentricly (if that's a word... 2nd time I've used it) a little but when writing it isn't an issue. I was happy with the way the bronze accent turned out also. Here's another...

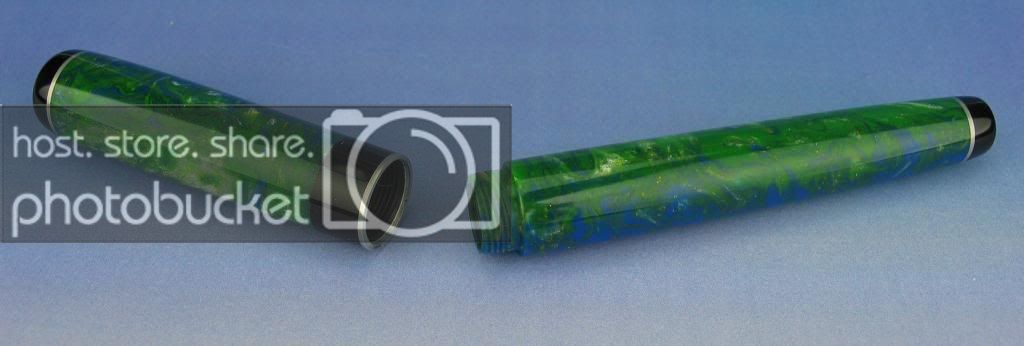
The section is ebonite that isn't completely finished. I went back and tried to even things out and only made it worse and I haven't finished it yet.
#7...

Had to try one with a clip. It's extra work but it worked out well. The only issue is the body to cap threads are very tight. It will bottom out but it takes a little effort. #5 Meister nib with m12x.8x3 cap to body threads and m10x1.25 section to body threads. Another pic...

The hole in the cap is for an accent piece that I haven't decided on yet (which means it'll probably never happen... my A.D.D.). There is a hole at the end of the body waiting for a piece as well.
#8...
Finally what you've all been waiting for...


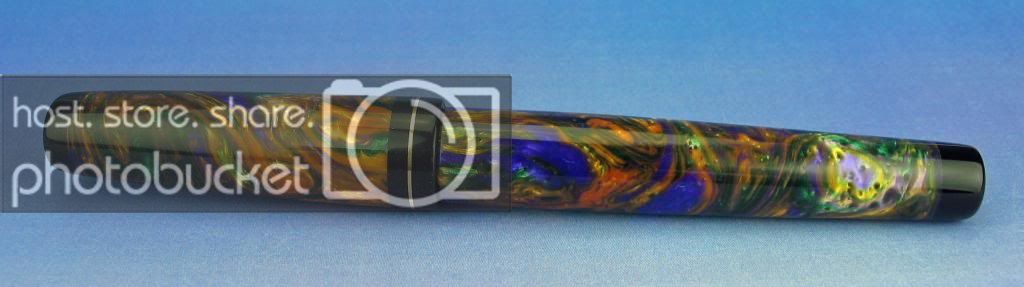
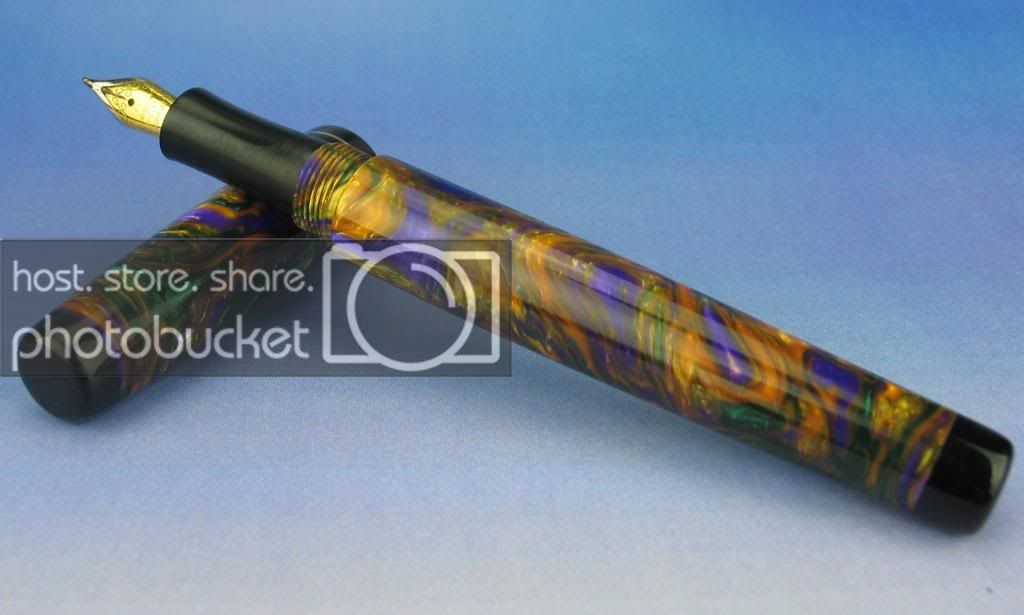
Finally concentric. Here's another...

It's got a #6 Med. Meister nib and is cartridge/ converter feed. The cap to body threads are m14x.75 and the section to body threads are m10x1.
Capped length... 5 1/2"
Uncapped...5"
Posted... 7"
Again sorry for the big pics and the large post. I am looking for comments and criticisms please. Come on let me have it.
dave
I posted in another area that I was having concentricity issues. Click here for more on that. I figured out what they were and I said I'd post a small chronicle of my journey from first kitless pen to finally something worth showing to everyone. It took me 8 tries so I will post a pic or two of each step along the way. Here we go...
It's obvious what happened here. It was a functional pen for a short time. I tried to do too much with my first try. It's all stabilized wood except for the black parts. I was trying to mimic a Broadwell kit from PSI using wood/ plastic. This, despite what it looks like now, gave me hope. I realize the file size is too big but I want to get these posted.
Here is #2...
A perfectly functional pen but slightly off contrentricly. There is also the nick on the threads as well as the ugly section (I just wanted to finish it one late night but didn't have any ebonite yet and it was on the previous pen where it matched).
#3...
Not a horrible pen if it wasn't off so horribly (it feels worse than it looks). And another...
Also a success since I added some aluminum and it doesn't look that bad.
#4...
Got a catch and boom. Still haven't found the piece that went flying... Eugene at Mutt Blanks very kindly sent me a replacement and unfortunately this happened...
#5...
Such a rookie mistake. Again, late night and turned the die just that extra little quarter turn and ugh! For whatever reason I wasn't that mad since I figured out how to turn the alumilite without it exploding on me.
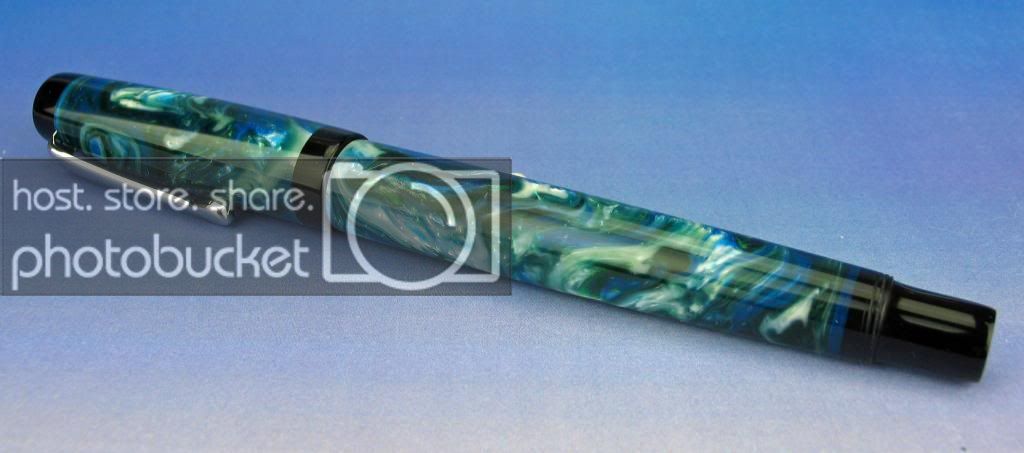
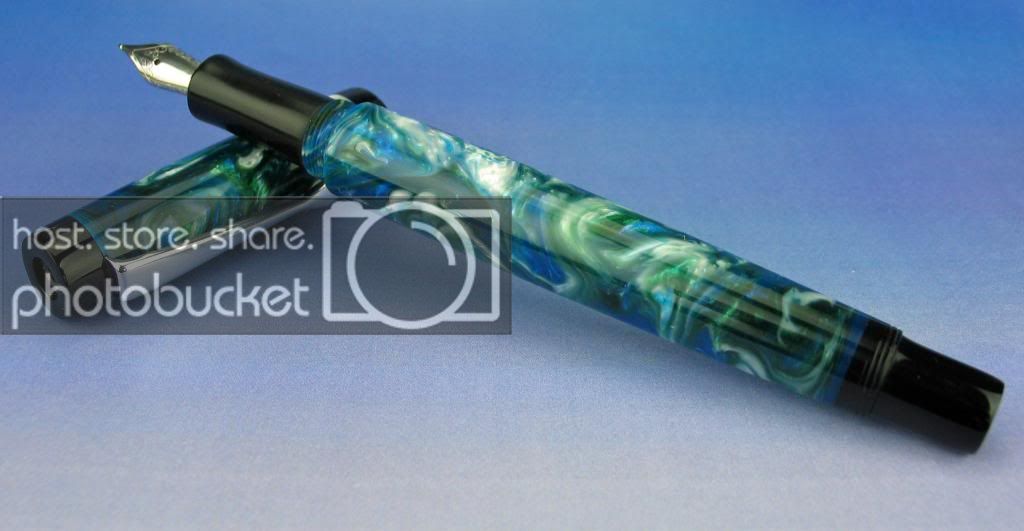
#6...
I actually carry this pen around. I love the colors and the #5 Meister is just great. It is off concentricly (if that's a word... 2nd time I've used it) a little but when writing it isn't an issue. I was happy with the way the bronze accent turned out also. Here's another...
The section is ebonite that isn't completely finished. I went back and tried to even things out and only made it worse and I haven't finished it yet.
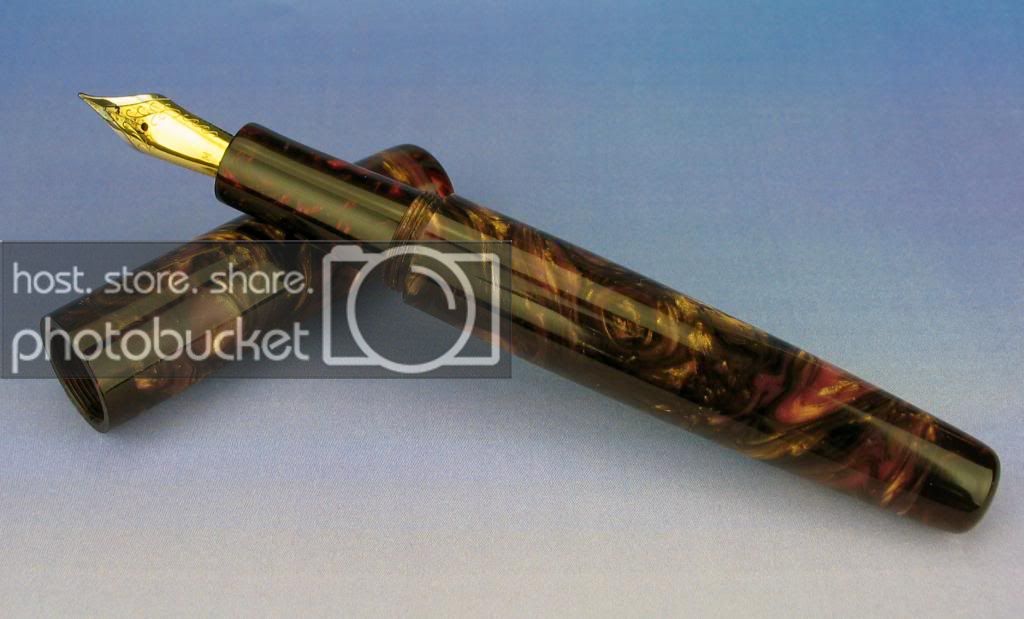
#7...
Had to try one with a clip. It's extra work but it worked out well. The only issue is the body to cap threads are very tight. It will bottom out but it takes a little effort. #5 Meister nib with m12x.8x3 cap to body threads and m10x1.25 section to body threads. Another pic...
The hole in the cap is for an accent piece that I haven't decided on yet (which means it'll probably never happen... my A.D.D.). There is a hole at the end of the body waiting for a piece as well.
#8...
Finally what you've all been waiting for...
Finally concentric. Here's another...
It's got a #6 Med. Meister nib and is cartridge/ converter feed. The cap to body threads are m14x.75 and the section to body threads are m10x1.
Capped length... 5 1/2"
Uncapped...5"
Posted... 7"
Again sorry for the big pics and the large post. I am looking for comments and criticisms please. Come on let me have it.
dave
")