Pen Display Cases

Signed-In Members Don't See This Ad
See more from JimMc7

JimMc7

Member
Joined
May 12, 2009
Messages
731
Location
NE Oklahoma
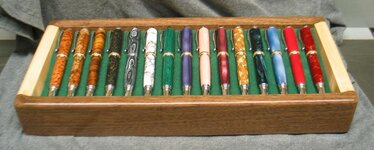
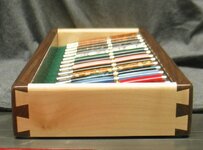
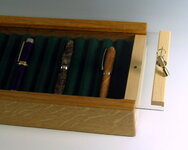
Got tired of making pens so I dug out the table saw and router table to make some pen display cases. These are inspired by the Serge tutorial in the library and some great tips from jskeen posts regarding making pen trays. I sell pens on consignment at a local jewelry store and will use these for display instead of the 30 pen "leatherette" cases with the elastic string holder (which can mar the finish if you remove/replace the pens frequently). Store owner keeps the pens in a display case so no need to include a lid or lock in my case.

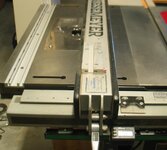
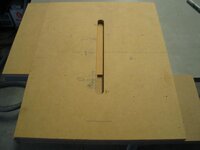
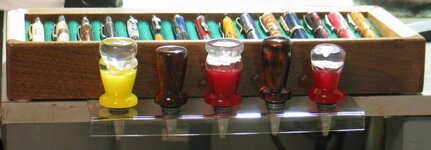
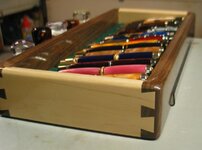
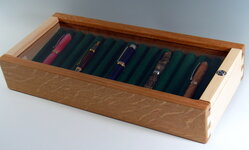
Walnut & maple with a tray from 1/2" MDF set at a 10* angle in the box. Grooves cut with 3/4" core box bit set at ~1/4" depth on 25mm (~ 1") centers. Tray liner is exotic felt :)smile:) from the local Walmart attached with Aleene's tacky spray adhesive (also from WM). I made the trays oversized and then trimmed on the table saw after applying the felt (leaving a reasonably clean edge on the felt). Top edge of the box relieved with a small raised panel bit to give the box a subtle picture frame effect. Box bottom is walnut veneered 1/4" MDF panel set in rabbet cut in the frame. Finished with gloss water base lacquer (Target EM6000). Felt pads applied to bottom to prevent bottom finish from any "sticking". For size reference, the pens are all JSIIs.

Thanks for looking.
 

Attachments

  • IMG_8182.jpg
    IMG_8182.jpg
    44.8 KB · Views: 1,334
  • IMG_8190.jpg
    IMG_8190.jpg
    50 KB · Views: 2,312
Signed-In Members Don't See This Ad
Joined
Aug 13, 2010
Messages
150
Location
Cameron Park, CA
That is a great looking case! I'm getting ready for my first shows and am planning in making a couple of cases to go with the stands I made. I don't have a dovetail jig yet so I'll probably just go with box joints but the dovetails add so much to the high end look.

I have been doing pens for a few months and woodworking in general for a year or so. I have one question: How do you keep the correct spacing and parallel for the routed pen grooves? I have a router table but it's not deep enough for a 15" wide insert like yours.

Chris
 

jskeen

Member
Joined
Oct 11, 2007
Messages
1,754
Location
Crosby, Texas, USA.
Very Nice Work! Clean lines and proportions, well executed and nicely finished. Shows off the product well, and demonstrates that the pens deserve special treatment. Gotta help sell a few more just in itself.

One suggestion, if you are selling a box full of pens the same length, a simple square stick covered in felt at the bottom to keep them all lined up without having to tip the box back every time will probably keep the display looking better in the store. Don't have to be fastened in, just sitting in the bottom. That way you could remove it if you want to put in some longer pens.

Can't figure what tips you picked up from me on that one though :)
 

JimMc7

Member
Joined
May 12, 2009
Messages
731
Location
NE Oklahoma
<snip> I have one question: How do you keep the correct spacing and parallel for the routed pen grooves? I have a router table but it's not deep enough for a 15" wide insert like yours.

Chris

Chris, Serge in his tutorial uses layout lines, straight edge and top/bottom backer boards to route the grooves. My "router table" is actually a router insert in table saw cast iron wing. I have a Wixey digital fence on my table saw fence so easy for me to use this saw fence to route a groove, bump 25mm, cut another and so on -- 1st photo. I also made a jig for routing dados for another project using a template collar -- using layout lines (don't have to be on the cut line -- edge of the jig would work, too) this jig could also be adapted to route the grooves -- 2nd photo.

James, I got the idea of cutting oversize from your post in Tim Harvey's (THarvey) thread. You and Peter (wood-of-1kind) also suggested making your own in this thread re commercially available pen trays (so - inspiration tip credit to both of you on that one!). Most folks on this forum are very generous with tips so just trying to credit you, Tim, Peter and Serge for examples of that generosity! Plus -- your spacer strip suggestion is great, too, so glad I got your attention!
 

Attachments

  • IMG_8198.jpg
    IMG_8198.jpg
    42.3 KB · Views: 342
  • IMG_8197.jpg
    IMG_8197.jpg
    30.1 KB · Views: 322
Last edited:
Joined
Aug 13, 2010
Messages
150
Location
Cameron Park, CA
Thanks. I have to admit that I am guilty of "asking first and going to the library second" as the old saying goes. I did look up Serge's tutorial this morning. With some careful layout work I think I can get a tray done on my router table by flipping the panel around to effectively double the capacity of my fence adjustment. I have a jig for my router that I use to cut dadoes in book case sides for shelves, I can probably modify that to work too.

Now, if you can get me to freehand beautiful dovetails like yours I'll owe you one!
 

turbowagon

Member
Joined
Sep 2, 2009
Messages
1,067
Location
Tucson, AZ
These are very nice... love the dovetails.

And GREAT TIP about cutting the felt oversize and trimming on the table saw.
 

JimMc7

Member
Joined
May 12, 2009
Messages
731
Location
NE Oklahoma
Probably not much use to anyone else but wanted to share my solution to displaying stoppers with these pen cases. I had placed a couple of stoppers in the pen slots but obviously looked rather clunky and tended to hide the neighboring pens. I have an open space in front of the cases on the store shelf so I made this Lexan stopper display to work with the pen display cases. Thin Lexan from the borg with 1/2" lips at back (to catch display case and hold in place) and front (to stiffen holder against weight of the stoppers). I made the bends with Lexan clamped to end of the table saw and applied heat gun until the material bent to 90*+ (minute or so). I'll probably use some double stick tape to keep the Lexan from shifting. The Lexan is thin enough to slip in the space created by the felt bumpers on the bottom of the case.
 

Attachments

  • IMG_8302.jpg
    IMG_8302.jpg
    34.2 KB · Views: 231
  • IMG_8303.jpg
    IMG_8303.jpg
    41 KB · Views: 188
  • IMG_8304.jpg
    IMG_8304.jpg
    22.6 KB · Views: 188

JimMc7

Member
Joined
May 12, 2009
Messages
731
Location
NE Oklahoma
Variation on the earlier version for a seller who needs a locking case. The only hardware required is a plunge lock. A tilting lid would have been better for a show-type display but the hardware for that is more expensive and this design is fine for this seller. Not exactly Fort Knox, but it keeps the pens a bit safer from someone wanting to pocket a pen for free. Made from quarter sawn white oak and maple with a satin finish.
 

Attachments

  • IMG_8859.JPG
    IMG_8859.JPG
    73.1 KB · Views: 159
  • IMG_8848.JPG
    IMG_8848.JPG
    82.8 KB · Views: 164

patmurris

Member
Joined
Feb 25, 2011
Messages
357
Location
Nice, French Riviera
Really nice work - i wish i'd be able to do something like that!

My only thought is that the two tone frame, the visible dove tails and the somewhat bright colored felt are distracting from the case content.
 
Top Bottom