I did it! My first captured ring!

Signed-In Members Don't See This Ad
See more from Fay Prozora

Fay Prozora

Member
Joined
Jul 20, 2014
Messages
469
Location
Port Angeles, Wa
I was messing around with this today and I finally got my first captured ring made. I used a combination of tools to get it done and that was time consuming so come payday, I will get the captured ring tool. Saw one in the PSI catalog that I got in the mail one that cuts 3 different sizes of rings. So I'm going to order that one I think. I could not get the parting tool in on the left side so it threw the wood off balance and the sanding did not go very well, but hey! I wanted to try cutting one and I got one done. Have a look Fay
 

Attachments

  • Captured ring-1 (640x480).jpg
    Captured ring-1 (640x480).jpg
    66.5 KB · Views: 405
  • Captured ring -2 (640x480).jpg
    Captured ring -2 (640x480).jpg
    65.5 KB · Views: 400
Signed-In Members Don't See This Ad

Edward Cypher

Member
Joined
Feb 8, 2011
Messages
1,901
Location
Denver, Colorado
I do my captured rings with converted allen wrenches. I have the sorby captured ring tool but nothing has worked as well as the allen wrenches and they are easy to make for any size ring.
 

Fay Prozora

Member
Joined
Jul 20, 2014
Messages
469
Location
Port Angeles, Wa
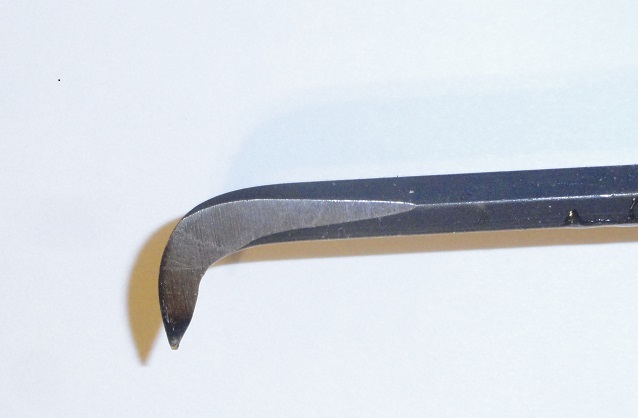
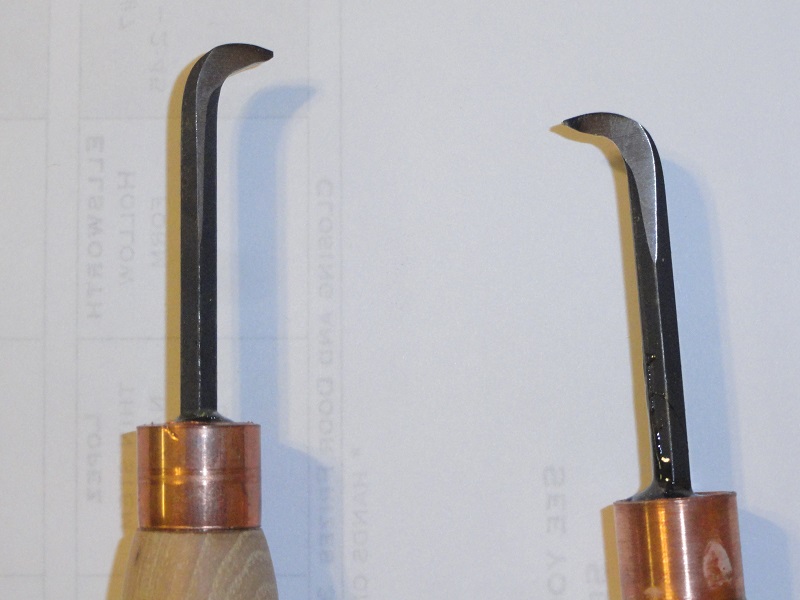
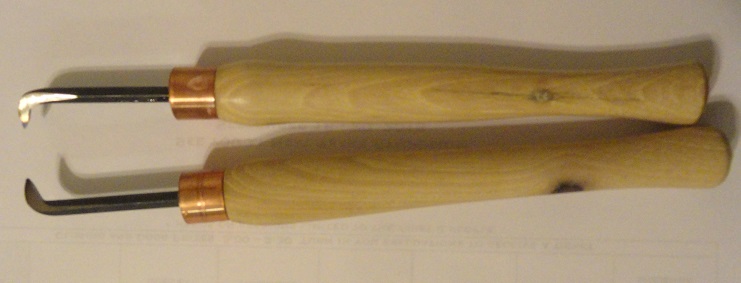
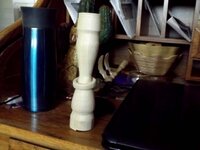
Well first off, I didn't even think to make a captured ring tool from other tools. I have a whole bunch of allen wrenches in different sizes. How would you make the tool? now the answer to the next question.. I rounded the wood while it is on the lathe, Then marked off the section for the ring with a pencil, then marked the rounded part on the ends of the wood, ( I did not finish that part as the wood got knocked off balance so that part did not get done.) Then I use the parting tool to cut on each side to he marking for the ring. You can make it as wide or as narrow as you want to.. Then I used the spindle gouger tool to narrow the wood down to the ring section and then I used the parting tool several times until I got the depth that I wanted, Then rounded the ring and then went ahead and worked more on the taper on each side of the ring. Then with the skew I started cutting in at the taper next to the ring but cutting inward. Switched between the parting tool and the skew and you have to be very careful because it is hard to get in there with the parting tool. It's a challenge but I should try making my own tool to cut that ring for the heck of it... Fay
 

Fay Prozora

Member
Joined
Jul 20, 2014
Messages
469
Location
Port Angeles, Wa
thanks for the lesson,now I want to know how to make a turning tool from a allen wrench:redface:


Me too! I tried a nail but that did not work and I played with an old allen wrench but it was a no go. Now I too want to know ,, awwwww come Edward,, spill the beans,,, I mean allen wrenches... Tell us,,,, Thanks in advance Fay
 

Edward Cypher

Member
Joined
Feb 8, 2011
Messages
1,901
Location
Denver, Colorado
When I get back out in the shop I will take some pics. It is really quite easy and very cheap. By tomorrow night I will post them to late tonight to take pics or get into the shop. No big secret.
 

Fay Prozora

Member
Joined
Jul 20, 2014
Messages
469
Location
Port Angeles, Wa
Thank you so much Edward. I'm looking forward to seeing your pictures. I really appreciate this. I'm new to this and I want ot give this a try. Thanks again,, Fay
 

Edward Cypher

Member
Joined
Feb 8, 2011
Messages
1,901
Location
Denver, Colorado
Allen wrench captive ring tool.

I hope nobody thinks I am hijacking this thread as I was asked about the tool in the thread by various people.

:)The first pic is a closeup of the grind on a HF allen wrench for the right side of a ring tool.


View in Gallery

The second pic is the pair you need to do a captive ring the right and left cutter.


View in Gallery

This last pic is the allen wrenches with home made handles with copper pipe ferrules. Very simple to make you just need two allen wrenches the same size.


View in Gallery
 

Edward Cypher

Member
Joined
Feb 8, 2011
Messages
1,901
Location
Denver, Colorado
To do rings on pens I have ground down the $1.99 pics from HF because they are so much smaller. Same as the allen wrench one for the left and on for the right. Fun to play with.
 

Fay Prozora

Member
Joined
Jul 20, 2014
Messages
469
Location
Port Angeles, Wa
Thank you so much Edward. I really appreciate these pictures. They look like they would work. I don't have a grinder but I did have a lot of allen wrenches and will make one maybe I best make 2 one for right side and one for the left side and then give this a try. I did end up ordering a cheapo $15 dollar tool and I'm in hopes that will work. So today or maybe later today I will order a grinder of sorts to get my tools sharpened. Don't worry about hijacking this thread. I was the one who wanted to know. Fay
 

kovalcik

Member
Joined
Jun 9, 2011
Messages
891
Location
Barrington, NH
My first one, many years ago, I used a small Craftsman wood chisel to do the seperation. I also have to say that one come out nearly perfect. Thought I had it down, but the next 3 I tried were complete failures. Taught me a lesson.
 

Notnate

Member
Joined
Apr 15, 2014
Messages
85
Location
Sioux City, IA
First off, great job Fay on your first ring!

Second that's a pretty cool trick Edward. I have the Sorby tool as well and my first attempt a few months ago with that one left a bitter taste in my mouth, then I found pens and haven't though much of it. After seeing this I might try that myself! I have a set of tiny tools I bought before I realized that they were worthless. I cannot imagine anyone turning anything with those. I might finally have a use for them now... steal the handles for these!
 

truckerdave

Member
Joined
Dec 7, 2008
Messages
134
Location
Rochester, New York
I would to see a video detailing how to grind the Allen wrenches into the captive ring tool. I am not clear on whether you grind on only one side or what.
 

Edward Cypher

Member
Joined
Feb 8, 2011
Messages
1,901
Location
Denver, Colorado
Sorry truckerdave I do not have a video camera. But yes they are grinded only on the top. They act kind of like a scraper the bottom side is relieved very slightly just to prevent catches. Kind of like a negative rake scraper. If you look at the Sorby tool the ring parts (3 different sizes) really look like a flat scraper and are grinded on both sides to eliminating having to have two tools (left and right). But the Sorby cost a lot more than allen wrenches and if you are doing small items even there small ring tool is very large. It works but to tell the truth I have not used it in years since I made the allen ones.
 

solobiker

Member
Joined
Jan 7, 2014
Messages
152
Location
Colorado
Thanks for the pictures Edward. Is this same idea as when people use an allen wrench as a hollowing tool? What I mean by that is would the ones you made work to hollow out mini birdhouses our do you need to have a different angle?
 

Fay Prozora

Member
Joined
Jul 20, 2014
Messages
469
Location
Port Angeles, Wa
Those would be a great idea on the mini bird houses but maybe a smaller allen wrench might work on them. I never thought of using some thing like to hollow out smaller items like that. Fay
 

Edward Cypher

Member
Joined
Feb 8, 2011
Messages
1,901
Location
Denver, Colorado
Solobiker and Fay yes they work just fine. Although I have found that the pics work the best and are dirt cheap. Heck HF sometimes have the pics for free without a purchase. There is a guy in our Denver club who did a complete demo on hollowing miniatures with pics, starting blank size was one inch by one inch. If you get a chance solobiker come to the meeting in Denver and join and you can check out the DVD on miniature hollow forms turned with HF pics.
 

solobiker

Member
Joined
Jan 7, 2014
Messages
152
Location
Colorado
Solobiker and Fay yes they work just fine. Although I have found that the pics work the best and are dirt cheap. Heck HF sometimes have the pics for free without a purchase. There is a guy in our Denver club who did a complete demo on hollowing miniatures with pics, starting blank size was one inch by one inch. If you get a chance solobiker come to the meeting in Denver and join and you can check out the DVD on miniature hollow forms turned with HF pics.


I am thinking about heading on down to the meeting on Tuesday. Thanks for the reply.
 
Top Bottom