First Band Saw Box

Signed-In Members Don't See This Ad
See more from byounghusband

Status
Not open for further replies.

byounghusband

Member
Joined
Oct 27, 2005
Messages
834
Location
Celina, Texas, USA.
I recently took a class at Woodcraft learning how to make Band Saw Boxes. I really enjoyed it and they are NOT as difficut as they appear to be. I do need to go get a 3/16" blade to do tighter cuts on my own band saw though..... Maybe even a 1/8", but there would be at least two blade changes per box required to do so...[:I]
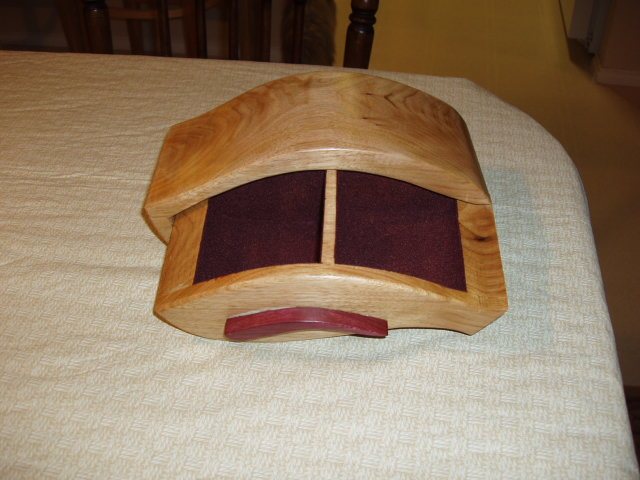
Here is a Butternut box with a Purple Heart handle. I started out a a solid block. I finished it with Polyurethane. I might try waxing it to really bring out a shine, but am undecided right now....


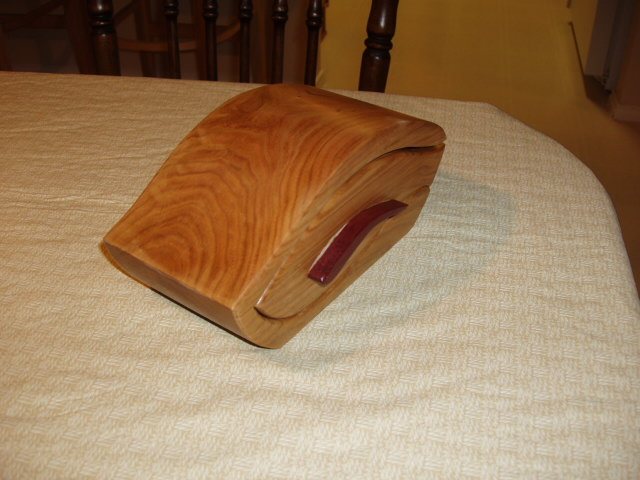
The inside of the drawers is lined with Wine-Suede Flocking, which is really easy to do. Make sure you have good ventilatin for the adhesive though....[xx(]

 
Signed-In Members Don't See This Ad

ahoiberg

Member
Joined
Apr 10, 2007
Messages
1,763
Location
Ames, IA, USA.
nice work bob, i've been wanting to build one of those for a while! they do seem pretty easy... did you saw out the drawer shape, then cut the front and back pieces off, then hollow out the drawer area?
 

byounghusband

Member
Joined
Oct 27, 2005
Messages
834
Location
Celina, Texas, USA.
Thanks for the comments!! It was a fun project and I have another sitting 1/2 finished in the shop right now. The pattern was given to us in class. We were sitting there wonderng how we would use a contrasting piece of wood for the handle and I remembered that I had purchased a bag of purple heart pen blanks for an order, so I resaw'd three blanks for the class.

To make one, you must make sure the block is square (90 degree sides), then resaw 1/4" off the intended back side and set it aside.
Attach your pattern to the intended front with spray adhesive and cut the drawer body out of the center and set it aside.
Glue the 1/4" slice to the remaining main block. It will be an "almost" invisible glue up. Set it aside to dry.
Cut 1/4" off the back for the drawer block and 1/2" off of the front and set aside.
Cut the drawer hollows out of the remaining block.
Glue the drawer front and back to the hollowed block and set aside.
Cut the outside of the box from the original block that the back was glued to.

Now you have a LOT of sanding to do!!! Both machine and hand sanding is required.
Once all smooth and pretty, sand some more because you WILL find the need....
Cut a handle out of what ever you want of cut/sand a way to pull the drawer out.
Finish with your choice of finish.

We used two band saws in class since it took a a 1/2" 3 tpi blade to resaw and 3/16" 8 tpi for cutting the curves. I imagine it can all be done with a 3/16" blade to avoid changing it....
 

Draken

Member
Joined
Sep 19, 2005
Messages
1,248
Location
Stafford, Virginia, USA.
Great looking box, I too hope to attempt those one day. My first attempt was a typical box, curved or flowing. Found a photo tutorial for doing these, here's the URL for anyone interested:
http://bt3gallery.fhauto.com/view_album.php?set_albumName=album34&page=1
 

byounghusband

Member
Joined
Oct 27, 2005
Messages
834
Location
Celina, Texas, USA.
Draken,
That tutorial is pretty close to what we did. with a couple minor exceptions. One thing I found is that the Oscillating Spindle sander needs to have a spindle that is taller than your box. He had one, Woddcraft didn't, so some of my sanding there was difficult....[B)]. There are several good books available on Band saw boxes as well. I have one and tow more are on order with Amazon.com.
 

ahoiberg

Member
Joined
Apr 10, 2007
Messages
1,763
Location
Ames, IA, USA.
cool, thanks for the breakdown. i've checked out a few of those books from the local library and that sounds just like how they did it... can't wait to try one!
 
Status
Not open for further replies.
Top Bottom