stabilization with poly

Signed-In Members Don't See This Ad

penmaker1967

Member
Joined
Jul 8, 2010
Messages
1,082
Location
biscoe nc
hi guys i wanted to try to use poly for stablization. my pith person had done it on the pen he sent me. i have some blanks that have been in quart jar for about 2 weeks and it has soaked up just about all the poly. now how long do i need to leave it in the oven or do i just let dry naturally
thanks for the help
 
Signed-In Members Don't See This Ad

seamus7227

Member
Joined
Mar 18, 2009
Messages
6,220
Location
Wichita Falls, TX
"poly" meaning polyeurothane or polyresin? never heard of this technique, unless of course there was a vacuum pulled on it, more details if you have them, please?!
 

penmaker1967

Member
Joined
Jul 8, 2010
Messages
1,082
Location
biscoe nc
all i know is that i was told to put the blanks in a jar and fill it with polyeurthane and let it sit for a few weeks to soak it up. was best to use spalted blanks for this and then put them in a toaster oven but was not told the setting for the h=eat or how long to leave them in the oven. the oven part is what i am needing info on.thanks
 

PTownSubbie

Member
Joined
May 15, 2009
Messages
2,229
Location
Chesapeake, VA
I've heard of guys putting blanks in a jar and leaving it in the hot sun for a day. Sealing the jar and cooling it down. Sort of drawing a vacuum on the jar as it cools off.

This is potentially a way to get deeper penetration. Poly is fairly thick though. I am unsure the penetration you will get without some form of vacuum or pressure.

Make sure you review Curtis' latest post on his pressure/no pressure/vacuum results......
 

ghostrider

Member
Joined
Feb 3, 2011
Messages
952
Location
Grand Rapids, Michigan
Hello Todd,


I use the pickle jar method mentioned in the library, and a hand vacuum pump I got from Harbor Freight.
Brake Bleeder & Brake Bleeder Vacuum Pump Kit


I have had success with both Cabbot's and Helmsman, although Helmsman is more clear (most polyurethane will be amber).

I leave it in the vacuum for about three to four weeks as I've found that a couple weeks just didn't do it for me. I am still experimenting with it, but have found that 250 for an hour or so may do it depending on conditions (my set up was in an unheated warehouse. Took only an hour in the summer, but a couple in the colder months.) I've had to put the blanks back in the oven before because they still weren't done.

It could have been a difference in the brands, or conditions (I don't know). I just tried a second cook on some blanks this week, and after another 90 minutes @200, they had just dried.

After that, I let them sit for as long as I can wait until the smell goes away to make sure they are fully cured.

The blank I used for your pen was actually overcooked:redface:, and had a burnt look to it. I was a lighter color before I got to it. Fortunately I very much liked the way it turned out. It was originally going to do something else for PITH, but I liked this one so much it just sort of insisted on being the one.

ETA: forgot to mention that thinning the poly can help. Read clean up instructions to find out what to thin it with. Both my poly's called for mineral spirits. It's all been pretty much trial and error for me.
 
Last edited:

PTsideshow

Member
Joined
Dec 26, 2011
Messages
1,033
Location
Macomb County Michigan

ElMostro

Member
Joined
Mar 17, 2007
Messages
1,940
Location
San Antonio, TX.
I posted this a while back but it applies to your question so here it is again.
Eugene.

Disclaimer: I am not an expert, these are techniques that I use and work for what I do, there are likely better (read more expensive) ways to stabilize wood out there so this list is not all inclusive. First I will give you my definition of "stabilizing wood" for pen turning. "To take a piece of wood that is too soft in its current state and and harden it (stabilize it) in order to make it turnable.

METHOD 1: (the simplest). Use Minwax wood hardener. Pour a can of Minwax Wood Hardener in a glass jar big enough so that a normal pen blank (aprox 3/4" x 3/4" x 5 1/2") can lay flat. Drop the blanks in the jar and close lid tightly. Wait until blanks sink plus one day then take out and let dry. The Minwax will saturate the blank and harden the fibers. It will not fill wormholes or repair cracks. Depending on the type of wood this can take from 2-5 days and drying will also take a few days. (DO NOT PUT IT IN A TOASTER OVEN TO SPEED UP DRYING...unless you like to turn burnt wood...DAMHIKT)

METHOD 1A:If you want to speed it up you can place a weight (do not use a wood block bec it will absorb the hardener) on top of the blanks so that they do not float. Make sure the liquid completely covers the blank and follow steps above.

METHOD 1B: If you want to speed it up more and plan on doing this for many blanks you can set up a paint pressure pot and apply pressure to the blanks while submerged in the hardener. This is what I do and apply 80 psi for about 24 hours and by then the blanks have sunk. (Vacuum will also work but it foams up and wastes most of the liquid AND over time the acetone will destroy the rubber parts in the pump)

Method 2: Requires Acetone, acrylic (Plexiglas) air compressor and a paint pressure pot . Make sure it is acrylic because if not it will not work. Pour the acetone in a tall mason jar about half full. Cut the Plexiglas in 1" squares. I use a bolt cutter for this just make sure you have eye protection bec the plexiglas has a tendency shoot out when it cracks. Put the pieces of Plexiglas in the acetone jar and close tightly (acetone evaporates very quickly). Sit jar on a shelf out of the way and shake it every 4-5 hours. Depending on the quantity of Plexiglas and acetone it may take a few days to dissolve into a syrup like slurry. Take another jar like the one from the minwax method and pour the slurry in the jar. If you have a clump at the bottom of the mason jar leave it there and pour more acetone in it. Set it on a shelf and shake it at least twice a day. Keep repeating this until the Plexiglas is completely dissolved and transferred to the larger jar. Make enough so that the large jar is no more than half way full but full enough to cover the blanks if submerged. The final solution should have the consistency of water. Once the solution is ready put the blanks you want to stabilize in the mixture, weigh then down with something so they stay submerged put the whole thing in the pressure pot put the lid on as per instructions and apply pressure. Again I apply 80 PSI. Apply pressure for about 12 hours then release it, let stand for several hours then apply pressure again. I do this about 4 or five times over a 3-4 day period. After doing this several times release the air, open the pot and take out the blanks and set them out side to dry. Do not stack them on each other bec they will stick. The acetone evaporates and the dissolved acrylic hardens inside the wood fibers. One additional benefit is that wood treated like this is easier to turn and finishes easier. You can use vacuum BUT remember that acetone disolves rubber so unless you have a filter on the vac pump the acetone fumes may damage the rubber in the pump)

Method 3: Requires Mineral Spirits, oil base poly, air compressor and a paint pressure pot. Make a 50/50 mix of poly and mineral spirits. Again, not more than 1/2 full for the large glass jar. Follow the directions above for the plexi-tone, the method is the same but the mixture is what is different.

And Finally ""Caution""; Do this only in a WELL VENTILATED area (out doors) and use eye and breathing protection, in addition to gloves AND don't smoke. All of these chemicals release vapors that are bad for your lungs and eyes and are flammable. Safety first!

Again; This is the way I do it, it works for me but may not work for you.

El Mostro
 

ghostrider

Member
Joined
Feb 3, 2011
Messages
952
Location
Grand Rapids, Michigan
I have tried the soak method in Min-Wax Wood hardner, but haven't yet cut into that blank, so I'll have to let you know. I also let it soak for a couple weeks.

Here is something else I found.

NOTE: EXERCISE EXTREME CAUTION, AND READ ALL OF TUTORIAL BEFORE STARTING.
http://www.northcoastknives.com/northcoast_knives_tutorials_hints_tips3.htm

Again, this can be dangerous.

I just tried something similar in my kitchen sink. First, I held the jar (with blank and wood hardener in it) under the hot water tap for a little while, then put the lid on. A hour later I checked, and some saturation was apparent (The blank didn't settle fully below the liquid level and was clean when I set it on the shelf, now it's obviously got some color from the wood hardener and dye, so something happened). I could also perceive the vacuum as the lid had collapsed a bit, and heard the release when I unscrewed the lid in the next paragraph.

Then I unscrewed the lid, and put the jar in a container underneath the tap again. I ran my hot water out of the tap into the container holding the jar with the wood hardener and blank until I started to notice some activity in the wood hardener (I could still dip my finger in the water without getting burned, although it was hot), then screwed the cap back on and put on the shelf. I'll wait a few days to a week or two and see what happens.

And again, this site recommend extreme caution due to the flammable nature of Min-Wax Wood Hardener.

 
Last edited:

penmaker1967

Member
Joined
Jul 8, 2010
Messages
1,082
Location
biscoe nc
update on the idea that i could do the blanks with poly. i left them in a jar for about 2 weeks they soaked up all the poly by then. i put them in my brand new toaster oven that i got for the shop. put it on a very low heat and set the timer. 5 mins in the oven and now i dont have a toaster oven anymore beacuse it destroyed the oven from the flames that it produced and so i will never try that again almost lost my shop but luckly i had a water hose close by and the only thing that got burned up was the blanks and the oven. note to self dont ever be so stupid (lol)
 

sbell111

Member
Joined
Jan 16, 2008
Messages
3,465
Location
Franklin, TN
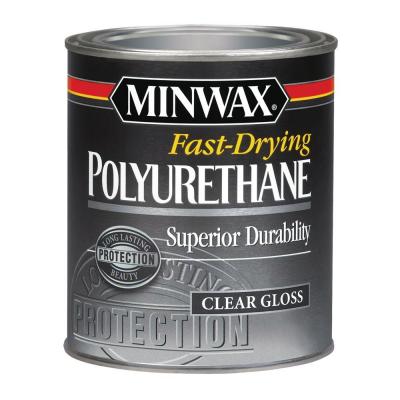
pls advise what is "oil base" poly? tks

10a88f13-42ed-4bff-a6b4-ee0561ddb79e_400.jpg


Note 1: Anything that is oil-based is going to burn pretty good. Keep it out of your toaster oven. Dry the blanks using time, not heat.
Note 2: Toaster ovens don't really do 'very low heat'. The way that they typically work is that they are either all the way on or all the way off. They use a thermostat only to cycle the element on and off so the oven stays close to the set temperature, but when the element is on, it's ON.
 
Last edited:

ghostrider

Member
Joined
Feb 3, 2011
Messages
952
Location
Grand Rapids, Michigan
update on the idea that i could do the blanks with poly. i left them in a jar for about 2 weeks they soaked up all the poly by then. i put them in my brand new toaster oven that i got for the shop. put it on a very low heat and set the timer. 5 mins in the oven and now i dont have a toaster oven anymore beacuse it destroyed the oven from the flames that it produced and so i will never try that again almost lost my shop but luckly i had a water hose close by and the only thing that got burned up was the blanks and the oven. note to self dont ever be so stupid (lol)
Sorry to hear about that. I've done this at least three, maybe four times, and never experienced a fire. I've left them in for as long as 2 hours before without problem.

Did you wrap them in tin foil, or did you just put them on a plate and put them in the oven?

I would imagine that an unwrapped blank would leave the poly directly exposed to the heating element, and that doesn't sound good.
 

leehljp

Member Liaison
Joined
Feb 6, 2005
Messages
9,330
Location
Tunica, Mississippi,
The idea for polyurethane has been around for quit a few years. I read about it when I joined in '05. Some people had some success with it and a few did not. It was dependent upon the individual and his or her experience and determination.

I tried it and it worked on a few pieces. But don't get in a hurry. Sometimes it takes weeks for it to cure all the way through on soft or porous wood.

Eugene (El Mostro) had some great pointers and suggestions.
 

ghostrider

Member
Joined
Feb 3, 2011
Messages
952
Location
Grand Rapids, Michigan
The idea for polyurethane has been around for quit a few years. I read about it when I joined in '05. Some people had some success with it and a few did not. It was dependent upon the individual and his or her experience and determination.

I tried it and it worked on a few pieces. But don't get in a hurry. Sometimes it takes weeks for it to cure all the way through on soft or porous wood.

Eugene (El Mostro) had some great pointers and suggestions.
I've never been able to see good results overnight. I usually shoot for three weeks, but then I am only using a hand pump. I once didn't get around to taking the pieces out for over a month. They definitely got saturation.
 
Top Bottom