theidlemind
Member
Okay, carbon fiber is cool and we've seen a lot of neat carbon fiber, fiberglass, and kevlar pens lately.
I've cast a few and figured I would give a quick primer on how I do it.
Not necessarily the right way but it works for me.
Safety First....:doctor: Wear a mask when cutting these fibers.
Cut them when the sun light is shining through your shop window and you will see uncountable fiber dust in the air.
You do not want this in your lungs.
The fun part.
I was asked to put some carbon on some tubes and cast them.
No idea what the tubes are for, doesn't matter......
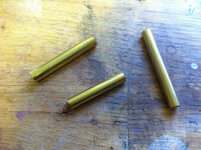
Paint your tubes.
Paint your tubes.
You might not need too, but you won't find out until after you cast them.
Paint your tubes.
I scuff them with sandpaper first,
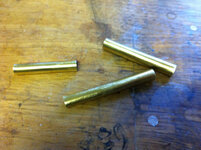
and then hang them on my high end painting jig.
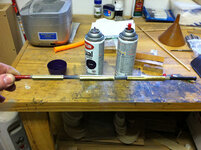
Spray them,
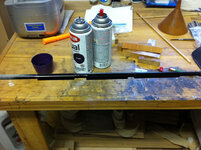
then let them dry.
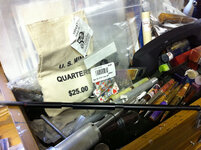
I buy my fiber from Soller Composites. I have found that 1/2" sleeve is the only size I need.
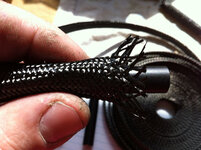
It will fit anything from a Slim to a Majestic.
They have lots of other neat things like Kevlar, Colored Fiberglass, Fiberglass/Carbon blends
and are very good people to give your money to.
The stuff comes in a roll and is like a Chinese handcuff.
Pull on it and it won't turn loose, push on it and it will bunch up and release.
Remember to wear your mask when you cut it.
And don't use your wife's scissors.
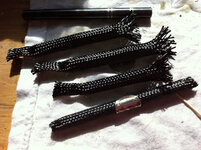
So, notice the fuzzy ends? I don't know how to prevent that so I cut mine long so that I have a nice, tight wrap on my finished blank.
You will trim the ends after you glue them to the tube.
I always test fit mine before mixing my clear epoxy. Don't want to glue it and find you have fuzzies on your tube.
Got gloves? I HIGHLY recommend gloves at this point.
You will use quite a bit of epoxy on this step, it needs to dry CRYSTAL CLEAR.
I buy mine from this guy.
Mix it up, roll your tube in it so it has a fairly thick coat all over it (hopefully wearing gloves.....)
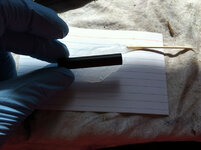
Push your fiber tube so that it expands in diameter and shortens in length, slide your tube in (no comments now, I'm concentrating),
then pull the fiber tight.
You should see epoxy squeeze out of the fiber.
Take your fingers and slick this down so that you have a smooth coat on it.
It doesn't need to completely coat it but you want it smooth with no air bubbles.
If you use less epoxy, that's okay too, the resin will finish the job.
You just want to make sure the fiber is fastened to the blank, resin has a way of shrinking and pulling the things you cast.
Right now is a good time to decorate your tubes with watch parts or coins if you want.
Set aside to dry.
When they are dry you can take your scissors and trim the fuzzy ends of the fiber.
You are still wearing your mask?
I trim the fiber to within about 3/16" or 3 or so millimeters, whichever you use.....
I usually take the epoxy all the way to the end to try to prevent fuzzy ends,
That makes it harder to trim but less stuff floating in the air.
Now you just cast them.
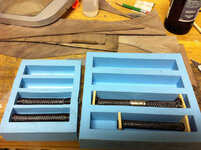
I have used Resin Savers, they save resin.
My favorite molds are from Fred and I call them "Money Saver" molds.
I call them "Money Savers" because one mold will fit A BUNCH of different tubes.
The big molds pictured have cast everything from Slims to Long Clickers to Zens.
And the small mold pictured is the executive mold and I have no idea what tubes I just cast in it, Shock Absorber pen maybe??
Anyhow, I use Silmar Polyester Resin and use all the standard casting techniques.
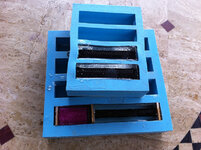
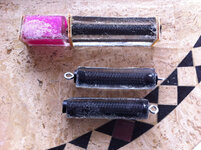
turn, polish and assemble.....
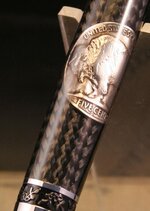
So that's all there is to it. I lost a bunch of material learning to do this,
maybe this will make the learning curve easier for someone.
Hopefully.
I've gained a LOT of knowledge on this site, maybe I've given a little back.
Let me know how your carbon casting goes.
And definitely let me know if you have an easier/better way
 eace: david
I've cast a few and figured I would give a quick primer on how I do it.
Not necessarily the right way but it works for me.
Safety First....:doctor: Wear a mask when cutting these fibers.
Cut them when the sun light is shining through your shop window and you will see uncountable fiber dust in the air.
You do not want this in your lungs.
The fun part.
I was asked to put some carbon on some tubes and cast them.
No idea what the tubes are for, doesn't matter......

Paint your tubes.
Paint your tubes.
You might not need too, but you won't find out until after you cast them.
Paint your tubes.
I scuff them with sandpaper first,

and then hang them on my high end painting jig.

Spray them,

then let them dry.

I buy my fiber from Soller Composites. I have found that 1/2" sleeve is the only size I need.

It will fit anything from a Slim to a Majestic.
They have lots of other neat things like Kevlar, Colored Fiberglass, Fiberglass/Carbon blends
and are very good people to give your money to.
The stuff comes in a roll and is like a Chinese handcuff.
Pull on it and it won't turn loose, push on it and it will bunch up and release.
Remember to wear your mask when you cut it.
And don't use your wife's scissors.
So, notice the fuzzy ends? I don't know how to prevent that so I cut mine long so that I have a nice, tight wrap on my finished blank.
You will trim the ends after you glue them to the tube.
I always test fit mine before mixing my clear epoxy. Don't want to glue it and find you have fuzzies on your tube.

Got gloves? I HIGHLY recommend gloves at this point.
You will use quite a bit of epoxy on this step, it needs to dry CRYSTAL CLEAR.
I buy mine from this guy.
Mix it up, roll your tube in it so it has a fairly thick coat all over it (hopefully wearing gloves.....)

Push your fiber tube so that it expands in diameter and shortens in length, slide your tube in (no comments now, I'm concentrating),
then pull the fiber tight.
You should see epoxy squeeze out of the fiber.
Take your fingers and slick this down so that you have a smooth coat on it.
It doesn't need to completely coat it but you want it smooth with no air bubbles.
If you use less epoxy, that's okay too, the resin will finish the job.
You just want to make sure the fiber is fastened to the blank, resin has a way of shrinking and pulling the things you cast.
Right now is a good time to decorate your tubes with watch parts or coins if you want.
Set aside to dry.
When they are dry you can take your scissors and trim the fuzzy ends of the fiber.
You are still wearing your mask?
I trim the fiber to within about 3/16" or 3 or so millimeters, whichever you use.....
I usually take the epoxy all the way to the end to try to prevent fuzzy ends,
That makes it harder to trim but less stuff floating in the air.
Now you just cast them.

I have used Resin Savers, they save resin.
My favorite molds are from Fred and I call them "Money Saver" molds.
I call them "Money Savers" because one mold will fit A BUNCH of different tubes.
The big molds pictured have cast everything from Slims to Long Clickers to Zens.
And the small mold pictured is the executive mold and I have no idea what tubes I just cast in it, Shock Absorber pen maybe??
Anyhow, I use Silmar Polyester Resin and use all the standard casting techniques.

- heated resin
- pour slowly from one end
- vibrating table
- work the bubbles out
- sometimes a pressure pot

turn, polish and assemble.....

So that's all there is to it. I lost a bunch of material learning to do this,
maybe this will make the learning curve easier for someone.
Hopefully.
I've gained a LOT of knowledge on this site, maybe I've given a little back.
Let me know how your carbon casting goes.
And definitely let me know if you have an easier/better way
