Adventures with Polyester Resin (PR)

Signed-In Members Don't See This Ad

KDM

Member
Joined
Nov 12, 2009
Messages
618
Location
Redditch, England
Well, I really like the look of some of the castings which are for sale. I very nearly bought one or two to try. I drew lots of inspiration from Anthony Turchetta's brilliant HowTo article. There are loads of articles on PR casting, but this is the one which made me least frightened!!

I remembered seeing a big bottle of polyester resin at the back of a friend's garage, which had been unused for some years. I decided to make a mold (or mould - I find they're equally used). I based it on Serge "Darley" Delagnes' excellent HowTo guide on the subject. In order to make the mould, I needed to make a mould for the mould! I call them the mould positive and the mould negative. The positive being the timber in which the silicone is cast and the negative being the silicone in which the PR will be cast.

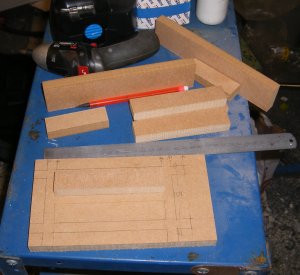
I made mine from a plank of 15mm MDF I had lying around. Here are the parts of the positive ready to assemble:

1_20100501DoubleMouldParts.jpg


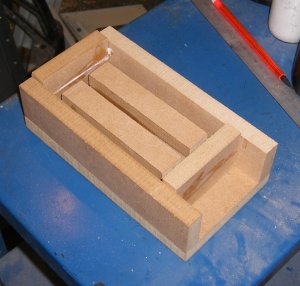
The assembled positive. Don't worry, I didn't glue it together. It's screwed. The glue line you see is two pieces of MDF because I accidentally cut it too narrow:

1_20100501DoubleMouldAssembled.jpg


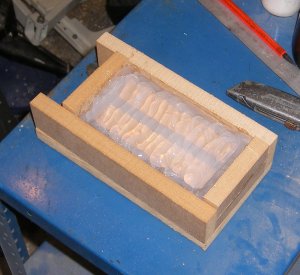
Scooshed it full of bathroom sealant:

1_20100501DoubleMouldFilled.jpg


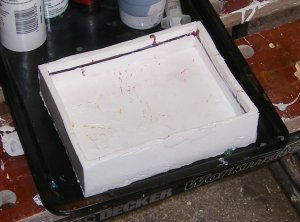
And a few days later, here's the completed negative:

1_20100503DoubleMould01.jpg


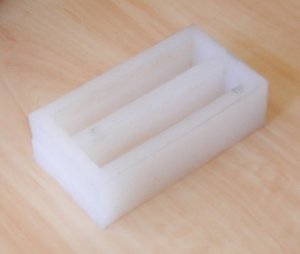
The walls are about 5mm thick, which is a little excessive, but it will certainly stand the test of time. Also, I neglected to cover the wood with clingfilm. That's OKay, it wasn't difficult to separate it, but you can see the saw tooth marks in the mould. I'm sure the clingfilm would have smoothed this a bit. Doesn't really matter - the blanks will go straight on the lathe anyway!

Polyester resin, hardner, pigments are all available from these guys who are just 15 minutes away from where I work. I've never seen such an Alladin's cave of casting materials and the staff are really helpful! This may be my new favourite shop, overtaking my local DIY shop and my local electronics shop. (I would recommend them to any UK penmakers, particularly if you're in Northern Ireland. They have a reasonable eBay presence, too.)

Nothing prepared me for the heat as the PR cured. My first batch produced visible fumes. This may have been because the silicon wasn't fully cured at that time! I was also massively impressed with how quickly the PR hardened. One could make a cast and be turning it inside an hour.

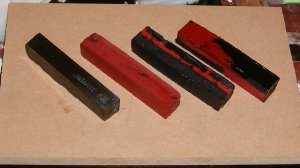
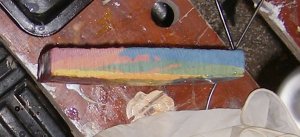
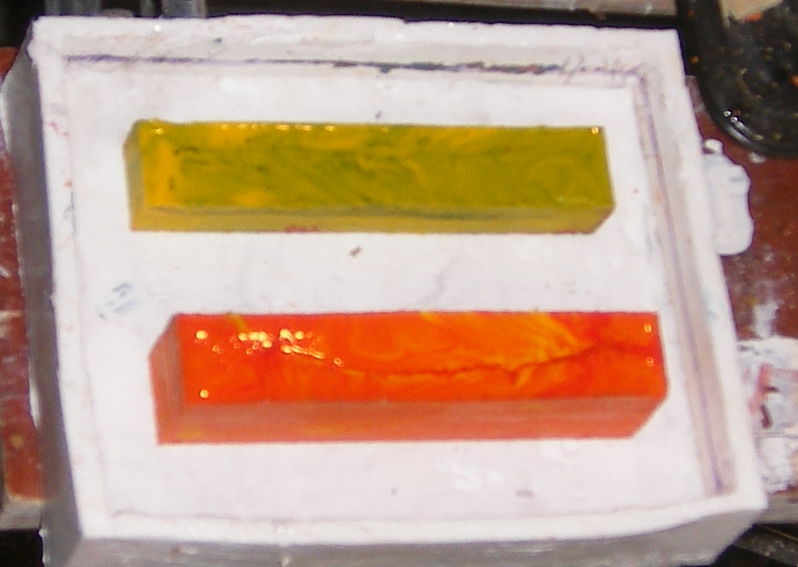
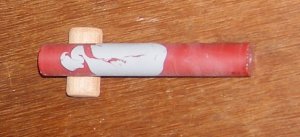
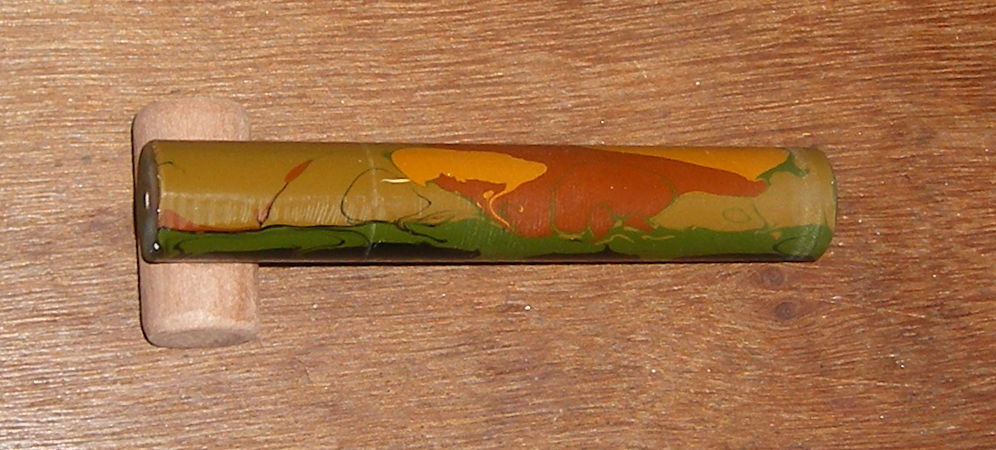
Here's a YouTube video of one of my first blanks. Here are some photos of others. Before turning:

1_20100506232438FirstPRCastings.jpg


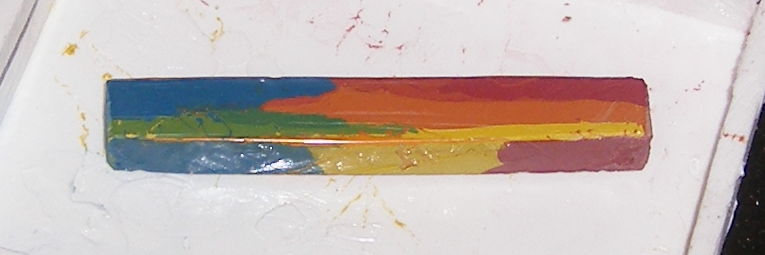
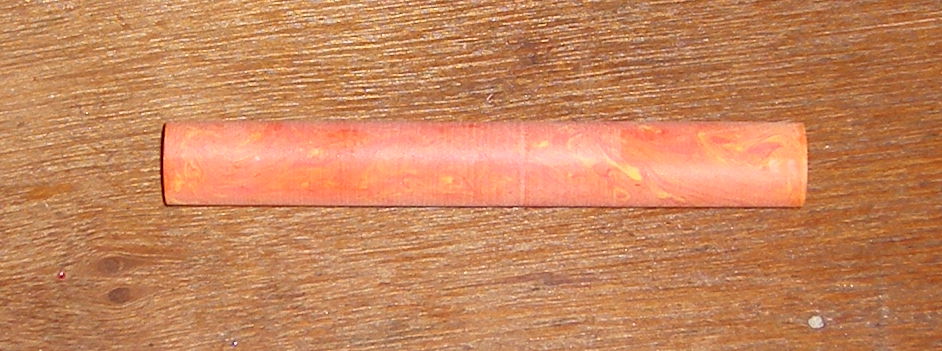
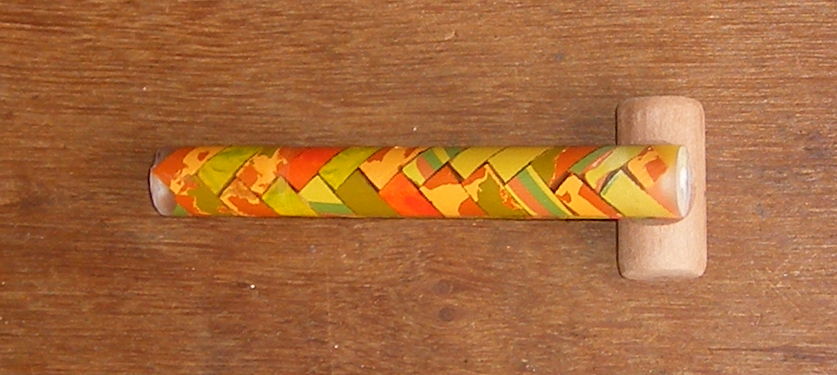
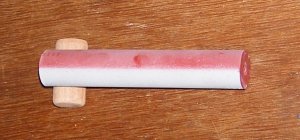
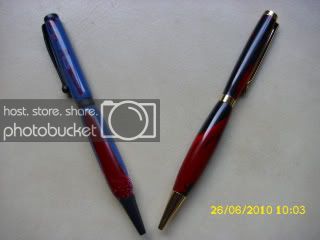
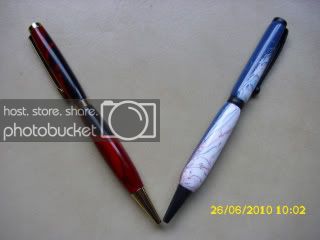
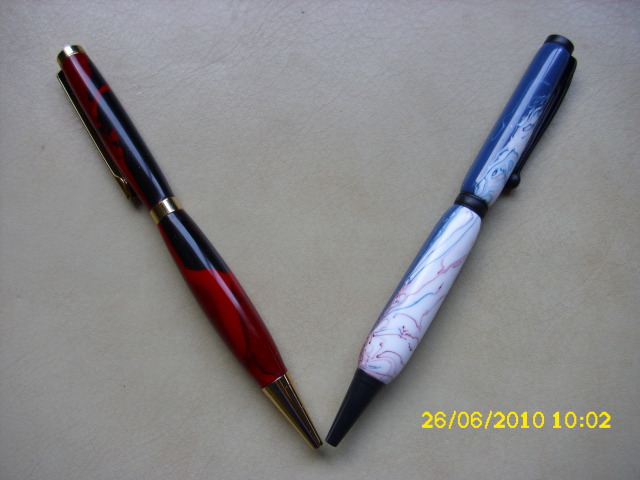
...and after turning and a little bit of mild sanding:

1_20100507235916CastingsTurned.jpg


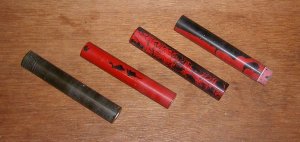
The leftmost one (in both photos) is the colour of the raw PR with no pigment added. In the tin, it's a lovely purple colour, but it goes green when it cures. I dunno what type it is. My next experiments will be more controlled because I'll know what I bought!!

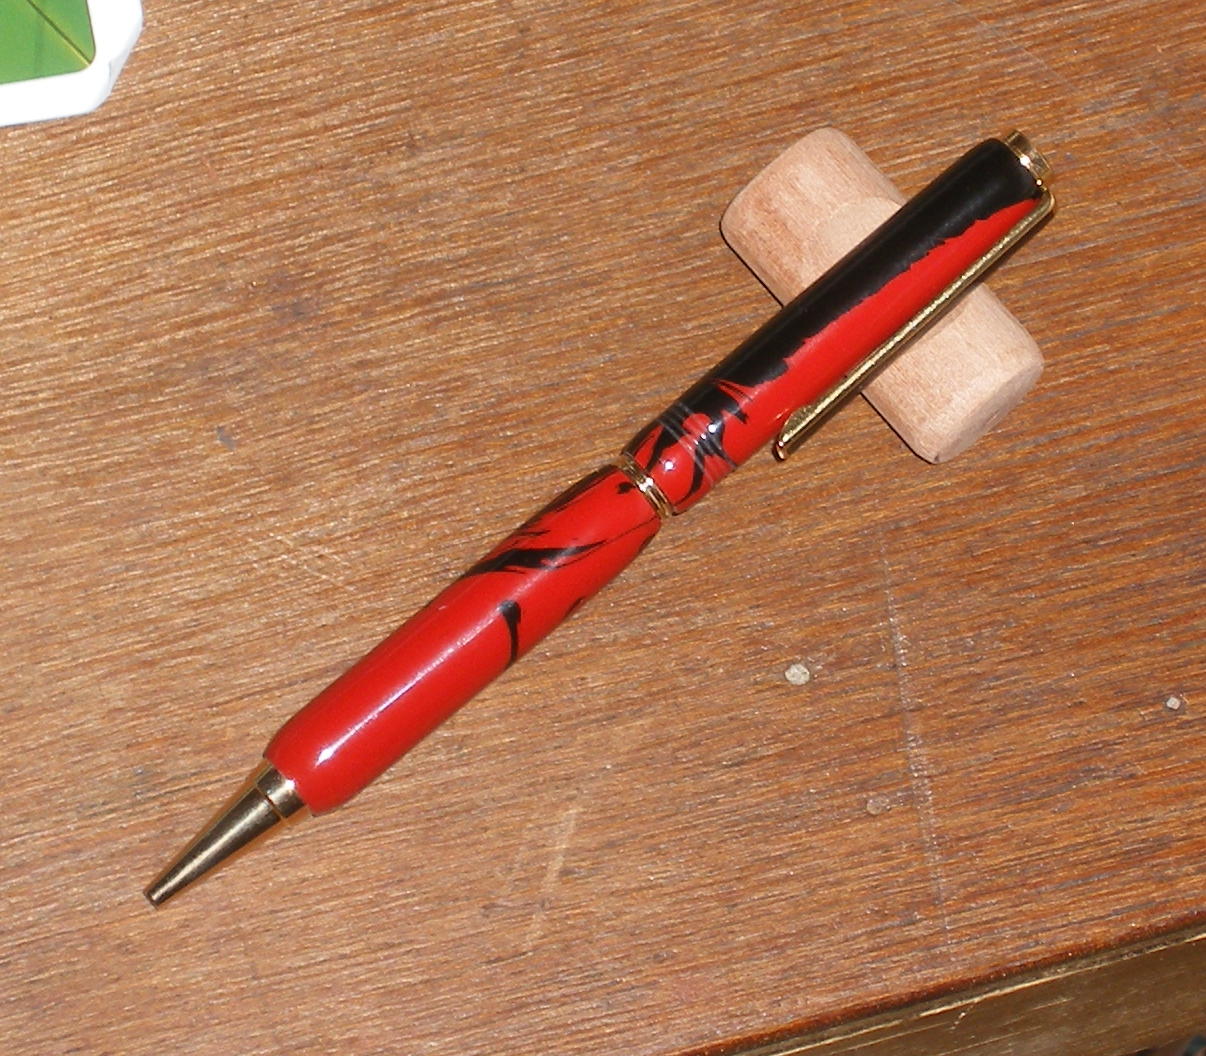
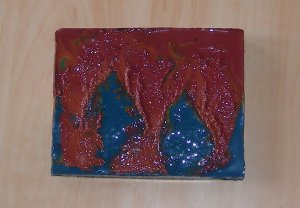
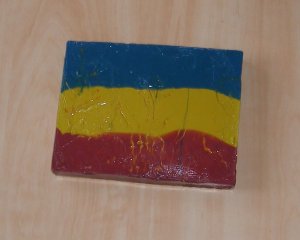
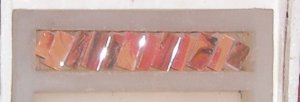
Here are a few more. I tried colouring the PR with enamel paint. It seems to have worked, but the cure time is longer. Black and red were the only proper PR pigments I had and, as you can see from the photo below, all the black pigmented resin fell to the bottom of the mould. Dunno why that happened, but I've got the proper pigment now so, again, more controlled next time. This is a nice before and after photo:


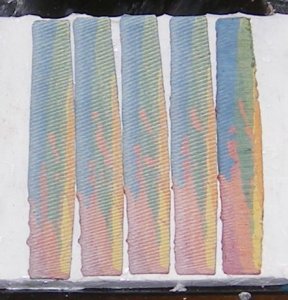
Because I use a metal turning lathe, I had to grind a special tool for turning the PR. I believe the result is now generating the requisite "ribbons":

1_20100509PR_Ribbons.jpg


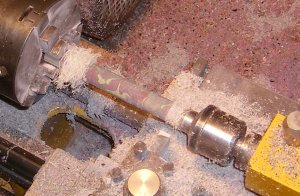
Here's the discussion that led me to creating a skew-like tool (Photos to follow.)

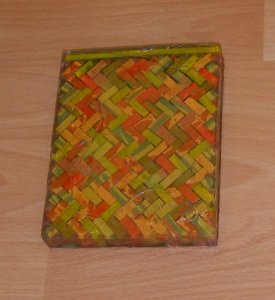
Now, I'm moving on from that first mould to a bigger one. I fancy making a big sheet of cast polyester resin which I can just slice up on the bandsaw. I reckon this is a big enough positive to make a mould which should yield 7 good blanks:

1_20100507Mould02.jpg


Ooooh. I haven't actually made any pens yet out of all these blanks. But making the blanks is sooooo much fun!!

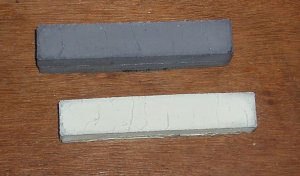
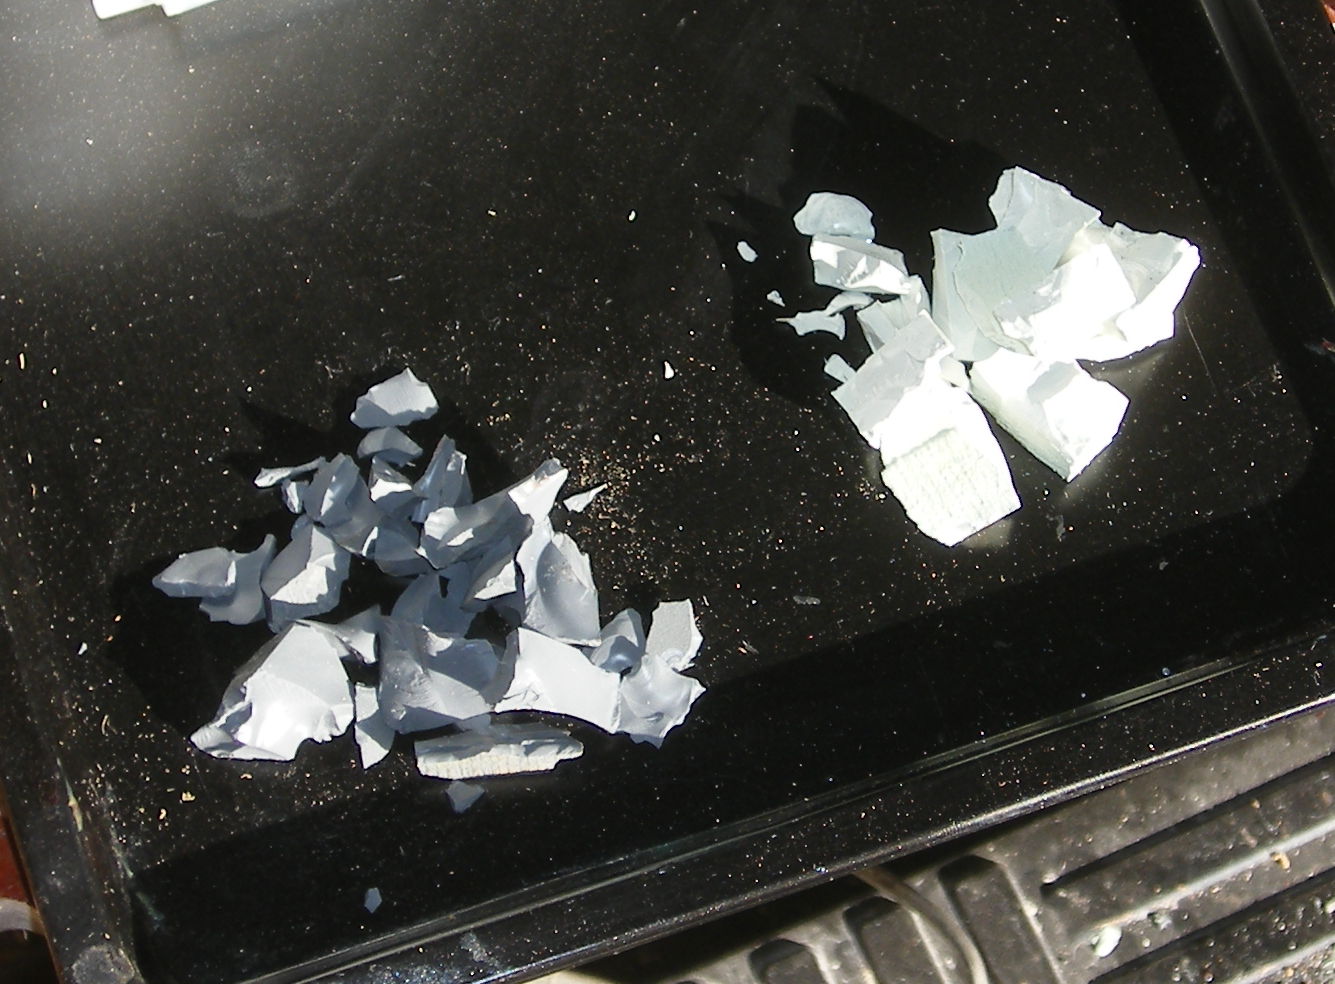
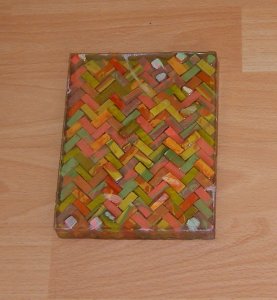
Speaking of fun, here are a couple of plain PR blanks. The plan is to smash them up then set the bits in another colour of PR (probably black) just to see what'll happen...

1_20100510WhiteGray.jpg
 
Last edited:
Signed-In Members Don't See This Ad

Brooks803

Member
Joined
Sep 13, 2009
Messages
5,632
Location
Aiken, South Carolina
The bug has bitten and you are definitely infected my friend! Those blanks look great! I like the one with the green in it. What are you using for pigment? It's great you're having fun, but do be careful of the fumes! I'm sure we'd all like to see some finished pens when they're made!
 

David Keller

Member
Joined
Nov 30, 2009
Messages
1,618
Location
Enid,OK
Nice job on the molds and blanks. I also like the one with the green in it. Now let's see some finished pens.
 

PaulDoug

Member
Joined
Mar 2, 2008
Messages
3,488
Location
Benton City, WA.
Hey, thanks for the tutorial and references. How many times can you use the negative molds? You say saw marks, do you have to cut the blank out of the mold?

Are you a using pressure pot to get rid of air bubbles?
 

KDM

Member
Joined
Nov 12, 2009
Messages
618
Location
Redditch, England
Hey, thanks for the tutorial and references. How many times can you use the negative molds?

Well, this one is definitely over-engineered with 5mm walls. I've used it about 10 times now and it's not showing any signs. I imagine I'll still be using it in a few years' time.

The most brutal part of the process is probably the amount of heat which is given off by the PR.

You say saw marks, do you have to cut the blank out of the mold?

Nope. The PR shrinks a good bit when it sets, so there's absolutely no problem getting out out of th mold. In fact, if you turned the mold upside-down they'd just fall out. No stretching or cutting involved.

Are you a using pressure pot to get rid of air bubbles?

At first I was worried I'd have to, because I was seeing a lot of pitting, but it was because my tool was inappropriate. My blanks don't appear to have any bubbles in them. The guy in the plastics shop said I wouldn't get bubbles so long as I don't "whisk" the mixture! So, I mix slowly and evenly, then give it a little jiggle and let it settle for a few minutes before I pour, then I pour slowly. Seems to be working.
 

KDM

Member
Joined
Nov 12, 2009
Messages
618
Location
Redditch, England
WOOT WOOT! The camo blank is awesome!

Yeah. When my 9 year old saw it, he said "Wow, Daddy. Are you making an army pen?!?!"

I've made the photo a link to an enlargement in the main text above. It's not quite what I wanted. I was going for blobs rather than swirls, but all the black sunk to the bottom of the mold for some reason. I think it's because the rest of the PR was coloured with enamel paint while the black was the proper pigment. I'm going to do that one again.
 
Last edited:

KDM

Member
Joined
Nov 12, 2009
Messages
618
Location
Redditch, England
The second large, flat mould is ready and has been used once. I just didn't get around to photographing and posting it until now. Here's the mould negative. (Complete with black line showing the fill level!)

1_20100513Mould03.jpg


Here's the first blank to come out of it.

1_20100513RainbowBlank01.jpg


It's made with a rainbow sequence of colours. The colours seem to have different weights or something, because they have spread through each other at different rates, which is why it looks different from the front to the back. Here's the back (bottom):

1_20100513RainbowBlank02.jpg


It's hard to believe this is the same blank. There's also a photo of it from the end.


And, finally, a slice off it, polished up.

1_20100513RainbowBlank04.jpg


Looking forward to turning that. Will post the results.

You can see how it has bulged in the middle. It has actually turned up at the edges, too.

1_20100515Rainbowblank05.jpg


I suspect this has happened during curing, so I have now made a silicone lid for the mould. I'm hoping that'll help keep the heat in while curing and result in a more even shape.
 

KDM

Member
Joined
Nov 12, 2009
Messages
618
Location
Redditch, England
I took some slivers (appx 1mm thick) off the rainbow blank:

1_20100516RainbowStrips.jpg


...and bedded them diagonally in some black PR. Here's the turned and lightly polished blank (click for enlargement):


KDM

Member
Joined
Nov 12, 2009
Messages
618
Location
Redditch, England
Here, I cast a kind of peachy / skintone coloured blank with some red / grey marbling thorugh it. I sliced it up and set it diagonally in the mould.

1_20100516SkinToneInMould.jpg


I moulded that into some more black PR. Here's the result of that experiment (click for enlargement):


Looking forward to turning that down. I reckon once it's pen-thickness, the big black blobs will have disappeared and I'll be left with fine black lines between the peachy "bricks."
 

KDM

Member
Joined
Nov 12, 2009
Messages
618
Location
Redditch, England
...and, I thought I should post a YouTube video of the blanks as I rotate them so you can see all round.

The first is the peachy skintone pieces remoulded in black resin.
The second is a red and blue swooshy thing of various shades. Looks like marble. Probably because I coloured it with enamel paint and it mixed in a strange way.
The third is the rainbow slivers moulded diagonally in black PR.
The fourth is the grey and mint green PR blanks I smashed up with a hammer. The pieces have been set in black PR.

I'm looking for names for each of these blanks. Does anyone have any suggestions?
 

PenMan1

Member
Joined
Jul 8, 2009
Messages
6,380
Location
Eatonton, Georgia
Well, two thing are certain. 1. You have been bitten by the PR bug. 2. Your work is very good and your posting of your mold and blank making is simple and easy to follow. I think I'll buy no more molds because of your post.
 

KDM

Member
Joined
Nov 12, 2009
Messages
618
Location
Redditch, England
Couple more for ya.

These were supposed to be part of my Autum Houndstooth blank, which you'll see later...


But the orange one was so pretty I decided to keep it:


I made up a few blanks in Autumn (UK) / Fall (US) colours (UK) / colors (US).:rolleyes:

Err... I made up a few blanks in Autumn colours. I sliced them into little bricks and cast them in clear resin. Here's the result. There are two layers of the little bricks, so the two images are of the top and bottom.

1_20100531AutumnHounstooth02.jpg
1_20100531AutumnHounstooth01.jpg


Here's what a strip of the blank looks like when turned.


I'm quite pleased with it, but there are a few little bubbles. Anyone know how these can be filled / repaired? Would a CA finish sort this out?
 

David Keller

Member
Joined
Nov 30, 2009
Messages
1,618
Location
Enid,OK
It appears that PR fumes have the same effect that cocaine does... Anyone else get the feeling that KDM hasn't slept in several days because he's been casting round the clock?
 

KDM

Member
Joined
Nov 12, 2009
Messages
618
Location
Redditch, England
I've gone through about 3/4 of a gallon of resin this month and have only made one pen out of it. I need to start selling my blanks or something. BTW, if anyone takes a particular fancy to anything they see, They're on offer for swaps here and here.

Although, I'm only learning, I can be commissioned. These were concepts for a Nebraska Huskers fan:


KDM

Member
Joined
Nov 12, 2009
Messages
618
Location
Redditch, England
Ummm... Question on the "gel stage"

Folks, I was trying to do a swirl a few nights ago. I did as advised and poked the freshly poured blank every 5 minutes to see if it was at the "gel stage." It seemed to stay quite liquid for about 25 minutes, then 5 minutels later I thought it had turned to gel, but when I tried to swirl additional colour in, I found that the PR had started to set. It was almost what you might describe as lumpy. Any thips?
 

bitshird

Member
Joined
Aug 27, 2007
Messages
10,236
Location
Adamsville, TN, USA.
Casting is a lot of fun, you are on your way to going bonkers figuring out new color/colour patterns and combination's, keep a small notebook write down each mixture . it helps if some one wants more.
 

KDM

Member
Joined
Nov 12, 2009
Messages
618
Location
Redditch, England
Gel Stage Trouble

Folks, I wonder if anyone has any advice on this. I'm trying to make a swirly PR blank.

This is attempt one.

1_20100609NoSwirl2.jpg


I was poking it every 5 minutes over a period of about 35 minutes after adding the MEKP and it went into a real thick gel stage very rapidly. I poked it and it was runny. I poked it 5 minutes later and it was too damn thick to swirl porperly!!

I think I got over-cautious with attempt two seen below:

1_20100609NoSwirl1.jpg


I swirled it when I thought it was gelling, but as you can see, all the grey just sank to the bottom as it was curing.

From experience, how long do you normally have between detecting the start of the gelling and it becoming too damn thick to stir?

This is really bugging me. :frown:
 

Pioneerpens

Member
Joined
Oct 11, 2009
Messages
1,673
Location
Huntington, WV
wow, you are doing great!! very creative blanks....I also can't seem to find that moment between liquid and solid....it goes right from one to the other. *sigh* eventually we'll find it lol
 

bruce119

Member
Joined
Jul 30, 2007
Messages
2,978
Location
Franklin, NC, USA.
Folks, I was trying to do a swirl a few nights ago. I did as advised and poked the freshly poured blank every 5 minutes to see if it was at the "gel stage." It seemed to stay quite liquid for about 25 minutes, then 5 minutels later I thought it had turned to gel, but when I tried to swirl additional colour in, I found that the PR had started to set. It was almost what you might describe as lumpy. Any thips?

Well that sounds about rite and as your probably finding out and don't want to hear. There is no real rite or wrong and EVERYONE has a different way of doing it. There are a LOT of variables involved. You can get consistent results on a clear cast with the same volume and the same temperature same humidity same cayst. room temp. Get the picture now just change one of those things and things are going to change. 25 minutes sounds about rite with about 78-80 deg. resin and 3 drops per once. And you add in dye or pigment and it can change. You will wait till it starts to set and you fell it firming up it will go fast once you feel heat it is over. I think the trick mite be to control your temps experiment with times. And to get a good separated swirl mite be to anticipate the set time and swirl just before it goes off. Your rite if you wait till it gel your going to get crackle.

Isn't this fun did you fill a standing cabinet with different resins and chemicals that didn't work. I got about 100 lbs and probably about $5,000.00 worth of "try this"

The net is a great place for info. read all you can and only time can solve your problems. With all the stuff we cast the manufactures don't have the answers. We are pushing resin beyond what it was made for.

Good Luck
 

dalemcginnis

Local Chapter Leader
Joined
Apr 18, 2007
Messages
1,027
Location
Daphne, Al. USA
Your casts look great. Swirls are tricky. you have to get the timing just right. Too soon and the colors separate, too late and all you get are globs, and to complicate the process one color may set faster than the other, so you have to watch both cups. You need to wait till the resin starts to thicken but before it is gelling to mix the swirl. Most of it is practice and even then your going to find your timing is off on occasion. I've had batches where the swirls came out perfect and I thought I was finally getting the timing down, then the very next cast I wind up with a two toned blank or a big blob.
And remember, just because a cast didn't turn out the way you planned it doesn't mean it was a failure. I've had casts that I was very disappointed with because they did not come out the way I had planned, yet when I went ahead and made it into a pen and showed it to others they thought it looked great.
 

KDM

Member
Joined
Nov 12, 2009
Messages
618
Location
Redditch, England
Big Important Stuff

Well, I Learned a lot yesterday.

I had a decent chat with one of my suppliers. He buys massive vats of colours and resins and then separates them into smaller containers. He showed me a couple of different cans of colours. They were all different thicknesses. We looked at two cans of black from the same supplier and one was quite lumpy while the other was quite runny. Obviously different ratios of pigment powder to substrate. (The substrate probably being PR.)

A few of my very first casts had a lot of red and I noticed that they got very hot and cured very quickly, giving off white fumes. I assumed red made hot casts. It may be the case that my current batch of red may be ONE OF the influences making my current batch of resin heat up!

Clearly, the addition of too much catalyst can cause it to speed up and heat up.

That's another thing. The MEKP (Methyl ethyl keytone peroxide) catalyst is highly explosive, so distributors dilute it with diethyl pthalate in order to make it less volatile. This dilution might be anywhere from 30% to 70% and I'm concerned that the catalyst ratio mix might be as inconsistent as the mix used for pigments!!

This is a pretty big revelation to me. Casting really is a rollercoaster ride!
 

KDM

Member
Joined
Nov 12, 2009
Messages
618
Location
Redditch, England
...and my new "FireBird" blank. This is my first play with pearlescent. It's in the red. Let's see what happens next...


KDM

Member
Joined
Nov 12, 2009
Messages
618
Location
Redditch, England
Oh, brilliant job! The Red White and Blue ones came up a treat. Your red and black looks similar to mine. Great job. Would you consider going for a fatter pen kit? I see you've encountered the old "slimline pen clips don't work unless you make the top skinny" problem! I think I prefer the lines on your R/W/B one.

Enlargements are available here and here.

What sanding pads did you use?
 
Last edited:

3Peake

Member
Joined
May 20, 2010
Messages
331
Location
Lancashire, England
I used fine emery upto 600 grit then wet and dry upto 200 grit(wet).
then used scratch removal pollish for cars and then to finish with I used meguirs nxt metal polish.:eek::eek:
( talk about using what you have in -- I ran out of plastic pollish so make do and mend:rolleyes::biggrin::biggrin:)
I'll get a couple of pics of the new camo pens up for you soon
 

KDM

Member
Joined
Nov 12, 2009
Messages
618
Location
Redditch, England
Ken how much would it cost for a 1 1/2" by 1 1/2" by 12" blank of the camo look.

1.5 inches square? A foot long? Ummm... That's about 40x40x300mm and I'd say it would weight around 800-900g.

BUT, are you sure you want it that size? That's one big-ass pen! It would be easier to manufacture as two blocks of 120x150x20, yielding around 14 pen blanks.

I trust this is not for a pen? At that size, it would make some kick-ass shaving brush handles!!!

PM on way.
 
Signed-In Members Don't See This Ad
Top Bottom