Finally Set Up

Signed-In Members Don't See This Ad

Drewboy22

Member
Joined
Aug 21, 2015
Messages
727
Location
San Antonio, Tx
I finally got all the pieces for the "shop". I laugh when I say "shop" cause it is just a work bench, but it does the trick.

I had the Bench Grinder, but I did pick up a buffing wheel for it.
20150909_175352_resized_zps84cac585.jpg


I picked up the Band Saw used at a great price.
20150909_175324_resized_zps0d15a515.jpg


And a new to me Sears lathe was picked up this weekend.
20150909_175337_resized_zps4e83427e.jpg
 
Signed-In Members Don't See This Ad

Drewboy22

Member
Joined
Aug 21, 2015
Messages
727
Location
San Antonio, Tx
I put that piece of Cedar in the lathe to just check that every thing ran... And it did :)

I did notice that something didn't seem quite right and was just a bit off. I decided to check centers and found this
20150909_204117_resized_zps45eba97f.jpg


I did some googling and found the owners manual for the lathe and was able to make some adjustments.
20150909_211232_resized_zpsaa4def0d.jpg


Now I need to swing by Harbor Freight and pick up some tools and I am ready to rock!!
 

Drewboy22

Member
Joined
Aug 21, 2015
Messages
727
Location
San Antonio, Tx
For those "experts" out there - This is a 12X36 lathe. I am assuming this means that it can handle something with a 12" diameter and 36" in length. The cedar block I have in the lathe now is a 6X6 giving it an 8.5" max diameter corner to corner and it almost hits the tool rest bracket and I even had to turn the tool rest backward to make it fit. Does this seem right?
 

Skie_M

Member
Joined
Aug 7, 2015
Messages
2,737
Location
Lawton, Ok
Yup, that seems about right .....


Your maximum circumference for something you can turn (your "swing") is 12 inches .... so the largest size item you could mount up would be around 8 inches square, or around 10 inches octagonal.

This is just the max capacity .... to get even larger, you must do one of two things .... either use the bandsaw to cut a ROUND piece of stock to mount up (or as round as you can get it) ....

Or you may be able to swing the headstock around and run it outboard style (away from the bed ways).


In either instance, you should make yourself a floor-mounted adjustable height tool rest.
 

Drewboy22

Member
Joined
Aug 21, 2015
Messages
727
Location
San Antonio, Tx
I picked up this pen set at woodcraft last night.

142460.jpg


The are small and don't have a roughing gouge so I may still need to pick one up sometime.

To be honest, and I know she was only doing her job, she almost talked me out of the whole thing. I am on a budget and can not afford tons and tons of the best stuff out there. When talking to the Woodcraft lady she basically told me that my grinder that I have is no good for sharpening tools, and that in order to properly sharpen my tools I needed to spend $80 on a jig platform then another $80 - $100 for each individual tool jig. Also the $60 dollar tool set i was picking up is sub par and I really needed to look into the bigger sets that go for around $300 - $400. Had I bought what she said I "Needed" I would have spent about $1500.

After her whole shpeal, I told her again that I am on a budget and need enough to get by... I picked up my $60 set of tools some bits, some pen kits, some CA and some sand paper and spent a little more than I planned but close to what I expected. The bad part is my long - slow drive home (on 410 at 7pm), I kept questioning myself about whether this is what I need to be getting my self into. I don't usually suffer from buyers remorse but she had me close to it. :frown:

I did play a little bit with it last night and am still happy with what I want to do. I just have to figure out how to sharpen my tools without ruining them. :)
 

Robert Taylor

Member
Joined
Jan 6, 2008
Messages
971
Location
North Canton, Ohio, USA.
There are many plans out there (on the internet) to make your own sharpening jigs for next to nothing. I would return the Pen Set of turning tools to Woodcraft and buy the Harbor Freight set that you had planned on getting. Get their expensive set (about $60) and you will be getting a decent starter set. About five years ago Alan Lacer did tests on a lot of turning tools and the expesive Harbor Freight set faired quite well. just my $.02
 

flyitfast

Member
Joined
Sep 3, 2009
Messages
1,690
Location
San Antonio, TX 78247
Hi Drew,
Looks like you are getting your shop setup with all the tools needed. Good catch on lining up the points on the headstock and tailstock - that is a very important alignment step.
Sorry for the problems you had at Woodcraft. The issue over the grinder is minor. You have a 6" grinder whereas most have a 8" grinder. They both work! When you use a wheel grinder in puts a concave grind on the bevel. The 6" has a different radius on the bevel from a 8". Both work! Since the bevel is important with almost all tools, it will change how you present the tool to the wood. Only something to get used to. All the other equipment they suggested are only tools to help the quality and accuracy of your sharpening. I apologize, I don't know if the Wolverine grinding system works with the 6" wheel - that may be what the sales person was talking about. (Just checked with the mfg and they say it works on a 6" grinder also and their installation instructions give the setup for it).
If you want to talk, I'm available to discuss this further before you bust your budget further. Several of us in the penturning club are available as mentors and sounding board opportunities.
Hope you can make the Penturners meeting we talked about. A good chance to talk about any questions.
Good luck
Gordon
 

Drewboy22

Member
Joined
Aug 21, 2015
Messages
727
Location
San Antonio, Tx
Hi Drew,
Looks like you are getting your shop setup with all the tools needed. Good catch on lining up the points on the headstock and tailstock - that is a very important alignment step.
Sorry for the problems you had at Woodcraft. The issue over the grinder is minor. You have a 6" grinder whereas most have a 8" grinder. They both work! When you use a wheel grinder in puts a concave grind on the bevel. The 6" has a different radius on the bevel from a 8". Both work! Since the bevel is important with almost all tools, it will change how you present the tool to the wood. Only something to get used to. All the other equipment they suggested are only tools to help the quality and accuracy of your sharpening. I apologize, I don't know if the Wolverine grinding system works with the 6" wheel - that may be what the sales person was talking about. (Just checked with the mfg and they say it works on a 6" grinder also and their installation instructions give the setup for it).
If you want to talk, I'm available to discuss this further before you bust your budget further. Several of us in the penturning club are available as mentors and sounding board opportunities.
Hope you can make the Penturners meeting we talked about. A good chance to talk about any questions.
Good luck
Gordon

Oh, I will be at the next meeting for sure :biggrin:. I am looking forward to it. Thank you for all the help you have offered and I have your number saved to the phone. If I get in a bind, I will shout!

Her problem with the grinder was that is was 6" stone, course grind stone, it spun to fast, and there would be no way to control my bevel. She tried to sell all three of the grinder systems there, the belt sander type (I think someone on here from Hawaii was looking for one), then she went to the Tormek system cause it is water cooled, then she took me to the Wolverine system. And if the Wolverine system was ready to go for the $89 I might have justified it, but I needed a $60 jig for a gouge and a $80 jig for a skew, and a ... well you get the point.

All in all I planned on spending $200 and that included some pen kits and the bits and some polish, ect., basically what I needed to put together a decent pen. I think my bill was $240 and like I said before, I am fine now and was fine when I got to the house last night. It was just the long stew home that made me think I just stepped into a huge pile; without my boots on.
 

mecompco

Member
Joined
Apr 24, 2015
Messages
1,607
Location
Fairfield, Maine
I made a disc sander for my lathe for truing blanks. I don't use if for sharpening as I have a belt grinder, but I don't know why one couldn't sharpen on one. Then you can pick the grit and speed you want. I used a nut that fit my headstock and cut a piece of shelving into a circle on the bandsaw. I use spray adhesive to affix the paper. Just a thought.

Regards,
Michael
 

SteveG

Member
Joined
Dec 21, 2009
Messages
2,988
Location
Eugene, Oregon 97404
Congrats on you recent acquisitions/expansion of the "shop".

I will add a safety comment. You have mounted the buffing wheel to the grinder. Most buffing setups do not have the guard mounted, because:

Safety...get a buffing "catch", and it could push your hand/finger into the guard. That could impart a slicing event to your finger, possibly resulting in the inadvertent removal of a portion of the finger.

Utility...you will find that you want to use the buffing wheel in ways that are blocked by the guard. That could also lead to the safety issue just mentioned.

Another observation is that the buff could become contaminated by grinding debris. This will show up as scratches in the work. It is just a fact of life when grinding and buffing are on the same machine.
 

Drewboy22

Member
Joined
Aug 21, 2015
Messages
727
Location
San Antonio, Tx
Congrats on you recent acquisitions/expansion of the "shop".

I will add a safety comment. You have mounted the buffing wheel to the grinder. Most buffing setups do not have the guard mounted, because:

Safety...get a buffing "catch", and it could push your hand/finger into the guard. That could impart a slicing event to your finger, possibly resulting in the inadvertent removal of a portion of the finger.

Utility...you will find that you want to use the buffing wheel in ways that are blocked by the guard. That could also lead to the safety issue just mentioned.

Another observation is that the buff could become contaminated by grinding debris. This will show up as scratches in the work. It is just a fact of life when grinding and buffing are on the same machine.

I never thought of that... You have given me something to think about...:befuddled:
 

Sataro

Member
Joined
Mar 15, 2009
Messages
3,102
Location
Mexia, TX
Looks like you are ready to get going now. Don't let the salesperson give you any buyer's remorse. We all started somewhere. I still haven't bought a grinder to sharpen my tools on. I'm still using a belt sander for that job. It's not the best way but it works well enough for me. When I first started turning, I started using a cheap set of no name tools. I got so used to them, that I kept wanting to grab them after buying a better quality set later on.

Just go to some meetings & get started having some fun.
 

csr67

Member
Joined
Jan 27, 2015
Messages
355
Location
Eastvale CA
Congrats on you recent acquisitions/expansion of the "shop".

I will add a safety comment. You have mounted the buffing wheel to the grinder. Most buffing setups do not have the guard mounted, because:

Safety...get a buffing "catch", and it could push your hand/finger into the guard. That could impart a slicing event to your finger, possibly resulting in the inadvertent removal of a portion of the finger.

Utility...you will find that you want to use the buffing wheel in ways that are blocked by the guard. That could also lead to the safety issue just mentioned.

Another observation is that the buff could become contaminated by grinding debris. This will show up as scratches in the work. It is just a fact of life when grinding and buffing are on the same machine.


Good point, and as an Industrial Safety Engineer for the past 26 years, I can tell you I've seen plenty of missing digits from such improper use of grinders. We won't even get into the time a guy at a large hardware company decided to wrap a band saw blade around both hands to clean the wheel on a large industrial buffing machine. Let's just say he's now "one armed jack"....

I'd recommend the $40 buffer from HF, plenty of power and room to use the 6" buffing wheels. Just upgrade the junk HF wheels to good quality buffs and it works great.

6 in. Buffer

image_24883.jpg
 

stonepecker

Member
Joined
Oct 29, 2012
Messages
4,382
Location
central Minnesota
Drew, You do it the way you need to. You know what you can afford.

Once you get going.......you can decide what you need/want when you can afford it. Don't worry about doing things on the cheap. To many people think you need the 'best' tools to do the 'best' work.

Some of the tools I use are older then me. THEY STILL WORK!!! The best place I found for ideas is youtube. And Capt Eddie is one of the best for showing ideas and other 'cost saving' ways to turn.

Also, remember that what works for you is all that matters. I have yet to see two turners who do everything the same. When you turn, if it works for you is all that matters. When it works, leave it alone. When it doesn't, remember what you did wrong and don't do that again.

And like everyone here.......You will make a mistake. We all have made them. The best thing about here we can talk about them and hopefully avoid some of the more common ones. There is no such thing as learning to much. And turning anything is a learning process.

Best wishes and I hope we see some of your work soon.
 

Brian G

Member
Joined
Jul 2, 2013
Messages
1,571
Location
Bloomington, MN
Drew, I have and use that set. I use the skew more often than the other two, but the gouge works great for roughing blanks to round.

I haven't let the skew touch a grinder, and my opinion is that a grinder for this skew isn't necessary unless you're trying to change the angle of the bevel. I stick a piece of 320 grit adhesive backed sandpaper onto a flat surface, like a piece of MDF or tile, and touch up the bevel periodically. Put the bevel on the sandpaper, make 10 figure 8 motions per side, and you should be ready to go. If the skew catches the sandpaper, you're pushing too hard.

Sometimes people forget that "old timey" wood workers made some pretty nice things without needing fancy jigs and complex equipment.
 

Fish30114

Member
Joined
Oct 18, 2014
Messages
484
Location
Burbs of Atlanta,Georgia
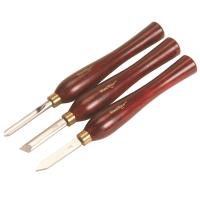
Brother, I will second what some other posters have recommended for tools the Harbor Freight 'best' lathe tool set is good to go. I read that same review from Alan Lacer. When you are ready to upgrade I highly recommend PM technology tools--they really do hold an edge much longer--Joe Fulgoni from You Tube is the owner and designer for Hurricane tools--the offer some PM tools at a good price my own favorites are Crown PM tools but they are a bit pricey. Also if you know what your looking for e-Bay and Amazon are really good resources.
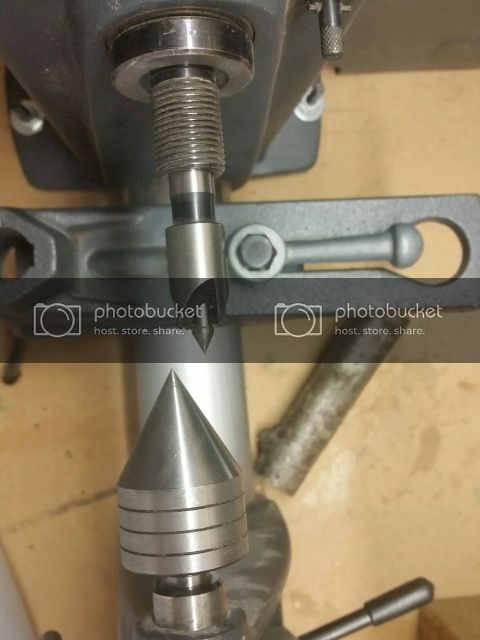
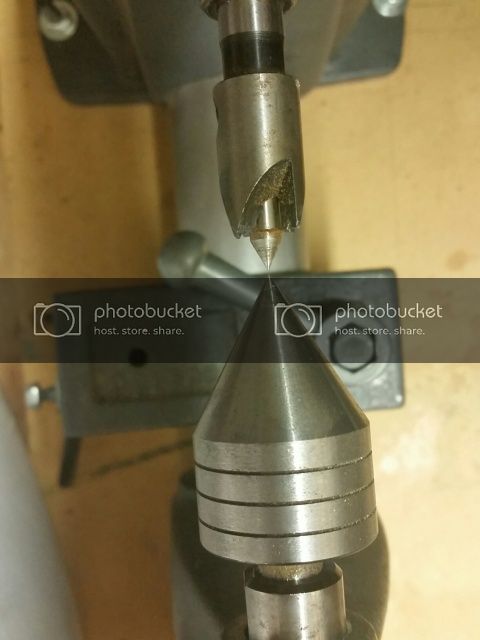
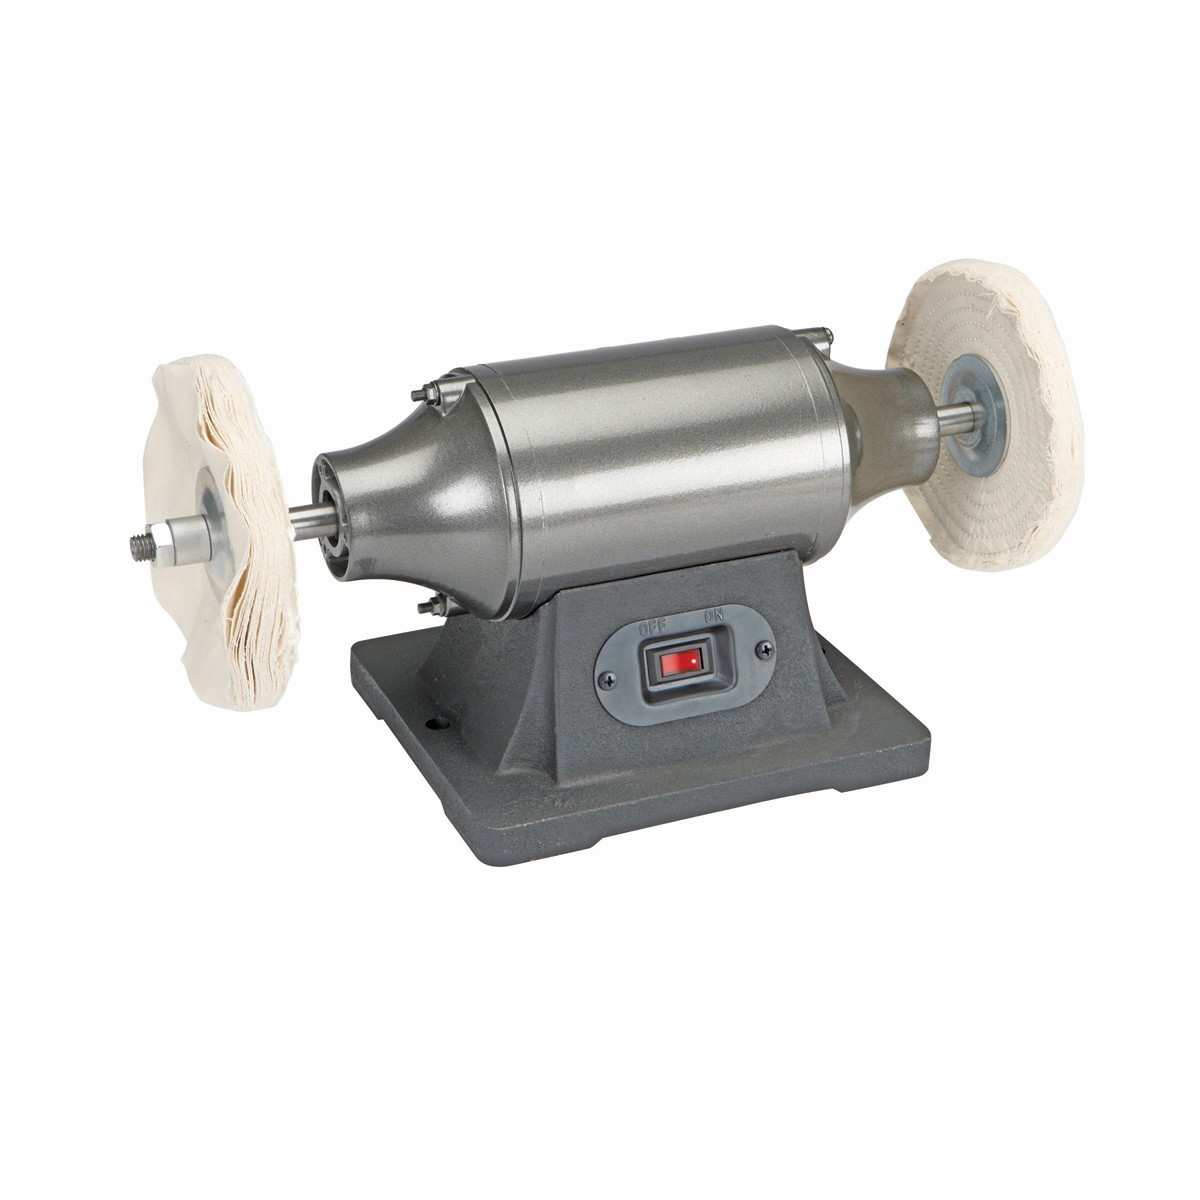
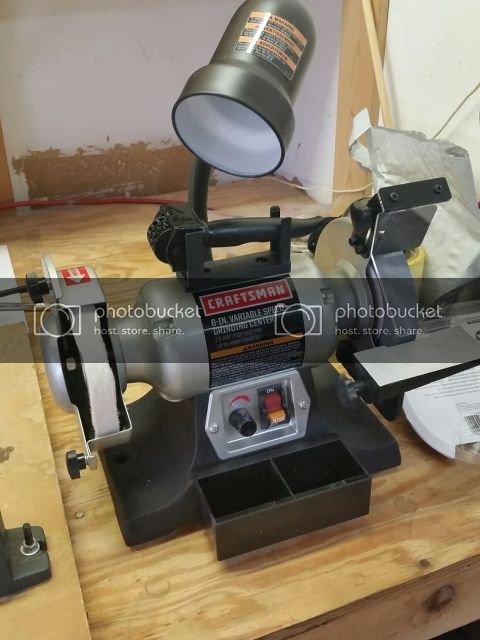
As to your grinder, the real issue is that it runs to fast--this makes it pretty easy to 'burn' the temper out of your tool edge--the key to avoiding this is pretty simple, keep a water source close, and dunk the tool after every single pass across the stone. I personally have a Wolverine jig system, and it is really good for setting up an putting repeatable edges on your tools--having said that the key is the repeatable part--any jig you make that lets you present your tool to the wheel the same way every time is all you are really trying to achieve.

I am also a fledgling knifemaker, and have a hella good belt sander-albeit the wrong size that most knifemakers would recommend a 1x42 instead of a 2x72, but it is a heavy duty machine for sure--I sharpen a lot on my belt sander, but a lot of care must be taken to avoid burning your tools/blades--I am yet to figure out a good jig system for the beltsander, and this is what goaded me into buying the wolverine for my grinder.

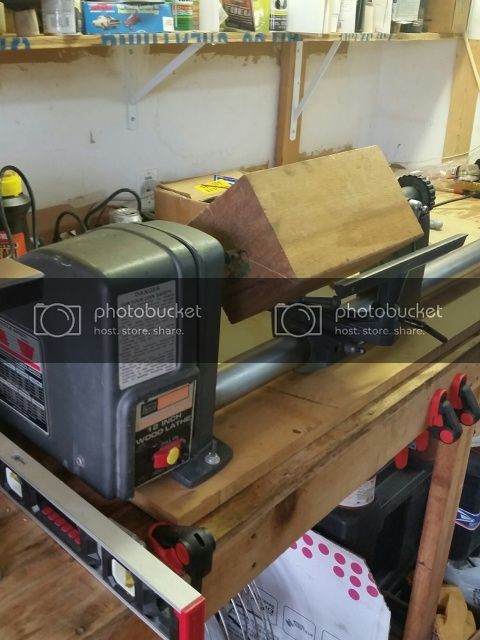
One last thought, a lot of tools can be bought without a handle for a really good savings, and then you can turn a tool handle on you lather--a really easy shortcut on this is to go to Home Depot or whatever big box supply store, and buy yourself a 1/1/2 dowel, or whatever size dowel, chop it up into appropriate lengths and turn your handle out of that.

You can spend almost limitlessly on this hobby, the IAP is a great resource to gather input on the various purchases you may make to help you make a decision.

Your off to a good start--remember the internet is your friend when shopping!
 

fastgast

Member
Joined
May 10, 2010
Messages
145
Location
Pahrump, Nv
Drew, Couldn't help but add my 2 cents. When I lost my job in 2008 I was in a real bad situation and decided to try turn some pens. I had no money for the "high end" stuff and surprisingly am still using what I could afford...1- used HF drill press, 1- used std HF grinder(bought the better grinding wheel) 1- new HF mini lathe, Pen vise & Pen press. There were a lot of blow outs and trial and error stuff. I eventually upgraded the assecories but I've sold over 6000 pens world wide and have a lot of repeat customers. Nothing fancy but it works and I still enjoy a good turn. Fortunately I managed to survive financially and now turn more for fun. It seemed hard to do at first but I kept using the Cheaper stuff and got to where I can produce a good product, I didn't skimp on drill bits and that helped a lot. Keep on turning and have fun, that's the most important thing.
 

Skie_M

Member
Joined
Aug 7, 2015
Messages
2,737
Location
Lawton, Ok
I'll second the bit about turning your own tool handles. It works quite well! :)


I get the cheap harbor freight lathe tool set and re-grind the bevels and sharpen them myself, and then I buff the bevels so that they are very glassy smooth. I think that this helps a lot with the quality of my cuts.

I don't use any sort of jig, so I'm sharpening by hand. When I have the parts and the time, I'll go online and see about getting myself a jig to use with the 1x30 belt sander that I have, but I'll still be buffing the bevels bright and shiny.

In addition to the harbor freight tools, I also have some old square-shafted screwdrivers with wooden handles that I picked up for a buck apiece at a local pawn shop. The quality of the steel is an unknown, and I haven't attempted any kind of heat treatment, simply ground the screwdriver tips off and ground various bevels on them to use them as small scraping and detail tools. I sharpened and buffed them on the 1x30 belt sander and 5 inch disc sander combo, with the disc replaced by a 4 inch buff. They do great work, especially when I want to get in close on an end turning and the tailstock is in the way.

Eventually, I plan to harden and temper the steel in these small tools, and replace the wooden handles, but for now they work great!
 
Top Bottom