duncsuss
Member
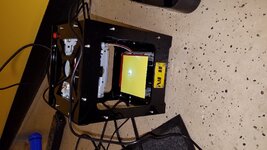
... got to get this hooked up.")
Remember -- "no pix, didn't happen" :biggrin:

... got to get this hooked up.
... got to get this hooked up.
Remember -- "no pix, didn't happen" :biggrin:
It takes a little playing but you can control a rotary attachment by connecting the third axis to it. Yo will need to play a bit to find the proper rotation feed rate.
Wait for it ............ got to get this hooked up.
Remember -- "no pix, didn't happen" :biggrin:
Ordered mine last week so now I just wait.
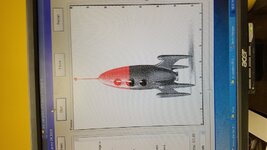
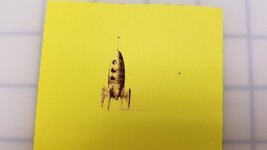
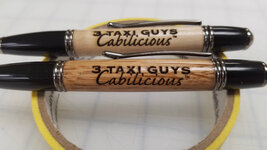
Ok Third real test and I'm very very impressed. I even think I can get it better with more fussing with the focus.
Ok Third real test and I'm very very impressed. I even think I can get it better with more fussing with the focus.
Looks pretty good to me! One other thing you can try (besides focus adjustment) is to give it a very light rub down with 320 or 400 grit, it can remove some of the "fur" around the edges of the burn and really get things crisp.
Does a coat of finish before burning help?
Perhaps it will help prevent soot from getting into open grain around the burnt image.
Keith, thanks, that is exactly the sort of info I was looking for! Please, do, post some pix when you have the chance. Are you engraving in CA covered wood, Acrylic, both? Text is pretty much what I'm interested in.
Regards,
Michael
PS: Could one engrave on bare wood, then apply the finish?
, and putting it to task on some nice pen projects.So, yes, my order has been put through at a cost of $67.54 (free shipping).
So, yes, my order has been put through at a cost of $67.54 (free shipping).
did you get it from GEARBEST? If you did and its this one you can get it shipped from the Los Angeles US Warehouse.
NEJE DK-8-KZ 1000mW Laser Engraver Printer-62.60 Online Shopping| GearBest.com
Ordering it from LA is also a little cheaper and I got it in 7 real days. See if you can cancel that order and re order it.
smile until such time as when that device DOES arrive.I saw a couple of people in this thread mention they used painters tape when engraving - I wondered why? Does it help keep the burn marks down? Does it help with a sharper engraved image?
Thanks
Bob
Sent from my iPhone using Penturners.org mobile app
Mine is able to burn antler and acrylic as well. Doesn't do amazing on these materials, but it will work.
and Gearbest seem to have two different answers about whether it can burn/engrave in plastics. It would be great if it turns out I can use it on acrylic acetate as well as wood.Mine is able to burn antler and acrylic as well. Doesn't do amazing on these materials, but it will work.
Interesting -- what is the power rating of your unit?
Mine is rated 1W (or as they like to call it, 1000mW :wink
Thanks!
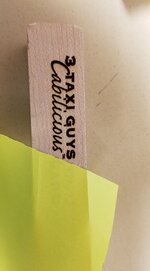
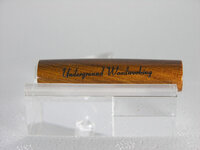
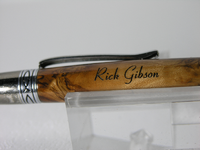
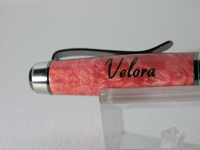
Got it this afternoon. Plugged in the software and got an unrecognized character cannot unzip error. After playing around and checking the internet to see if the software was available on the gear best website (it's not or at least I couldn't find it.) a light came on renamed the file using standard characters and everything worked as it should. I tried it on some veneer I had and it seemed to work fine. Then decided to try a pen blank I had and never used. The blank had my normal CA finish, about 8 coats of CA. For $100 Cdn. I'm happy. The white you see in a couple letters appears to be some CA, a light brush with a toothbrush and they are gone. Considering it costs me $20 to get a name engraved it should pay for itself fairly soon. Next step is to build the rotary setup I've seen on here. It actually looks better than the photo shows.
.1. Plugged in the software and got an unrecognized character cannot unzip error.
2. After playing around and checking the internet to see if the software was available on the gear best website (it's not or at least I couldn't find it.)
For those that are having trouble with the laser going through the motions, but not firing, check your USB cables. A bad cable can make it do this. I have no idea why.
Has anyone done antler?
Has anyone done antler?
Has anyone done antler?
. I only had time to unbox it, and install the driver/software. Sometime this evening, though, I will certainly be putting it to task, on some scrap wood, to see about latching on to proper settings. Very anxious about it all. If it does anywhere even near what I am expecting from it, then I know that I will surely look into getting another model, which would afford greater real estate to burn in. For those that are having trouble with the laser going through the motions, but not firing, check your USB cables. A bad cable can make it do this. I have no idea why.