
mikespenturningz
Member
Ok so I have been working on my pens for some time now and I have made a bunch. I am always looking for better ways of doing things. I started out using the pen mills and have made most of the mistakes that can be made using them including holding the blank in my hand while squaring and all of the mishaps that comes along with being just plain stupid. So I set out to do things better. I looked around in the library and read the forum here and this method was shown to me. It was much better until now. Now there is a better way! Keep reading and looking and I will explain.
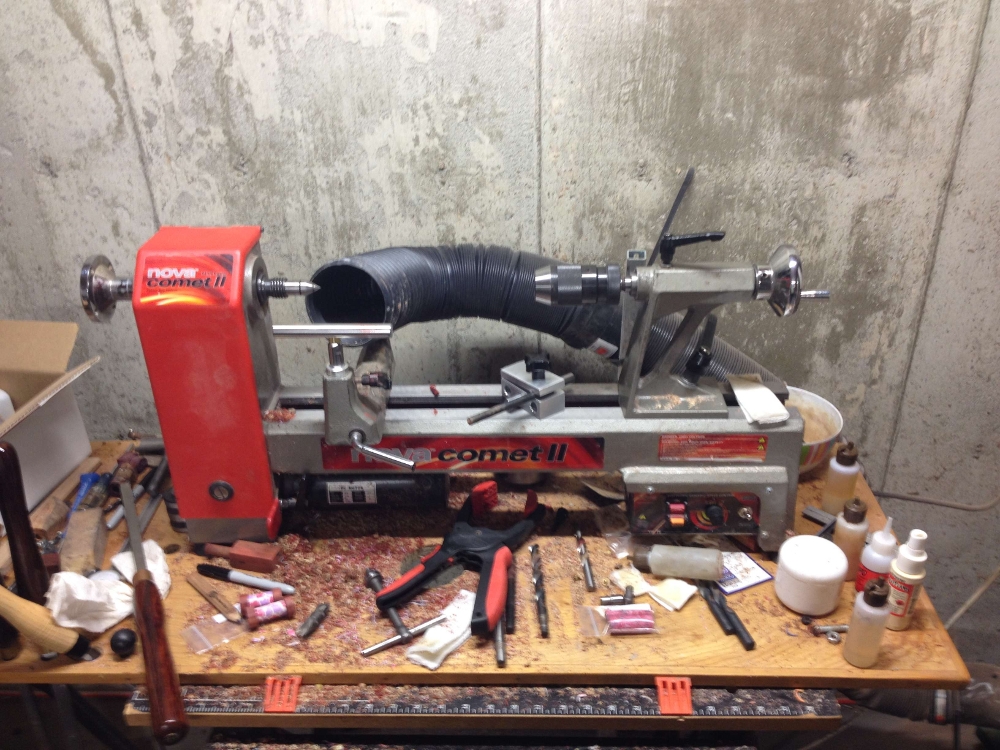
So this is how I do it now.. The way I start has not changed. But notice that nice new tool rest made by Rick Herrell now I know that lots of you have purchased these and now I know why, SSSWWWWEEEEEEEETTTT! Love this rest but that has nothing to do with this process! Or does it.. I think it may keep reading. This sanding disk is made from some plywood and uses a bowl face plate to attach to the lathe. It has velcro attached to it so very fast to change out.
So after I get the blank rough sanded and so so square.. I mark the ends with a pencil to see how I am. This step is not my own I am simply using what others have done before me and shared. But I bet there is going to be some thing new..
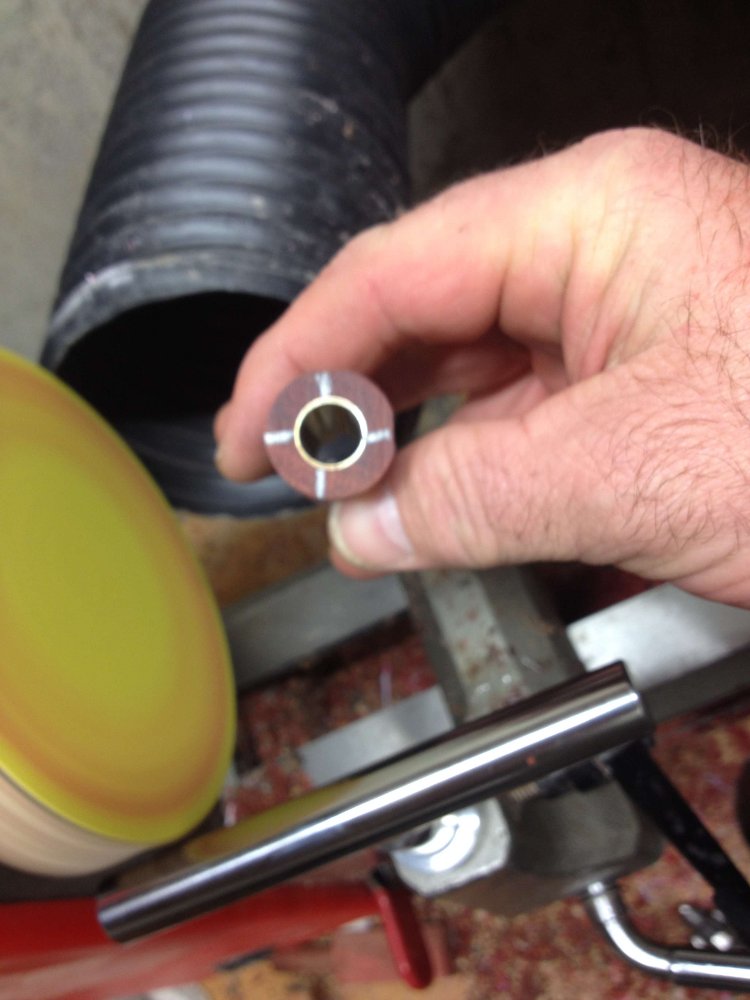
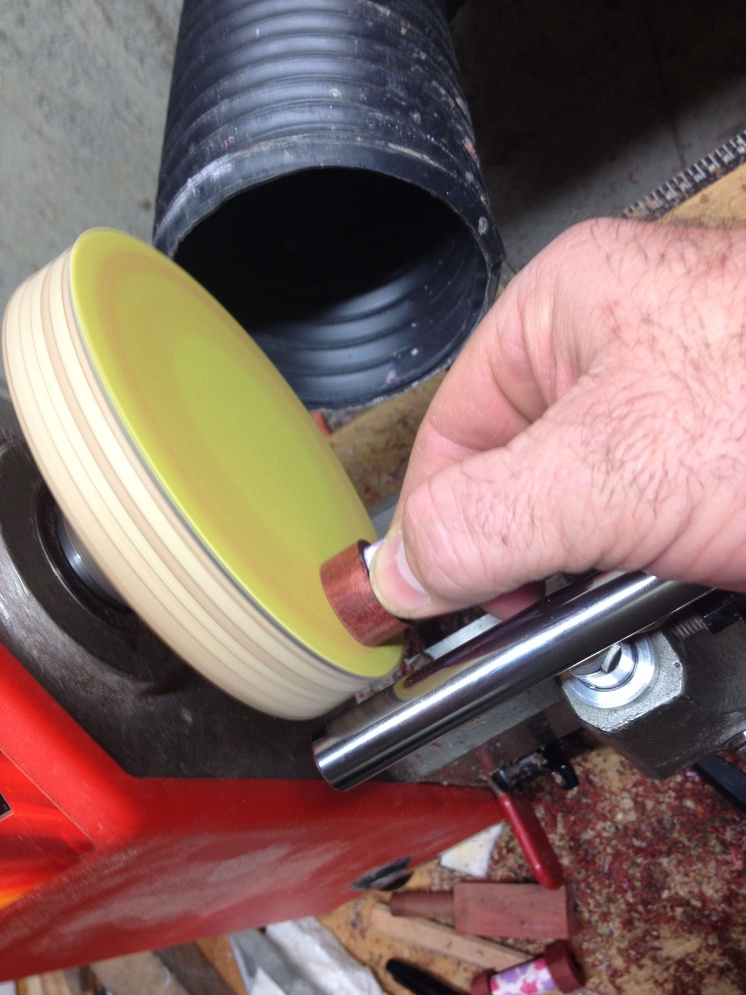
Now once I have this step done I put in my Jacobs chuck into the tail stock and use my HF punch set to sand these square.. Still nothing new just stuff that others have taught me. But this step can be very slow. It does't take much to ruin the very center of this paper..
Now enter something new that you have not seen before. I was ordering my tool rest and a set of pin chucks from Rick when I mentioned to him that I would love to see a jig that could offset my blanks while I was squaring. I explained to him how I do it now as seen in these images. Within an hour or so Rick was back to me with a very rough drawing for a prototype.. Now that is what is coming next in the very next image!
This method is so fast it isn't funny and it seems to be very very accurate. This thing is the very best way I have had yet to square my blanks.
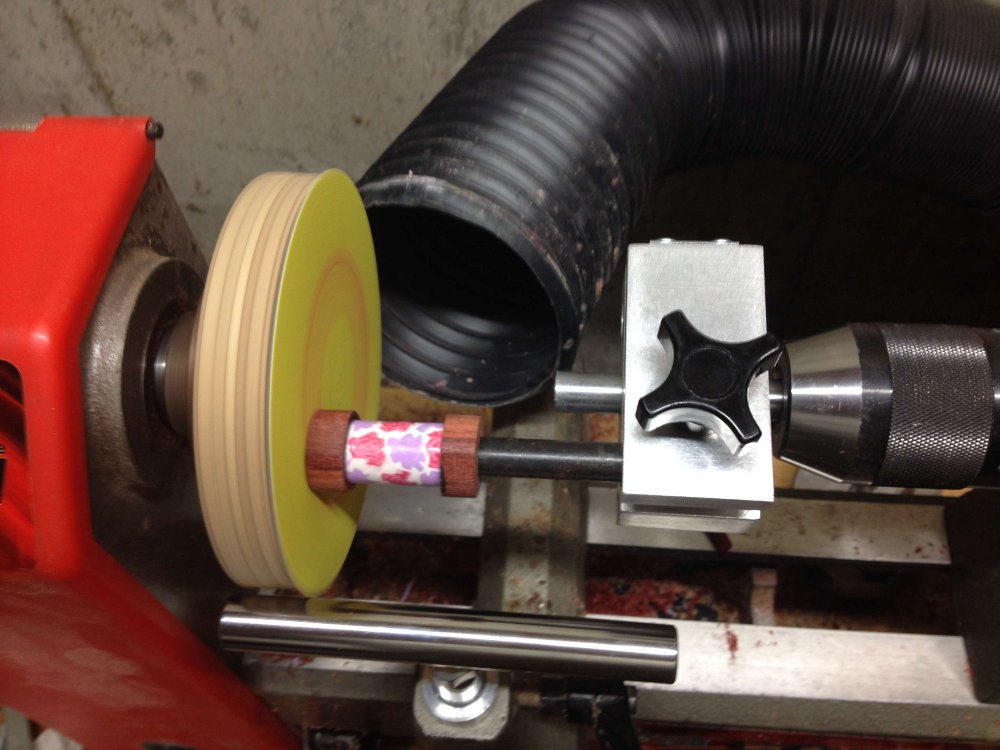
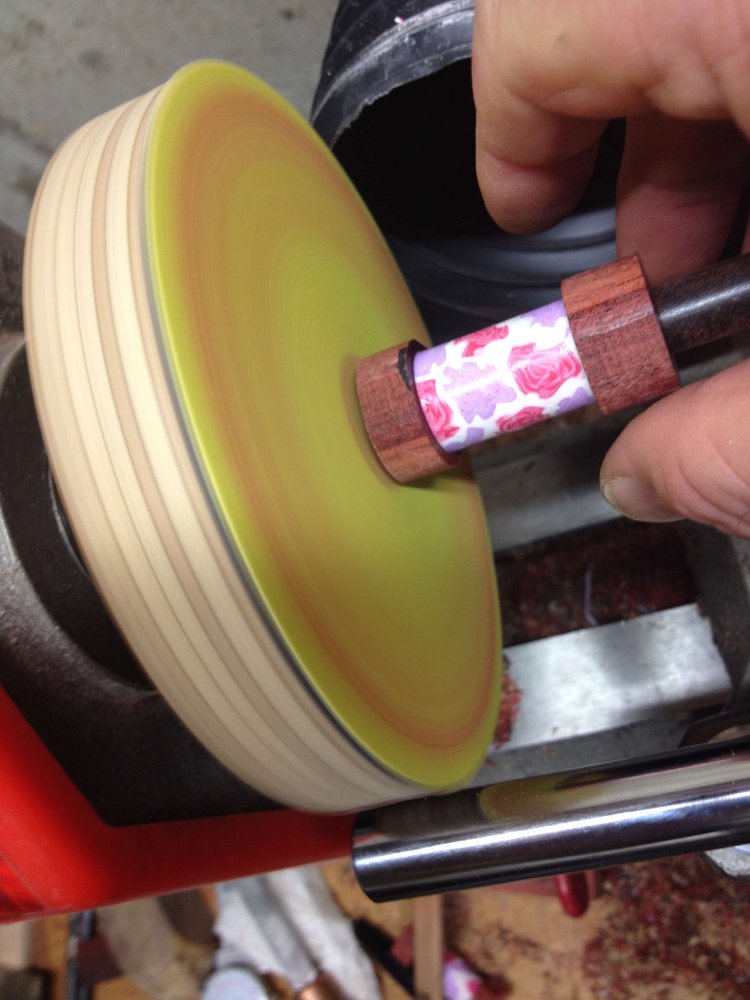
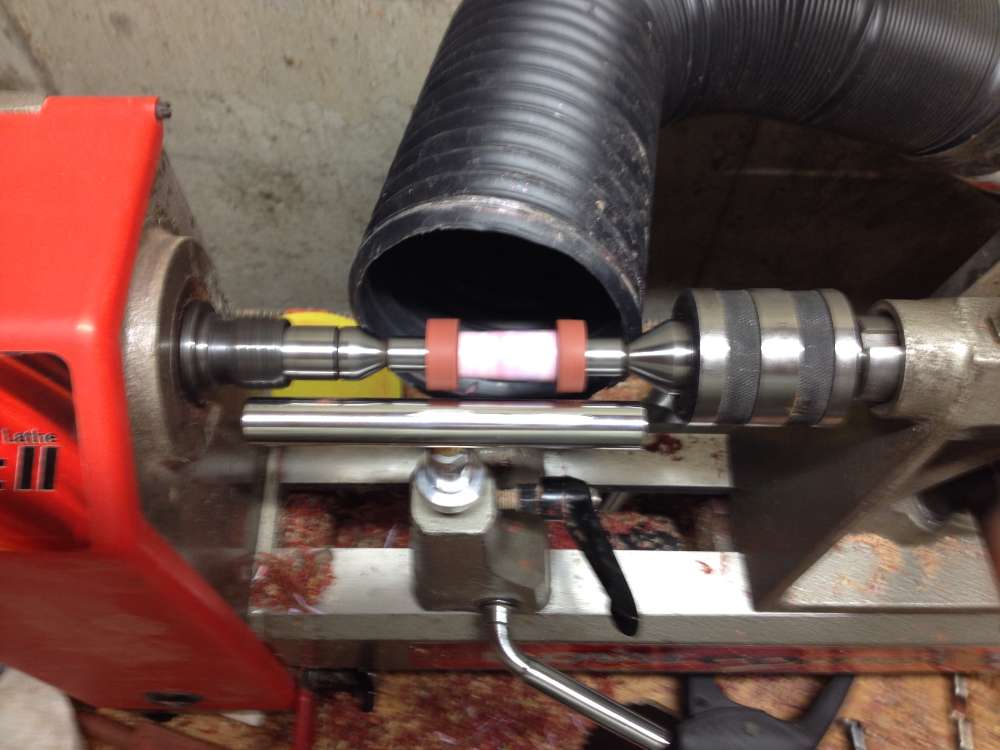
Now lets finish the tutorial now that you see what I am so excited about. Just a few more images to wrap up. You can see in the center of my bed the offset jig that Rick Herrell made for me.
Here the blank is ready to turn
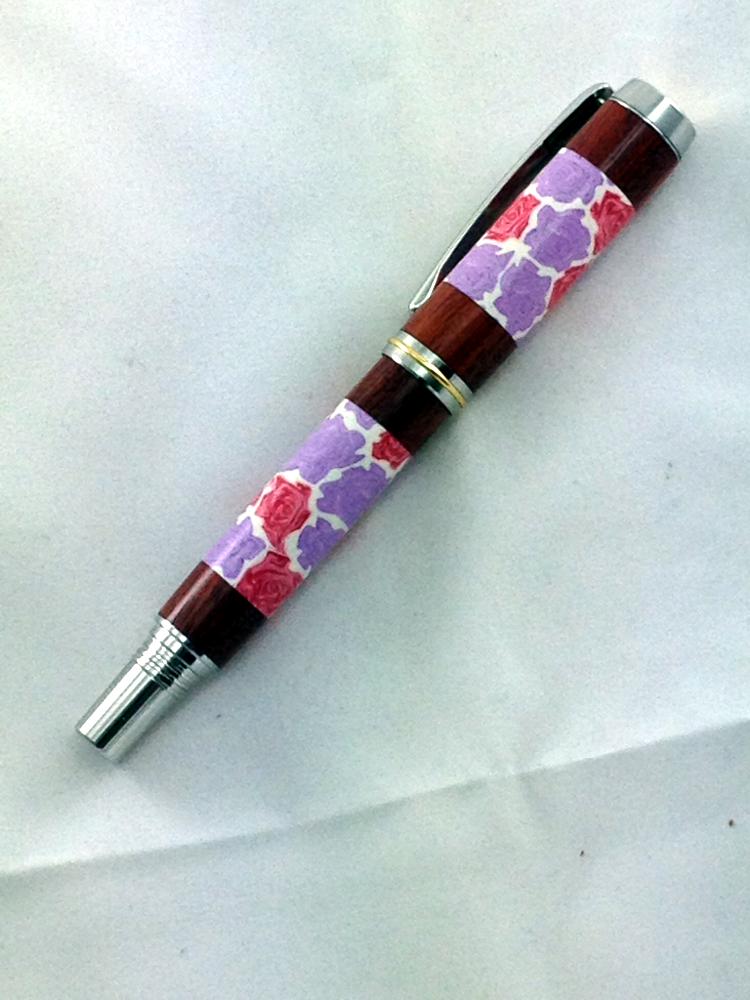
And yes here is a very bad iPhone photo of the finished pen.
This is my usual Jr. Gent 2 Rhodium Polymer Clay made by Gail and Blood wood segments.
So that is the process that I now use. This jig is the cats meow. It is easy to setup, adjustable and gets me off that center of the disk which makes the process very fast. Drop Rick a note if you like this.. Maybe we can get him to add this to his product line! rherrell
So this is how I do it now.. The way I start has not changed. But notice that nice new tool rest made by Rick Herrell now I know that lots of you have purchased these and now I know why, SSSWWWWEEEEEEEETTTT! Love this rest but that has nothing to do with this process! Or does it.. I think it may keep reading. This sanding disk is made from some plywood and uses a bowl face plate to attach to the lathe. It has velcro attached to it so very fast to change out.
So after I get the blank rough sanded and so so square.. I mark the ends with a pencil to see how I am. This step is not my own I am simply using what others have done before me and shared. But I bet there is going to be some thing new..
Now once I have this step done I put in my Jacobs chuck into the tail stock and use my HF punch set to sand these square.. Still nothing new just stuff that others have taught me. But this step can be very slow. It does't take much to ruin the very center of this paper..
Now enter something new that you have not seen before. I was ordering my tool rest and a set of pin chucks from Rick when I mentioned to him that I would love to see a jig that could offset my blanks while I was squaring. I explained to him how I do it now as seen in these images. Within an hour or so Rick was back to me with a very rough drawing for a prototype.. Now that is what is coming next in the very next image!
This method is so fast it isn't funny and it seems to be very very accurate. This thing is the very best way I have had yet to square my blanks.
Now lets finish the tutorial now that you see what I am so excited about. Just a few more images to wrap up. You can see in the center of my bed the offset jig that Rick Herrell made for me.
Here the blank is ready to turn
And yes here is a very bad iPhone photo of the finished pen.
This is my usual Jr. Gent 2 Rhodium Polymer Clay made by Gail and Blood wood segments.
So that is the process that I now use. This jig is the cats meow. It is easy to setup, adjustable and gets me off that center of the disk which makes the process very fast. Drop Rick a note if you like this.. Maybe we can get him to add this to his product line! rherrell
Last edited: