I say sand-through also.
I do a lot of finishing with CA. . I get the best results by very careful sanding and what I mean is this:
I always put on the CA thick enough so that the risk of sand through is small (based on years of experience).
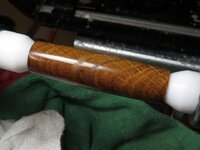
I sand with the blank held between centers on the lathe, I only sand lengthwise, and I rotate the lathe by hand, never under power.
I always watch the progress of the sanding very carefully.
I start sanding with 240 grit and I don't change grits until all the shiny spots are matte - this is a very tedious process but I have found it to be essential.
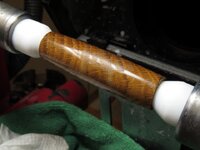
With the 240, I initially sand the whole blank with long strokes (lengthwise) wiping off the sanding dust frequently while looking for shiny patches/spots.
After a while, the shiny patches are gone and I'm left with "a few hundred" shiny spots (maybe not that many but it seems like a whole lot).
Still with the 240, I start focussing my sandy on a small number of shiny spots, sanding more lightly as they disappear one at a time. . As they disappear I shift my focus to the remaining shiny spots.
Eventually you get down to a few (quite a few) shiny spots scattered over the blank and they seem to be, at this stage, more concentrated near the ends of the blank.
I now start to focus on just one shiny spot at a time and removing it by light sanding.
I watch carefully, shifting the light as needed, sanding lighter and lighter until each spot JUST disappears with very light sanding.
I move on to the next shiny spot and repeat, with lighter and lighter sanding strokes.
I never try to remove a lot of shiny spots together, focussing on a small number or just one.
After wiping I carefully inspect for more shiny spots and process as described.
When I can see no shiny spots over the whole blank, I change to the finer 320 grit.
It is now safe to lightly sand larger portions of the blank ... lightly ! Inspect and remove any missed shiny spots.
Progress through 320, 400, 600, 800, 1000, 1200, 1500 grits. Sand lightly always. Inspect frequently. Wipe off dust often. Inspect, inspect, inspect.
As you work your way to finer grits you can gradually reduce your inspections. But if you find shiny spots, you might have to go back to a coarser grit, using that VERY lightly, and then resume with the next finer grit.
This is a tedious process the first few times you do it, but you gradually get better at it.
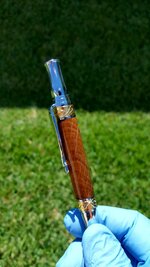
One key is not to rush through it. Even a small shiny spot can look ugly on the finished product so strive for perfection, especially when using the coarser grits at the beginning.
Another key is to get rid of all the shiny spots, one at a time if necessary. The major key is to do all the sanding LIGHTLY and focus on a few or only one shiny spot at a time.
Straight grain is easier than diagonal which should be easier than cross grain (which I almost never use).
Hope this helps ... keep at it !!