Ridge at end of tube

Signed-In Members Don't See This Ad

Bope

Member
Joined
Oct 24, 2018
Messages
183
Location
Western NY
I have been making some slimline pens and finishing with med. CA glue. I also use the plastic non-stick bushings when finishing. My problem is at the ends of the tubes there is a small ridge of CA built up. When I am done and take the tubes of the mandrel I have to snap off the bushings. This leaves a sharp burr like edge on the tube. I have started taking the tubes off before buffing and using some 600 sandpaper to take that burr off. Then put them back on the mandrel to sand down and polish. Is this a common problem? Anyone have a better solution?
 
Signed-In Members Don't See This Ad

edstreet

Member
Joined
Aug 12, 2007
Messages
3,684
Location
No longer confused....
Yes. CA does not stick to Pfte, silicon, many plastics, wax, Teflon and so forth. Simply apply wax or Teflon to the standard bushings and treat normal. If applied properly the bushings will not stick, if they do a simple twist on the lathe will separate it.
 

jttheclockman

Member
Joined
Feb 22, 2005
Messages
19,132
Location
NJ, USA.
I do not make videos and some times it is just hard to put in words what you want to convey. But I will try. AS you progress in this hobby you will pick up little tricks and many never get mentioned because people think they are so obvious everyone knows that. But here is mine. If you are using those bulbous non stick bushings for finishing, they do not leave you any room on the ends for the excess CA to go and it builds up pretty good. I prefer to use and I made my own because they are simple to do, cone shaped bushings. What this does is allow the motion of your swipe of CA to continue past the edge of the tube and up onto the bushing thus less build up of CA on the ends. If I however get a large glob I take a blue shop paper towel and gentle touch the edge of the tube where the glob is and it gets absorbed in towel. This all leads to less CA on ends and to remove tube is a matter of a very slight snap or twist that does no damage to CA. Now I sand ends down and get ready for finish polishing. But before I do that I put some thin CA on a piece of wax paper and gently dip ends in to seal ends. Wipe any excess off. It is important to seal ends of wood blanks because if you use water to lubricate sanding efforts it can get under CA and cause other problems. Like I said easier to do and show than to explain but it is little tidbits I picked up over the years and you will get your own too. Good luck.
 

Bope

Member
Joined
Oct 24, 2018
Messages
183
Location
Western NY
John, thanks for the tips. I also ordered some HDPE rod so I can turn down some more plastic bushings. For a slimline pen that is going to be very thin at the end and wonder about the durability of that thin plastic. It has been interesting that this usually happens only at one end of the tube. I must wipe slightly different to the right than I do to the left.
 

Dale Allen

Member
Joined
Oct 27, 2012
Messages
1,384
Location
Massillon, OH
If you are going to make your own bushings why not make them for turning between 60 degree centers.

And here's another tip. When you have the 2 blanks ready to go on the mandrel, use a black sharpie and put a mark on the inside of the brass tubes on the ends that go to the center. You will likely still be able to see the mark if the orientation gets mixed up.
 

Woodchipper

Member
Joined
Mar 15, 2017
Messages
5,211
Location
Cleveland, TN
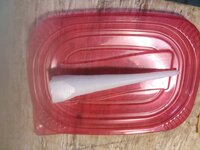
Bope, turned some plastic of some kind; got it at the recycling center as guys from a local business were putting it in a recycling bin. Anyway....I have turned it down to almost paper thin. I even turned a tapered piece to use as an insert tool for glued tubes into a blank.
 

Attachments

  • 20180312_140601 (1).jpg
    20180312_140601 (1).jpg
    182.4 KB · Views: 311
Last edited:

bsshog40

Member
Joined
Oct 2, 2018
Messages
2,370
Location
Omaha, Tx
I have only done a few ca finishes but I noticed how the ca can build up fast on the non stick bushings. The first time I had to twist them a little to get them off. So I changed my wiping pattern when I finished on the others. Instead of putting ca on the towel and wiping from one end to the other, I start instead about 1/4 of the way from the end, wipe back to the end and back to the other end. I don't use a lot on coats so I do this wipe pretty fast. It has stopped most of the globbing on the ends. After each pen I also will let the non stick bushings dry and peel off the ca with my fingernail before putting back on the mandrel for the next finish. This just my method soo far until I get better and I find another way that works better.
 

jttheclockman

Member
Joined
Feb 22, 2005
Messages
19,132
Location
NJ, USA.
Woodchipper just showed you it can be done. Not that hard and for finishing they do not have to be perfect. You are not turning on them just finishing. That is all I do. If I want to turn on them I use the dead and live center between centers for final touch ups.
 

ramaroodle

Member
Joined
Feb 15, 2018
Messages
686
Location
Seattle
But before I do that I put some thin CA on a piece of wax paper and gently dip ends in to seal ends. Wipe any excess off. It is important to seal ends of wood blanks because if you use water to lubricate sanding efforts it can get under CA and cause other problems.

Good tip! Have to remember that.

Still wondering what the advantage is to turning between centers over using a pen mandrel??
 
Last edited:

Bope

Member
Joined
Oct 24, 2018
Messages
183
Location
Western NY
I have started turning some Sierra style pens. With slimline style pens the silicon finishing bushings butt directly up to the pen. When applying the finish it can build up next tot eh bushing. With the Sierra style pens the bushing fits inside the tube leaving a gap between the blank and the bushing. This gap keeps the finish from building up on the ends. It also allows you to get some finish on the ends of the blank.

Now that i have a turning station set up I have a light directly over the work. Now after applying the CA I start sanding with 1500 grit micromesh. After sanding for a while I dry off the blank and turn off the lathe. There is a line of reflection from the light along the blank. I slowly turn the blank and watch that line. The sanded surface is dull while the unsanded areas are shiny. If that line sparkles I know there are still low spots. Now I can level the finish with the 1500 before moving through the grits and polishing. Doesn't help with the ridges on the ends but does help getting a more consistent finish.
 

Hoplite22

Member
Joined
Dec 28, 2020
Messages
1
Location
Australia
Yes. CA does not stick to Pfte, silicon, many plastics, wax, Teflon and so forth. Simply apply wax or Teflon to the standard bushings and treat normal. If applied properly the bushings will not stick, if they do a simple twist on the lathe will separate it.
Sent you a private message..
 

penicillin

Member
Joined
Feb 27, 2019
Messages
1,036
I think we are talking about two different things. Correct me if I am wrong.

1. Build-up: @Bope was originally asking about the ridges or build-up of CA glue beyond the end of the pen blank.
-> It happens to my CA finishes. I lay sandpaper on a flat surface, hold the finished pen blank vertically, and carefully swirl the pen blank on the sandpaper to remove the excess CA build-up that appears beyond the ends of the pen blank. Be sure to keep the pen blank vertical (no tilting!) to avoid scratching the visible ends. Check your work frequently as you go. It takes a couple minutes at most.

2. CA Sticking to the Bushings: Others have mention the issue of CA sticking to the bushings, even plastic bushings.
-> Me too. I use plastic bushings, and CA can build up on them, too. Sometimes I pick off the hardened CA with a fingernail, leaving a clean plastic bushing. Waxing the bushings with Renaissance Wax, SC Johnson Paste Wax helps, but requires periodic refreshing, and I still find myself picking off hardened CA. Sometimes I just ignore it and let it build up on the plastic bushings.
 

Bope

Member
Joined
Oct 24, 2018
Messages
183
Location
Western NY
This thread is a blast from the past. I have found CA sticks to those teflon bushings pretty well. I used to try to turn off the built up CA until a light came on about a month ago. Now I keep a small jar of acetone and drop my plastic bushings into it after use. This keeps them nice an clean. I also just received a sanding mill from Rick Harrel. I have not had a chance to use it yet but I am hoping it makes sanding off the CA on the ends a little quicker.
 

egnald

Member
Joined
Jun 9, 2017
Messages
3,105
Location
Columbus, Nebraska, USA
Greetings From Nebraska - I see by your last post that you are spot on with what I learned over time.

I used to try to scrape, chip, or turn off the CA buildup on the Non-Stick bushings, and frequently damaged them in the process. Since starting to drop them in a 8 oz jar of Acetone, they are always in like-new condition.

As for the buildup "fingernails" on the blanks, I used to manually sand them on a flat surface, but I've found that the safest and most accurate method is to sand them on my squaring jig by lightly touching the ends just enough to take off the CA fingernail.

Finally, I put a few drops of thin CA on a paper towel folded to be like a blotter and touch the ends. This final step of sealing the ends back up with CA has resolved an occasional adhesion problem I used to have where the CA on the ends of the blank would let go a little causing a light, foggy looking spot between the CA and the blank (hard to describe).

Good Luck as you get your regimen refined.

Regards,
Dave

PS. Someone asked about what the advantage is to using turning between centers for finishing over using a pen mandrel and the non-stick bushings. The biggest advantage I see, as related to finishing, is that using "pointy" non-stick turn between centers for finishing is more advantageous for 8mm and 7mm tubes because the bushing goes all the way into the tube instead of just butting up against it. The taper angle allows more "wipe-across" without as much build up right at the bushing-tube/blank interface.
 

sorcerertd

Member
Joined
Sep 30, 2019
Messages
2,695
Location
North Carolina, USA
I'm late to the party here, but I have been purposely putting a little ca on the ends of the barrels/tubes. I do try not to build it up too much, though. Once I have the barrels polished, I put a sanding disc on the headstock and then use a transfer punch in a drill chuck on the tailstock to clean it up (very carefully). That way I end up with a nice clean, sharp edge instead of a shoulder and the barrel meets up flush with the parts. Maybe it's just my imagination, but it seems that the CA would also soak in a little to protect the ends, too.
 

Todd in PA

Member
Joined
Feb 16, 2021
Messages
658
Location
Port Matilda, PA
I'm not sure if the plastic bushings I got off Amazon are junk or what, but I have a heck of a time removing the bushing from the end of the barrel. One pen recently I could not get the bushing off the barrel with all my hand strength. I'm used channel lock plyers to not so gently compress the bushing until it let loose. I'm always holding my breath to see if it cracks the finish. I've also started breaking them off half way through the application process to prevent it from getting baked on there too good.

I know that it's somewhat my sloppy technique because the right bushing is always way more stuck than the left one.

PS, I poured some acetone in a disposable plastic cup to clean the bushings and there was no bottom on that cup before I stopped pouring. After that I wasn't so sure I should put these dubious plastic bushings in the acetone. LOL
 

leehljp

Member Liaison
Joined
Feb 6, 2005
Messages
9,326
Location
Tunica, Mississippi,
Good tip! Have to remember that.

Still wondering what the advantage is to turning between centers over using a pen mandrel??
1. Pen mandrel are notorious for causing out of round (not "technically" accurate term) for a number of reasons. Usually 3 to 6 months in, with some experience under the belt, suddenly minor inaccuracies are noticed that were not noticed before. The inexperience of how to fix any one of those 5 or 6 possible problems drive them to ask "why" here.
Mandrels work if one knows the numerous things to look for and how to fix.

Then there is TBC with less parts, much more simple, less likely to have out of round. And if you are one who wants to inspect and measure your turned blank for precise fitting, maybe putting it back on the lathe and taking it off two or three times during a turn - then TBC is the way to go because it is quick to take off and put back on and polish, turn or alter - in seconds. Plus no dropped threaded nuts or fittings.
Lastly - in general more accuracy due to less out of round.
 

Bope

Member
Joined
Oct 24, 2018
Messages
183
Location
Western NY
I'm not sure if the plastic bushings I got off Amazon are junk or what, but I have a heck of a time removing the bushing from the end of the barrel. One pen recently I could not get the bushing off the barrel with all my hand strength. I'm used channel lock plyers to not so gently compress the bushing until it let loose. I'm always holding my breath to see if it cracks the finish. I've also started breaking them off half way through the application process to prevent it from getting baked on there too good.

I know that it's somewhat my sloppy technique because the right bushing is always way more stuck than the left one.

PS, I poured some acetone in a disposable plastic cup to clean the bushings and there was no bottom on that cup before I stopped pouring. After that I wasn't so sure I should put these dubious plastic bushings in the acetone. LOL
Todd,
It sounds like you are being a little heavy handed with the CA. I am not sure why they call those bushings non-stick because the CA does stick to them probably just not as good as it does to other things. Try being a little more careful when applying the CA that you don't push a lot off the end. You can also take a knife and score the CA at the bushing-pen interface. Dropping them in some acetone to remove the excess CA is a good idea.
 

leehljp

Member Liaison
Joined
Feb 6, 2005
Messages
9,326
Location
Tunica, Mississippi,
Todd,
It sounds like you are being a little heavy handed with the CA. I am not sure why they call those bushings non-stick because the CA does stick to them probably just not as good as it does to other things. Try being a little more careful when applying the CA that you don't push a lot off the end. You can also take a knife and score the CA at the bushing-pen interface. Dropping them in some acetone to remove the excess CA is a good idea.
This is to Bope's Question on - Why are they called "Non stick" . . . "Non-stick is a relative term and there are different materials that are non stick in different degrees. And, - before "non-stick" bushings/cones came on the scene, there were only regular metal bushings. With daily stuck metal bushings to deal with, the non stick ARE non-stick in comparison. Just throw the non stick ones away, use only metal ones for a year, then it will be understand how much easier "non-stick" are.
 
Last edited:

Todd in PA

Member
Joined
Feb 16, 2021
Messages
658
Location
Port Matilda, PA
LOL, Hank. Point taken. šŸ˜® I think I'll keep my plastic bushings and be grateful. I did dunk them in acetone and they didn't dissolve. But the old CA did. Good tip!
 

Dueyvan

Member
Joined
Jan 14, 2021
Messages
65
Location
Lethbridge, Alberta
Greetings From Nebraska - I see by your last post that you are spot on with what I learned over time.

I used to try to scrape, chip, or turn off the CA buildup on the Non-Stick bushings, and frequently damaged them in the process. Since starting to drop them in a 8 oz jar of Acetone, they are always in like-new condition.

As for the buildup "fingernails" on the blanks, I used to manually sand them on a flat surface, but I've found that the safest and most accurate method is to sand them on my squaring jig by lightly touching the ends just enough to take off the CA fingernail.

Finally, I put a few drops of thin CA on a paper towel folded to be like a blotter and touch the ends. This final step of sealing the ends back up with CA has resolved an occasional adhesion problem I used to have where the CA on the ends of the blank would let go a little causing a light, foggy looking spot between the CA and the blank (hard to describe).

Good Luck as you get your regimen refined.

Regards,
Dave

PS. Someone asked about what the advantage is to using turning between centers for finishing over using a pen mandrel and the non-stick bushings. The biggest advantage I see, as related to finishing, is that using "pointy" non-stick turn between centers for finishing is more advantageous for 8mm and 7mm tubes because the bushing goes all the way into the tube instead of just butting up against it. The taper angle allows more "wipe-across" without as much build up right at the bushing-tube/blank interface.

Your little foggy bit on the end is what I came to this forum looking for help with and found the answer here in a thread I was reading for educational purposes. Thanks.


Sent from my iPhone using Penturners.org mobile app
 

leehljp

Member Liaison
Joined
Feb 6, 2005
Messages
9,326
Location
Tunica, Mississippi,
Your little foggy bit on the end is what I came to this forum looking for help with and found the answer here in a thread I was reading for educational purposes. Thanks.


Sent from my iPhone using Penturners.org mobile app
This "foggy bit" on the end is also caused "CA lifting" because the CA lifts or separates from the blank on the end as the bushing separates from the blank. This very issue was what brought TBC to usage on IAP 14 - 15 years ago.
 

Dueyvan

Member
Joined
Jan 14, 2021
Messages
65
Location
Lethbridge, Alberta
This "foggy bit" on the end is also caused "CA lifting" because the CA lifts or separates from the blank on the end as the bushing separates from the blank. This very issue was what brought TBC to usage on IAP 14 - 15 years ago.

TBC would probably be a really good thing to switch to at some point but right now I just started and have invested in 2 mandrels, not the bits I would need to turn between centres


Sent from my iPhone using Penturners.org mobile app
 

magpens

Member
Joined
Feb 2, 2011
Messages
15,912
Location
Canada
TBC would probably be a really good thing to switch to at some point but right now I just started and have invested in 2 mandrels, not the bits I would need to turn between centres


Sent from my iPhone using Penturners.org mobile app

@Dueyvan

You don't need any "extra bits" to turn between centers.
You would already have a dead center for your headstock and a live center for your tailstock. . That's all you need for TBC.
Just mount your blank between those, tighten up, and turn, sand, finish, or whatever you need to do.
 

Dueyvan

Member
Joined
Jan 14, 2021
Messages
65
Location
Lethbridge, Alberta
@Dueyvan

You don't need any "extra bits" to turn between centers.
You would already have a dead center for your headstock and a live center for your tailstock. . That's all you need for TBC.
Just mount your blank between those, tighten up, and turn, sand, finish, or whatever you need to do.
The grabber teeth on my drive would be too wide out to work a pen. maybe all I need is a new drive center
 

magpens

Member
Joined
Feb 2, 2011
Messages
15,912
Location
Canada
The grabber teeth on my drive would be too wide out to work a pen. maybe all I need is a new drive center

The best dead-center drive is a cone without any teeth. . What I use is an abrasive cone (coated with diamond dust which adds to the friction) .... bought that at Lee Valley . . Mine has a fairly sharp point, but these ones have a blunt point .. I prefer sharp. . The cone angle is about 45 degrees. . These cones are for sharpening things, but I don't know what kind of things. . My cone is also bigger than these, but I don't think they sell the big ones any more.


But a cone without the diamond dust should work. . You can buy such .... they are just called dead centers and they have a Morse Taper to match your lathe's headstock.

Only trouble with a plain steel conical dead center is that the blank could slip when you start applying you cutting tool to turn the blank


The live center for the tailstock has bearings so that it turns freely, which is what you need. . It is also mounted on a Morse Taper to match tailstock.

A headstock dead center with teeth would be OK, but it has to be of small enough diameter so that all the teeth make contact with your blank.

It is important that the end of your blank should be squared to the blank axis in order to use that kind of a dead center.
 
Top Bottom