CA is Breaking My Spirit

Signed-In Members Don't See This Ad

jkeithrussell

Member
Joined
Oct 20, 2008
Messages
1,277
Ok, I'm officially beaten down. CA teases me with one excellent finish, then 10 crappy ones. I've tried every variation of the CA finish, and probably some that would make you laugh. I got good results pretty regularly for a month, then crap for a month. Last night I struggled with putting a finish on 2 nice pieces of mesquite burl. I thought I had it right until I got some sleep and looked at them in the daylight. I'm ready to try something else. Maybe Turner's Magic. I could melt a purple crayon on the blanks and it would look better than what I got out of an hour's work last night.
 
Last edited:
Signed-In Members Don't See This Ad

StatProf

Member
Joined
Jan 30, 2007
Messages
168
Location
Richardson, TX, USA.
Have you tried William's method yet? I had trouble until I used this method. Also, my shop needs to be at least 65 degrees to get good results. This temp is pretty common in Texas, but last night it was in the low 40s, so no turning for me. Maybe on Saturday.

StatProf
 

StatProf

Member
Joined
Jan 30, 2007
Messages
168
Location
Richardson, TX, USA.
One other comment.

When I do William's method, I have a different criteria for when I fold the paper over. William says to fold the paper over after it goes from cloudy to shiny. I make sure that I am looking almost sideways at the blank and make sure that a light is bouncing off the blank. I start rubbing back and forth very quickly until the reflection from the light is in a straight line across the top of the blank. Before the CA cures, the reflection will be wavy. I know that the curing has begun when this reflection line is straight across the blank. Then I usually go for a couple more seconds before I fold over the towel.

Hope this helps.

StatProf
 

jkeithrussell

Member
Joined
Oct 20, 2008
Messages
1,277
Have you tried William's method yet? I had trouble until I used this method. Also, my shop needs to be at least 65 degrees to get good results. This temp is pretty common in Texas, but last night it was in the low 40s, so no turning for me. Maybe on Saturday.

StatProf

Yes, I've tried it. I put on 2 or 3 or 12 coats and when I'm done, there's almost no CA on the blanks. I thought maybe my CA had gone bad, so bought another bottle and got the same results.

Maybe I forgot to add crushed chicken's tooth or the juice from the eye of a newt, or maybe I used the wrong texture of paper towel, or maybe it was 2 degrees too cold in my shop. Perhaps used a thousandth of a cc too much BLO.

I probably could tolerate not getting it right if I hadn't gotten it right on a dozen or so pens already.

I think I just need a break from pen turning. I've been hitting it pretty hard lately. The last 10 or so have all had something wrong with them. Barrels will be smooth against the bushings (even new ones), but then won't match the kit. Finishing has been killing me. I've had trouble with some platings getting scuffed during assembly. Bought a buffing system that fits on everyone else's lathe except mine. Guess March is my month to be Eeyore.
 

george

Member
Joined
Jan 17, 2006
Messages
458
Location
Ljubljana, Slovenia.
I guess I am lucky to be able to make pens (among others turnery) for a living. That means, that I was able to learn about CA much more time, than just at the evenings and threw the weekends. And it still took me a long time to get it right.
This CA stuff was among the heaviest things I had to learn, doe some can say:" Is it really that hard to put on the wood few pieces of glue ?"
I have watched Russ F. DVD over and over, read everything on this site, but I still needed to find my own way.

So keep up trying; once you get it in your hand and your mind, putting CA on the pen becomes the best part of the penturning.
 

mywoodshopca

Member
Joined
Nov 3, 2008
Messages
1,123
Location
Charlottetown, PEI Canada, Derby Kansas and Canyon
I put a spot of blo on, heat it up a bit with a strip of paper towel, put a few drops of thin ca on a strip of paper towel, repeat about 5 times.. put a drop of plastic polish on a rag, rub for a quick second on the blanks then give one more drop of CA on a paper towel for a final coat.. seem to have good results with that.. turns out shiny :)
 

Texatdurango

Member
Joined
Apr 23, 2007
Messages
4,649
Location
Show Low, Arizona
...I've tried every variation of the CA finish, and probably some that would make you laugh. I got good results pretty regularly for a month, then crap for a month. Last night I struggled with putting a finish on 2 nice pieces of mesquite burl. I thought I had it right until I got some sleep and looked at them in the daylight. I'm ready to try something else. Maybe Turner's Magic. I could melt a purple crayon on the blanks and it would look better than what I got out of an hour's work last night.
I wonder if the bouncing around, trying different methods could be causing some of your problems? I remember when I started doing these I was so confused I didn't know which way was up or how to hold my tongue when spreading the glue.

In my opinion, too many people make WAY TOO BIG OF A DEAL over these CA finishes and it doesn't do anything but keep everyone confused and intimidated. I think you're listening to everyones little steps and it's just got you confused!

If you approach it with the attitude...All I'm doing is putting some glue on a stick, sanding it smooth then buffing or polishing it, I think you'll wind up doing a better job of it.

I've talked to dozens of people who were having problems and confused because they thought they were supposed to be doing this or that while trying to follow some convoluted 10 page checklist or particular process, then spent five minutes to show them how to do it then they did it and were amazed at how simple it really is. This is not to imply that I am a CA guru because I'm not, it just shows that it's NOT that hard!

Relax, take a scrap piece of pine 2x4, cut up some ¾ x ¾ blanks, turn into cylinders and apply some CA, let it cure, apply a little more, let it cure, sand it smooth then hit it with a buffing wheel. I think you will be amazed at your results and who knows, you might just feel like writing the 19,657th method! :biggrin:
 
Last edited:

Monty

Group Buy Coordinator
Joined
Mar 4, 2005
Messages
8,355
Location
Pearland, Texas, USA.
..... Barrels will be smooth against the bushings (even new ones), but then won't match the kit.....
Always always check the bushing against the kit. I've had new bushing that didn't match the respective kit.
And as for the CA finish, i believe Texatdurango hit it right on.
 

marcruby

Member
Joined
Feb 22, 2008
Messages
1,175
Location
Warren, Michigan, USA.
I'm going to second TexatDurango. Penmakers seem to adopt a moderately complex process without thinking about it, have trouble, and when they ask for help, wind up adding even more steps. The end result is a process with so many variables it is a miracle when it works.

Go all the way back to the beginning and work with test rods. Your objective is to get enough CA on the rod cleanly so that you can sand it and polish it. Try a couple of basic coating methods - a few coats of medium thick, a lot of coats of thin, etc. Wait for the CA to set at each step. Stay away from any additives like BLO or accelerants. Keep at it until you find one or two methods that let you lay a polished finish on the rod. Now you can look at additives and variations and have a chance of understanding what they do.

I use a very simple process in a controlled environment. I can show you pen after pen with a good finish. Last night was the first time I had to very that process to remedy an unusual circumstance. I only had to change one variable.

Marc
 

Gagler

Member
Joined
Jun 16, 2008
Messages
272
Location
Bellaire, TX, USA.
Where in Houston?

I see you're in Houston - where, and maybe we can hook up and go through my imperfect method. It took me a while, too, to get it down, and like others have said "my" method is a variation of the 20,000 or so other methods. I never could get Russ Fairfield's method with the old paper sack down despite watching the video what seemed like 1,001 times.

Last night in Houston it was a little cool (at least in Pearland) and very humid with the coming rain - I chose not to turn as my experience has shown a cooler, 99% humidity day in the Houston kills my improvised method of applying a CA finish. It's not the humidity (as that would mean I could only do it on the two days each year it is not humid in Houston), but I have found for me at least a combination of cool weather and humidity is tough. Monty (who posted just above) lives a couple of miles from me, and his experiences may be different or the same - each person is different.
 

jttheclockman

Member
Joined
Feb 22, 2005
Messages
19,132
Location
NJ, USA.
Ok, I'm officially beaten down. CA teases me with one excellent finish, then 10 crappy ones. I've tried every variation of the CA finish, and probably some that would make you laugh. I got good results pretty regularly for a month, then crap for a month. Last night I struggled with putting a finish on 2 nice pieces of mesquite burl. I thought I had it right until I got some sleep and looked at them in the daylight. I'm ready to try something else. Maybe Turner's Magic. I could melt a purple crayon on the blanks and it would look better than what I got out of an hour's work last night.

You do not say what it looks like. You just say it looks bad. What does bad mean??? Does it have a cloudy look, does it have ridges, Does it have wet spots??? You have to be more specific. I agree that I think too many people over think this CA finish and listen to too many people. When I started using CA I did read all the methods and followed the trials and tribulations that people were having. Then I went and tried it for myself.It took me about 3 or 4 trys and I found a method that works for me. I am not interested in any other methods now because this is what has worked for me. Skipping a step of not sanding if that is possible is not a big deal. I am not making 100 pens a day. Adding blo to the CA may be beneficial for ease of applying but not sure about what it does to the properties of CA. Is the CA now thinned to the point of its hardness is lost??? I am not a scientist so do not know and if it works for you then so be it. Finishing is such a subjective field that if you ask 100 people what their method is you have 1001 different methods.

Each piece of wood may have to be treated differently because of its characteristics. So one method may not work with all woods. An oily wood needs different method, a burl with tiny holes will need a different method so do not limit yourself. Tell us what you see and maybe someone can point you in the right direction.
 

jkeithrussell

Member
Joined
Oct 20, 2008
Messages
1,277
I'm on the Northeast side, but I'd love to get together with you some time. Spring Break next week, but maybe after that? Thanks.

I see you're in Houston - where, and maybe we can hook up and go through my imperfect method. It took me a while, too, to get it down, and like others have said "my" method is a variation of the 20,000 or so other methods. I never could get Russ Fairfield's method with the old paper sack down despite watching the video what seemed like 1,001 times.

Last night in Houston it was a little cool (at least in Pearland) and very humid with the coming rain - I chose not to turn as my experience has shown a cooler, 99% humidity day in the Houston kills my improvised method of applying a CA finish. It's not the humidity (as that would mean I could only do it on the two days each year it is not humid in Houston), but I have found for me at least a combination of cool weather and humidity is tough. Monty (who posted just above) lives a couple of miles from me, and his experiences may be different or the same - each person is different.
 

jkeithrussell

Member
Joined
Oct 20, 2008
Messages
1,277
John,

My post was more of a general rant. I have 2 main recurring problems with CA, and several smaller gripes about the process. The main problems are (1) circular scratches and/or (2) the CA does not adhere to the wood either at all or not on certain spots (spotty or patchy looking). The gripes are (1) it takes forever, (2) it makes a mess, (3) CA is expensive, and (4) it is fickle (weather, type of wood, method of application, whether you breathe through your noise or mouth, etc.).

I've had stretches where it has worked well for me. Just not lately.

Thanks for all the input. I'm going to take a break for a few days and get in a better frame of mind before I take the advice you have all given and start again. In the past couple of weeks I have goofed a bunch of pens and I think I'm just trying to do too much, too fast.
 

jttheclockman

Member
Joined
Feb 22, 2005
Messages
19,132
Location
NJ, USA.
John,

My post was more of a general rant.
Thanks for all the input. I'm going to take a break for a few days and get in a better frame of mind before I take the advice you have all given and start again. In the past couple of weeks I have goofed a bunch of pens and I think I'm just trying to do too much, too fast.

OK. ranting is good. Rant away. Some people like chanting after the ranting.
 

Monty

Group Buy Coordinator
Joined
Mar 4, 2005
Messages
8,355
Location
Pearland, Texas, USA.
Keith,
First off, if you can, try attending the Greater Houston Area meeting that Dion will be hosting on Saturday April 18 in Conroe.
Second, I believe our combination of humidity and temp plays a big roll. Normally I have no problem with my CA finish. However, last year in January, I had a special order for 2 flame box elder pens. When I was making them, the temp was in the lower 50's and lower for several days. Try as I may, I just could not get the CA to look good. Luckily, the person was not in a rush for the pens, so when the temp got back in the 70's, I tried again and was successful.
IMHO, once you get a CA finish to work in a given temp and humidity range, it will work consistently in that range. If one or the other changes from the norm, you will have to modify your procedure, that's why what may work in one place may not work somewhere else.
 

workinforwood

Member
Joined
Mar 1, 2007
Messages
8,173
Location
Eaton Rapids, Michigan, USA.
John,

My post was more of a general rant. I have 2 main recurring problems with CA, and several smaller gripes about the process. The main problems are (1) circular scratches and/or (2) the CA does not adhere to the wood either at all or not on certain spots (spotty or patchy looking). The gripes are (1) it takes forever, (2) it makes a mess, (3) CA is expensive, and (4) it is fickle (weather, type of wood, method of application, whether you breathe through your noise or mouth, etc.).

I've had stretches where it has worked well for me. Just not lately.

I have a different take on the situation. I say run now while you can because CA is not the only finish and not necessarily the best finish either. I have had all your problems and more. I can mostly put on a good CA finish, but still have days it doesn't work. What steams me is I work a pen to a brilliant shine. I pack my pens, get to a show and find one or two that went funky. Then they sit in the sun and a few more go funky, cloudy or cracked finish from the heat. With certain segmentations, the CA cracks at the seams because it has no flex. BLO weakens the strength of CA, so if you use BLO the pen life is reduced and I know this from experience using pens with different finishes on the job. A straight CA finish outlives a CA BLO finish substantially. Anyhow...I bailed on CA altogether because I do not beleive anymore that it is a finish worthy of a quality pen, and it is expensive and toxic on top of that. You'll save big money over time, and you'll never have finishing problems if you simply buy yourself an air brush and some catalysed urethane, or precatalysed acrylic finish. Make a litle rotisserie to spin a rod, nothing fancy, just a slow spinning rod...heck you can buy a pre-made rotisserie from some of the hunting/fishing stores because they do similar things with finishing rod handles. you mount your blanks on the rotiserie and spray them. With a catalyse urethane, you can re-spray every 10 minutes and should only need 4 coats. In a couple hours you can sand, buff and assemble, but it is better to wait 24 hrs because the finish will be more cured, reducing your chances of damaging it by heat when buffing. Catalysed urethanes, and acrylics are a very strong finish, far stronger than laquers and typical polyurthanes. These are usually UV resistant too. Odds are good that your kitchen is finished this way, and a kitchen cabinet takes quite a beating. These finishes won't crack either, because they are flexible with wood movement. You can shine them up super bright or go for a warmer sheen..you have options..imagine that!
 

mick

Member
Joined
Mar 13, 2005
Messages
2,608
Location
Decatur AL, USA
Can you third somebody? Anyway I agree with george and Marc. It's way simplier than a lot of folks make it. Before I get slammed tho let me say if you have a CA finish that works stick with it. I don't care if you stand on one foot and hum high opera while you finish, I'm not saying anything about your method:biggrin:. Now that I've covered my lily white butt I'll say this: If you don't have a CA finish that works for you start as simply as you can. Like George said, rub some glue on a stick!
Try this it's straight CA no BLO, no DA, no accelerator, no chicken wing powder, just CA.:wink:

1.Sand your blanks to 600
2.use your choice of paper towel(I use Bounty)folded into roughly an inch
wide strip.
3.place a drop of thin CA on the end of the strip
4.with the lathe spinning at the lowest speed of whatever range you
sanded on(I never get out of the high range of my Jet.If you have a non VS you might want to switch to low, if not...:eek:) Place a small drop of CA on the end of the folded towel and apply to the blank moving back and forth only 2 or 3 times just enough to cover the blank. depending on the type wood it may feel like it wants to stick the first coat cause it's soaking in.
If it's above sub arctic in your shop it'll dry almost instantly.(My shop is heated and usually in the 60's)
5. repeat the above step as many times as you feel you need to build up a smooth even finish. On open grained woods I'll switch to medium Ca for the last 2 or so coats. I normally put on 10 coats take me all of 5 minutes.
6.After the CA has cured(I wait over night but you can hit it with accelerator, ok I lied there can be accelerator involved...lol) lightly sand beginning with whatever grit depending on how smooth you got the CA. I usually start at 400 but I've been doing this finish long enough I end up with it very smooth.
Sand only until you have a uniform hazy appearance to the blank. Sanding as high as you want and buff or polish whichever you normally do. I sand through 800 and use plastic polish while still on the blank.

I think this method works well ......for me. Once again I'm not knocking anyones finish...just pushing anyone who's finish ain't working for them toward one that possibly might work for them. Now go out there and have fun!!! Tailor this to your individual needs until it works.

If I can come up with a video cam I'll make a video and put it with the other 56,831 on you tube....lol
 

jkeithrussell

Member
Joined
Oct 20, 2008
Messages
1,277
Jeff -- do you sand and polish with MM and a buffing wheel? That sounds like an interesting procedure. I have an air compressor, but no air spray gun. Sounds like a good excuse to buy some more tools.

Thanks everyone for the tips. Really kind of everyone to offer to help (and even invitations to meetings!).

If you want a good laugh, go look at my posts where I offered up my own process for using CA as a finish. I really thought I had it!
 

Rmartin

Member
Joined
Jan 14, 2007
Messages
1,263
Location
Columbus, Ga, USA.
I turned 10 cigar pens a couple of weeks ago. Used the exact same CA/Blo method on all of them. These were mostly burl blanks and each of them took the finish differently. Most of them turned out very nice, except for 2 which would not shine evenly; no matter what I did. I like the idea of finishing the blank while it is still on the lathe, but it's messy, and inconsistant. Spraying my blanks adds an extra day, but I know what the result will be, stunning.
 

workinforwood

Member
Joined
Mar 1, 2007
Messages
8,173
Location
Eaton Rapids, Michigan, USA.
But...you could make 20 cigars instead of 10, spray them, and have 20 pens in 2 days, instead of 10 pens per day, and have 100% success rate, and a cheaper cost. It's ok to be on the CA band wagon, but it's also ok not to be.
 

leehljp

Member Liaison
Joined
Feb 6, 2005
Messages
9,326
Location
Tunica, Mississippi,
I will add my 2 yen :wink: :

"In the past couple of weeks I have goofed a bunch of pens and I think I'm just trying to do too much, too fast."


The attitude and perception (that I see) for many new to turning pens - is that the cutting, drilling, glueing and assembling, turning and shaping is 90% of the work and time. WRONG!

PLAN for the finish to take 1/3 to 1/2 of the pen making time - until experience helps you reduce the time for a consistent finish. On flat work, it can take 2 days to a week to cut and assemble a fine piece of furniture. Then it will take 2 or more weeks for the finish. Too many people in home workshops will spend a week building very nice objects and try to rush the finish by spending 2 to 6 hours on the finish. It shows, but the maker doesn't want to hear it. Same for pens. The "finish" IS the presentation of the work. The "finish" deserves from the pen maker - the attitude that it is close to half of the process, not the quick end to a means.

Until considerable experience is gained - as it concerns variations in the temp, humidity and wood type from early morning to late evening, - rushing to complete a pen only complicates things. The above variables can be controlled to some extent, but an awareness of and adjustment for them is a must.

Do what George recommended by playing with some pine blanks. I did exactly that about 2 1/2 years ago over the course of several months. I also learned what to do in high humidity days, low humidity days, cold days, cool days and warm days. It changes from situation to situation, but I learned the variables and can make a good finish in each situation. The experience was worth it. My goal during this time was never a "finished pen" but "consistent finishes". The "finished pen" was a bonus. Now I enjoy the finishing process as much as the turning.
 
Last edited:

mdburn_em

Member
Joined
Mar 16, 2006
Messages
679
Location
Chesapeake, VA, USA
Ok, here's a different type of question for you.

How thick of a finish are you putting on?

Let's say I mic'd my hardware to be .365.

I would sand my blank down to .360
Then I add CA until I mic it at somewhere between .370 and .375
Starting at 400 grit, I sand the edges off any ca swirls I might have. No valleys!
600, 800, 1200, 1500, MM 6000, 8000 and 12,000
Micro-gloss
TSW
Ren wax
done!

If temps are cool, I might have to add accelerator(to CA coats) after waiting 1 minute (or more. Don't want any bubbling.)

Oh, let me give a shout out to between centers application. (No bushings)
Final sanding is done on the mandrel.
CA is removed off the edges (before placing on the mandrel for sanding) using one of Nolan's carbide tipped cutter heads or Lee's sanding tool.
 

foamcapt40

Member
Joined
Nov 2, 2008
Messages
154
Location
Delaware, Ohio
Frustrated!

I can relate to the frustration with CA finish. I had been using "the new way" for a while with decent results. Rather than leaving well enough alone...:rolleyes: I decided to try William Young's method because I liked the idea of sealing the wood with BLO. It works for me but no matter how hard I try, I can't get a gloss to my finish. The best I can get is a Satin finish; Good for some pens but I was aiming for glossy. I'm thinking about going back to my previous method but want to keep my options open. What to do?:confused:
 

babyblues

Member
Joined
Mar 8, 2007
Messages
658
Location
Portland, ME, USA.
I didn't find the CA finish to be as complicated as all that. I would usually mess it up when I rushed it. What I don't like is that CA is so brittle. Some of the pens I made last year have cracks in the finish. Some did, some didn't, but even wood that has dried for years is going to move. As the humidity level changes, so does the moisture content of the wood. You can't prevent that. The only wood that hasn't moved on me are the stabilized burls.

I really like the idea of catalyzed urethane. I'll have to do some research on the differences between post-cat and pre-cat, but I'm definitely intrigued. I have a small hobby compressor and hobby spray gun that I bought when I made model cars. Should work just fine for me. Like Jeff said, you could make a little rotisserie pretty easy. I'm going to have to give that a try once I find a permanent job. :biggrin:
 

Kaspar

Member
Joined
Aug 1, 2006
Messages
1,363
Location
Ahead of the curve. Waaay ahead.
... In my opinion, too many people make WAY TOO BIG OF A DEAL over these CA finishes and it doesn't do anything but keep everyone confused and intimidated. I think you're listening to everyones little steps and it's just got you confused!

I'm starting to think the CA finish for a pen turner is like a Light Sabre to a Jedi Knight in Star Wars: your skills are not complete until you come up with your own.

(And that statement uses up my GEEK! quota for the year.)

It is just glue on a stick. Really, really round barrels are a good first step. Then you won't have eccentricities in your barrels creating bald spots, and clumps and everything else. A good first step toward that is well-squared, perfectly center-drilled blanks. Then you're not creating eccentricities in your mandrel just turning it to round.

And that's all I have to say about that.
 
Last edited:

marcruby

Member
Joined
Feb 22, 2008
Messages
1,175
Location
Warren, Michigan, USA.
I don't spray, although there's no reason why I couldn't. It seems to me I have an old fishing rod 'rotater' somewhere I could set up to dry multiple pens, although I'd do it differently because I'm lazy. Thanks for the idea though!!

Marc

Here is what I use for my urushi finishes. Rod dryers are the way to go if you are spraying. Set up an array of these and you won't need to worry about CA any more.

http://www.acidrod.com/images/dryer.JPG

This is the array I'm building right now.

http://www.acidrod.com/images/rdm4.jpg
 

workinforwood

Member
Joined
Mar 1, 2007
Messages
8,173
Location
Eaton Rapids, Michigan, USA.
That will be a sweeeet setup Chris. I'm not to familiar with the rod turning equipment. I am not doing production either, but with my little rotisserie shown here, I can spray a multitude of pens in a day if I want. I only have to spray 3 coats to get a good thick finish and the finish dries very fast. I can knock out 3 coats in an hour, then slide the pen off the rod onto a dowel to cure over night, then wet sand and polish just like any finish. I put newspaper under my rotator so it doesn't get all messed up. I did not build this, it was made by someone here, but I am not saying who, because I don't know that he wants a ton of customers since he is busy already. My finish is a real finish, not a glue, so it moves with the wood and I've never had one fog up down the road due to heat, oil or moisture, nor does the finish ever crack from movement of the wood because the finish is super hard, yet flexible being that it is engineered to be a finish. CA is a non-flexible adhesive and nowhere on it does it recommend being used as a finish. Not saying don't use CA, I'm just saying that there are better stronger finishes than CA that require far less work, perform far better and cost a heck of a lot less. Who pays $5 for one ounce of finish!
Acrylic finishes can take some really serious abuse, that's why so many people use them on their kitchens. The are not water based finishes, nor are the pre-catalysed, but they can be called pre-catalysed, and they are cleaned up by using water. Acrylic finishes are more of a urethane finish suspended in water. Nobody really seems to know what to call them. What people do know is they are the shizbomb!
oh..one more thing. My rotiserie is an A mandrel. I bought delrin pre-drilled bushings from Joe Colazzo. I spun the bushings to look like corks. As a cork shape, they are able to hold any size pen withough needing to ever switch bushings, and no finish overlaps the pens to the bushings because of how they are made, so you don't need to cut the bushings from the pen to avoid damaging the finish. You just use a mill sander prior to assembly.
I do not wish to argue what is better, CA, or other. I'm just stating my opinion, which is part opinion, part experience and part fact.:biggrin:
 

Attachments

  • rotate 002.jpg
    rotate 002.jpg
    75.8 KB · Views: 159
  • rotate 004.jpg
    rotate 004.jpg
    68.7 KB · Views: 150

bitshird

Member
Joined
Aug 27, 2007
Messages
10,236
Location
Adamsville, TN, USA.
I will add my 2 yen :wink: :

"In the past couple of weeks I have goofed a bunch of pens and I think I'm just trying to do too much, too fast."


The attitude and perception (that I see) for many new to turning pens - is that the cutting, drilling, glueing and assembling, turning and shaping is 90% of the work and time. WRONG!

PLAN for the finish to take 1/3 to 1/2 of the pen making time - until experience helps you reduce the time for a consistent finish. On flat work, it can take 2 days to a week to cut and assemble a fine piece of furniture. Then it will take 2 or more weeks for the finish. Too many people in home workshops will spend a week building very nice objects and try to rush the finish by spending 2 to 6 hours on the finish. It shows, but the maker doesn't want to hear it. Same for pens. The "finish" IS the presentation of the work. The "finish" deserves from the pen maker - the attitude that it is close to half of the process, not the quick end to a means.

Until considerable experience is gained - as it concerns variations in the temp, humidity and wood type from early morning to late evening, - rushing to complete a pen only complicates things. The above variables can be controlled to some extent, but an awareness of and adjustment for them is a must.

Do what George recommended by playing with some pine blanks. I did exactly that about 2 1/2 years ago over the course of several months. I also learned what to do in high humidity days, low humidity days, cold days, cool days and warm days. It changes from situation to situation, but I learned the variables and can make a good finish in each situation. The experience was worth it. My goal during this time was never a "finished pen" but "consistent finishes". The "finished pen" was a bonus. Now I enjoy the finishing process as much as the turning.

Lee;
You are square on! I had almost 3 days with nothing else to do SOOOO I turned out some pens, 1 was a pen that is going to a very special friend in Texas, Nice kit Jr.Statesman sitting inside some of Nolan's Very Nice Amboyna Burl, Turning was a breeze, the wood was excellent, it cooperated beautifully, I probably spent close to an hour and a half applying CA. Then I turned a couple more trying William Young's method of BLO/CA, I did a Jr Gent is a Malle Burl also a pleasure to turn and bring to the point of applying the finish, I applied 6 coats, 4 or 5 days latter, I looked at both pens under a good lighting system (we had sunshine today) Much quicker, Now I'm faced with a problem There is a profound difference in the time, and I think overall look, Mr.Young's being the fastest, His Finnish enhances the grain or figure of the wood, But I can't get the same glass finish I can with CA.
I also did 5 sets of blanks for slimlines since I'm doing THE COUNTY'S BIGGEST ART SHOW this week end. Ok so there's only about 3 to 5 thousand visitors total to the show and it's heldl at different studios, there are 14 juried artists, exhibiting in 3 locations, These pens I spray painted with Delft Gloss Lacquer last Saturday night, I applied between 4 and 6 coats since I didn't want sags and runs, I warmed the can up in Hot water,(it was about 50 degrees out side) .
Today I started sanding and polishing them, They look GOOD, In reality, I probably spent more time on one of these silly Slimline table fodder $ 20-$25.
pens, than I did on a pen that is also trying to be part of a spiritual gift as well as a tangible personal Memento.
The Lacquer looks Very Nice, Very slight grain enhancement Real nice gloss, not like a killer CA or a 6-8 coat wipe on Polly, but that is a very time consuming finish for me, and I never got the results a few have had.
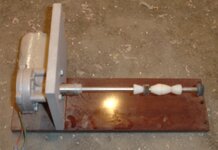
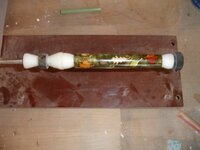
I think a multistage rod turning system would be great, I wonder if the current rod varnishes would adhere to wood that has been wiped with BLO after the oil had dried for a week or so?
I have a machine controller that can handle up to 6 servo or stepper motors , but my system board only handles 4, I think I'm going to build a single unit and see if I like it, I still want to present the best possible finish to a pen that represents my name, and I really had let some junk through, What difference does it make between a slimline and an Imperial or Emperor ?? What difference, either pen carries my name, SO I still don't think THE perfect finish for all applications has come round yet.
Exit stage Right.
 

chriselle

Member
Joined
Sep 1, 2008
Messages
1,251
Location
Ito City, Shizuoka, Japan
That will be a sweeeet setup Chris. I'm not to familiar with the rod turning equipment. I am not doing production either, but with my little rotisserie shown here, I can spray a multitude of pens in a day if I want. I only have to spray 3 coats to get a good thick finish and the finish dries very fast. I can knock out 3 coats in an hour, then slide the pen off the rod onto a dowel to cure over night, then wet sand and polish just like any finish. I put newspaper under my rotator so it doesn't get all messed up. I did not build this, it was made by someone here, but I am not saying who, because I don't know that he wants a ton of customers since he is busy already. My finish is a real finish, not a glue, so it moves with the wood and I've never had one fog up down the road due to heat, oil or moisture, nor does the finish ever crack from movement of the wood because the finish is super hard, yet flexible being that it is engineered to be a finish. CA is a non-flexible adhesive and nowhere on it does it recommend being used as a finish. Not saying don't use CA, I'm just saying that there are better stronger finishes than CA that require far less work, perform far better and cost a heck of a lot less. Who pays $5 for one ounce of finish!
Acrylic finishes can take some really serious abuse, that's why so many people use them on their kitchens. The are not water based finishes, nor are the pre-catalysed, but they can be called pre-catalysed, and they are cleaned up by using water. Acrylic finishes are more of a urethane finish suspended in water. Nobody really seems to know what to call them. What people do know is they are the shizbomb!
oh..one more thing. My rotiserie is an A mandrel. I bought delrin pre-drilled bushings from Joe Colazzo. I spun the bushings to look like corks. As a cork shape, they are able to hold any size pen withough needing to ever switch bushings, and no finish overlaps the pens to the bushings because of how they are made, so you don't need to cut the bushings from the pen to avoid damaging the finish. You just use a mill sander prior to assembly.
I do not wish to argue what is better, CA, or other. I'm just stating my opinion, which is part opinion, part experience and part fact.:biggrin:

Nice dryer Jeff. It's pretty much the same thing I have. My rods are a little longer so I can put a bunch of finished blanks on them and with the chuck I can change out the rods to sit on a drying rack after the finish has set for a few hours and won't sag. Also, the chuck is nice for swaping in and out closed end shafts. CA still is my standard "quicky" finish but I am slowly moving away from it.
 

Kaspar

Member
Joined
Aug 1, 2006
Messages
1,363
Location
Ahead of the curve. Waaay ahead.
Whatever the merits of the argument, the fact is CA is an acrylic finish since Cyanoacrylate (CA) is an acrylic resin.

As to the not-so-veiled suggestion :wink: that you give something of lesser quality and durability (Do your customers use their pens for chiseling granite?) when you give a pen with a CA finish: Time may tell differently, but I still have one of my earliest pens; it has great CA finish, and three years later, it still looks great. So for now, I don't buy it.

As I said, time may tell differently, but I use CA because I think it is best - by my definition of best. It is quicker, not too messy, and given the amounts used, the greater cost isn't all that big a deal. I love the mirror deep, high gloss "wet" shine I get with it. If I find something better, I will use it. But better means different things to different people. As Thomas Sowell has said, "there are no solutions; only trade-offs." If I had weeks to do a pen, I might familiarize myself with the longer curing finishes, and make a go of them. I do not have weeks. So I make the trade off.

Not to leave on a contentious note, these are very impressive set-ups I'm seeing, and for those who have the time to do these finishes, I think it's great. In the years to come, who knows? I may "come over from the dark side." Time will tell there, also.
 
Last edited:

Texatdurango

Member
Joined
Apr 23, 2007
Messages
4,649
Location
Show Low, Arizona
I can relate to the frustration with CA finish. I had been using "the new way" for a while with decent results. Rather than leaving well enough alone...:rolleyes: I decided to try William Young's method because I liked the idea of sealing the wood with BLO. It works for me but no matter how hard I try, I can't get a gloss to my finish. The best I can get is a Satin finish; Good for some pens but I was aiming for glossy. I'm thinking about going back to my previous method but want to keep my options open. What to do?:confused:

Don't give up! I tried the "new" method and like the results. Like yourself, I wind up with a nice satin sheen but found that a quick trip to the buffing wheel and presto... instant gloss!
 

workinforwood

Member
Joined
Mar 1, 2007
Messages
8,173
Location
Eaton Rapids, Michigan, USA.
Whatever the merits of the argument, the fact is CA is an acrylic finish since Cyanoacrylate (CA) is an acrylic resin.

Yep, there is not question about that. But, there's another way to look at it. What if I take half the windshield out of your car and stick in it's place my bathroom window. They are both glass. What side of the car do you want to sit on? :biggrin:

Nobody is going to be gouging there pen with a brick. But, one of the big draws people have to CA is it's legendary strength. I have pens that are BLO/CA, and the finish is completely warn away. I have pens that are CA only and the finish is completely intact although maybe a couple small scratches that can happen to anything. The problem I see, is that regardless how you apply it, there's too many issues that come up...CA has a high failure rate. It doesn't like to stick to oily woods, it is too strong to flex with wood movement especially in segmented pens, it does not like humidity especially humidity and heat at the same time. Some of us are CA gods perhaps and never have failures of any kind, but if you look through all the threads about CA, you'll logically see a trend where CA causes a problem. Most often the problem is in application, but some of the problems don't even show up till several months down the road. And, asside from the physical problems, there are the health issues of some, and the cost factor. All I'm getting at is there are finishes out there that can not only meet the strength factor of CA, but exceed it. The thick gloss look everyone craves can be delivered by these very same products. The cost is less. The health factor is drastically reduced, and the failure rate is near zero because the products not only adhere and soak in but they have the ability to expand. Some even offer UV protection without an ambering effect. The only real negative, is time...you can't finish a pen with other products and assemble it in an hour. I have lots of time to sit and polish a pen, because the finishing is the most important part of the project. it is what people see and feel first. At the same time, I know the finish will work before I apply it and long after, every single time.
My point...dont feel pressured that you have to use CA for the "perfect pen finish". If it works for you great. If not, explore your options.
 

limited60

Member
Joined
Feb 2, 2009
Messages
52
Yep, there is not question about that. But, there's another way to look at it. What if I take half the windshield out of your car and stick in it's place my bathroom window. They are both glass. What side of the car do you want to sit on? :biggrin:

Nobody is going to be gouging there pen with a brick. But, one of the big draws people have to CA is it's legendary strength. I have pens that are BLO/CA, and the finish is completely warn away. I have pens that are CA only and the finish is completely intact although maybe a couple small scratches that can happen to anything. The problem I see, is that regardless how you apply it, there's too many issues that come up...CA has a high failure rate. It doesn't like to stick to oily woods, it is too strong to flex with wood movement especially in segmented pens, it does not like humidity especially humidity and heat at the same time. Some of us are CA gods perhaps and never have failures of any kind, but if you look through all the threads about CA, you'll logically see a trend where CA causes a problem. Most often the problem is in application, but some of the problems don't even show up till several months down the road. And, asside from the physical problems, there are the health issues of some, and the cost factor. All I'm getting at is there are finishes out there that can not only meet the strength factor of CA, but exceed it. The thick gloss look everyone craves can be delivered by these very same products. The cost is less. The health factor is drastically reduced, and the failure rate is near zero because the products not only adhere and soak in but they have the ability to expand. Some even offer UV protection without an ambering effect. The only real negative, is time...you can't finish a pen with other products and assemble it in an hour. I have lots of time to sit and polish a pen, because the finishing is the most important part of the project. it is what people see and feel first. At the same time, I know the finish will work before I apply it and long after, every single time.
My point...dont feel pressured that you have to use CA for the "perfect pen finish". If it works for you great. If not, explore your options.

You've likely seen the video then....but this made things really easy for me. I just skip the paper bag step.

http://www.youtube.com/watch?v=ZOMHFuo13bk&feature=related
 
Joined
Dec 3, 2008
Messages
1,641
Location
Atlanta , Georgia, 30041
I don't understand why people having problems with Ca, It must be who applied it and not how. I have been using CA for about 3 years just out of the bottle( Medium) with small plastic bag or a piece of wax paper on a small block and very seldom do I have problems. I also use accelerator to speed up the drying process.
I would only put three coats on.
Sand with 220 up to 600 then go to a foam pad up to 1800, buff and I am done.
No scratches, shine is great and it last.
 
Top Bottom