Polarization and Glare

Signed-In Members Don't See This Ad

Sylvanite

Member
Joined
Jul 18, 2006
Messages
3,090
Location
Hillsborough, North Carolina, USA.
Unpolarized glare, part 1

Remember I said that whether or not a direct reflection polarizes light is dependent (in part) on the angle of reflection? Well, in my posts on "polarized glare", I placed the light at an angle that produced a polarized reflection.

In this post, however, I placed the light at a different angle -- one that produced a glare line, but such that the direct reflection is not polarized. See the four photographs below. I took them all with a polarizing filter (CPL) on the camera lens, rotated in approximately 45 degree increments.

attachment.php


Unlike my images with polarized glare, rotating the filter had little effect. The glare line is relatively unchanged in all four photographs. Even though the blank material (wood and CA glue) is non-conductive, the direct reflection at this angle is not polarized, and a polarizing filter does not eliminate it.

So, what can you do to cut unpolarized glare? Well, there are multiple approaches. Some of them are more effective than others. Some are more expensive than others. Some are simpler than others. I'll be going over a few of the options in future posts.

I hope that helps,
Eric
 

Attachments

  • UnpolarizedGlare.jpg
    UnpolarizedGlare.jpg
    38.3 KB · Views: 598
Signed-In Members Don't See This Ad

Sylvanite

Member
Joined
Jul 18, 2006
Messages
3,090
Location
Hillsborough, North Carolina, USA.
It is a fact that not all polarized sunglasses are the same.
That's just like CPL and ND filters used in photography ...they are not all of the same quality and its very noticeable in photography...

And the fact is Not everyone who makes sun glasses just use linear polarized film by its self and some sunglass producers don't use linear polarized film in there ( polarized sunglasses ) .

So what? I never said that all polarized sunglasses are the same. I never said that sunglasses were made from film. I never said that polarizing sunglasses are of the same optical quality as polarizing film sold for photography. What I said was that the polarizing sunglasses I used in my demonstration photographs ARE linear polarizing filters. I even posted photographs demonstrating that fact. I also explained that the sunglasses are just the control for the experiment - not the experiment itself. If you take them out of the CFL, incandescent, and LED experiments entirely, the results don't change. Those light sources emit unpolarized light.

Why would anyone want to conduct a what is to a very accurate test not use commercial linear polarized film that is what used in photography ?
Apples to apples .......................
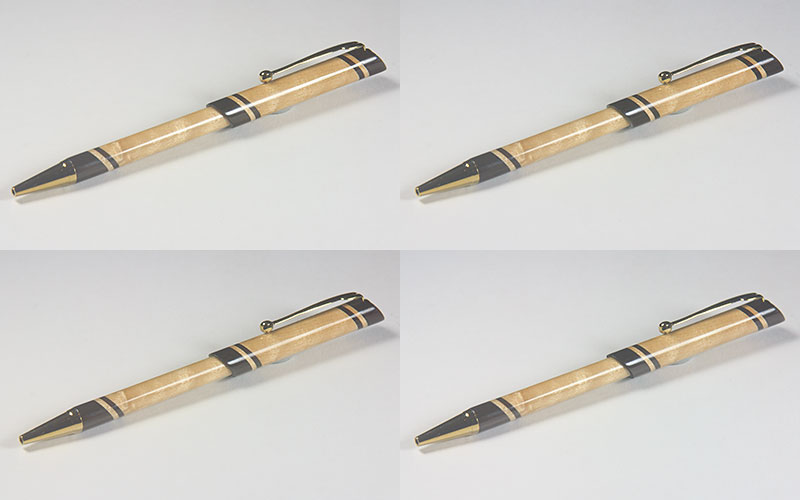
When this thread is about the reflection issues in pen photography.
Linear polarizing filters are linear polarizing filters. That is an apples-to-apples comparison. Also, I have posted photos using photographic linear polarizing filters that show the same results. Do you believe that linear polarizing lens filters are any different than your linear polarizing film? If so, how?

You started this thread teaching members about polarization ( polarized light and polarized reflection . And what its effects are in photo graphing pens,,, right ?
You went into using Linear polarized film and its effects .
And you have zero experience using linear polarized film in photography.
( what is up with that ) ?

Again, I never "went into using linear polarized film". You are twisting my words. I have only spoken about linear polarization and linear polarizing filters - regardless of their construction.

And you seem very negative about using linear polarized film in photography when its used thousands of times every day by professional photographers.
Straight up, how did you come not to like using linear polarized film in photography when you have never tried it once in your life ?

I never said that linear polarizing film doesn't polarize light. I never said that polarizing filters (on the camera or on the lights) doesn't work. In fact, I just posted several photographs showing exactly how polarizing filters in either location can (in some circumstances) be used to reduce glare.

What I HAVE said is that polarization and cross-polarization are not the ONLY tools available to a photographer to reduce glare. There are other techniques that are equally as effective (and actually more effective) in studio pen photography.

You have disregard or turned a blind eye to polarization by reflection, transmission and scattering. Wiki Links
You pawned these laws off as well some times you get polarized reflection and some time you dont.
I have never read that !

Well then read further. For example: "The extent to which polarization occurs is dependent upon the angle at which the light approaches the surface and upon the material that the surface is made of. Metallic surfaces reflect light with a variety of vibrational directions; such reflected light is unpolarized. " - Physics Classroom - Polarization by Reflection - the very same text you yourself have quoted. It clearly states that polarization by reflection is dependent on:
  1. The angle of the light, and
  2. The material the surface is made of.
That is exactly what I have claimed - and posted photos to demonstrate.

I believe you twisted or took polarization by refraction out of context.

Of course I did. You claimed (based on physicsclassroom.com "polarization by refraction") that ALL refraction causes light to become polarized. I used the exact same source (physicsclassroom.com "rainbow formation") and the exact same misreading (that all refraction causes rainbows) to demonstrate (via Reductio ad absurdum) that your statement is incorrect.

And what a camera see when using natural sun light, the light is partial polarized and that has been published over and over..
We are talking photography ? and not what the human eye sees .
Because it is also a published fact that humans dont see polarized light like most or like allot of other animals.... and you can include cameras in that list.

Published by whom? Please cite your source. And really? Are you serious?

If:
  1. humans dont see polarized light
  2. I consider all light to be polarized.
  3. Then it must be true that:
  4. Humans don't see all light.
Do you really believe that all humans are blind? I don't. By the way this is another example of Reductio ad absurdum. The logical outcome of your premise(s) is absurd, so it(they) must be untrue.

The human eye sees both polarized and unpolarized light in the visible spectrum - at least, my eyes do. I'm not an expert on the ocular anatomy of "a lot of other animals", so I can't say whether or not their eyes polarize light. Are you? A digital camera's sensor records the light that falls on it - whether polarized or unpolarized - just like the human eye. Are you really saying that cameras can see polarized glare but humans can't? Support that claim.

Regardless of what you know or you think you know you are not qualified to teach anyone about using linear polarized film in product or commercial photography ......... because you have zero experience .
Because of that and your total disregard to what i would consider the laws of polarization and i do have to thank you because i dont like learning things to debate anyone but I did learn.
4 laws that polarize light........
Polarization by
Transmission
Refraction
Reflection
Scattering.

Well, I've already said that I'm not trying to teach people how to use "linear polarized film". Just about polarization in general. I am about to make a post on "cross-polarization" though, so if I say anything untrue about "linear polarized film" there, I hope someone qualified to teach it tells me.

I've repeatedly pointed out your many misinterpretations of the physicsclassroom.com tutorials you've reposted. Most of them come from your misreading the word "CAN" as "ALWAYS DOES", which is incorrect. I've also pointed out sections you have ignored, such as the one I quoted in red above.

Your statements such as "all light is polarized", and "all light that is reflected is polarized" are in direct contradiction of the very source you quote to support your position. See the quote above for a specific example.

I am not the one "turning a blind eye".

Where are we, well I have been using linear polarized film in photography for about two years and i would expect that anyone wanting to teach people about polarization , reflection and glare and linear polarized film would have hands on experience... which you don' or at least not with LPF.

Again, I never said I have experience with "LPF", nor do I profess to teach it. I do, however, have experience dealing with polarization, reflection, and glare. Your wild claims about how everything polarizes light, and all light is polarized have convinced me that although you have been using LPF for two years, and you are getting some very nice results in your photography, you don't really understand why or how. I encourage you to find someone you trust with some real qualification (not me, and not your misreading of online sources), such as a physicist or a trained professional photographer, tell them that "all light is polarized" and that you have to use photographic polarizing film to repolarize it, and see what he says.

Or, as I've repeatedly requested, you could try these experiments out for yourself. What better way to test your understanding than by demonstrating it? If you still refuse, ok. I give up attempting to convince you to. You are in good company. After all, Aristotle used nothing but his common sense and intuition to conclude that heavy objects fall faster than light objects. That assertion served as the conventional wisdom up until Galileo decided to try it for himself and see.

I don't like using using Florescent , can i base my opinion experience ( yes )
You don't like Cross polarization technic , can you base that opinion from your own experience ??????????? NO
If you don't like fluorescent light, don't use it. But don't claim that it doesn't work. Don't claim that it's bad because it causes "polarized electromagnetic waves a.k.a. glare".

I believe that good pen photos can be taken under natural light, incandescent light, fluorescent light, LED light, and strobe light. I believe good pen photos can be taken with a light tent, with a softbox, and with discreet reflectors and diffusers. I believe good pen photos can be taken with or without polarizers (film and/or filter).

I like most of your pictures and i think you have allot of experience offering members advise using a light tent and florescent lighting.
I dont know about the rest of your photography skills or technic , but i would guess that you would do a good if not a great job.
But if you have never used linear polarized film in photography at least you should drop your bias opinion.

Thank you for the compliment. I believe you produce some very nice photos too. If I seem negative about linear polarized film, it's because I believe that good pen photographs can be taken with much less expensive setups. I won't tell the members here that they have to go buy a monolight, softbox, and polarizing film/filters when they can (with a little ingenuity) get excellent results with a homemade light tent and a few pieces of cardboard.

My goal is to teach that ingenuity so that people can improve their pen photographs without having to buy thousands of dollars of professional gear.
 
Last edited:

Sylvanite

Member
Joined
Jul 18, 2006
Messages
3,090
Location
Hillsborough, North Carolina, USA.
Unpolarized glare, part 2: cross-polarization

So, if your pen photo composition produces unpolarized glare (as in post #41), and a polarizing filter either before or after the reflection doesn't affect it (as in post #41), what can you do?

Well, there is a technique called "cross-polarization" that can still cut the glare. The trick is to use two polarizing filters -- one before and one after the reflection. That is, you put one linear polarizing filter over the light, and another on the camera lens. The photos below illustrate the effect. You can see one of the filters at the right edge. It covers the lower barrel of the pen. There is another polarizing filter on the camera lens.

attachment.php


In the top image, the two polarizing filters are aligned. That is, they are rotated so that their axes of polarization are parallel. You can see that they had no effect on the glare.

In the bottom image, I rotated the filter on the camera lens 90 degrees. Now the axes of polarization of the two filters are perpendicular. The glare on the bottom barrel is gone.

How cross-polarization works:
Remember I said that the glare (in post #41) was unpolarized? Well, what that really means is that the angle of direct reflection is one that neither polarizes, nor deploarizes the source light. Whatever polarization the source light produces is retained in the direct reflection. Because the source light (CFL with reflector in this case) is unpolarized, the glare (direct reflection) is too.

Well, by putting a linear polarizing filter over the light in this post, I've changed the pen's illumination (on the lower barrel) from unpolarized to polarized. The direct reflection (because of the angle) does not depolarize nor reorient it. Therefore, the glare is now polarized.

Because the direct reflection (glare) is polarized, a polarizing filter on the camera lens can block it out. When the two filters are oriented perpendicular to each other, the direct reflection is completely removed.

Two notes:
  1. I placed the first linear polarizing filter over the pen's lower barrel but not the upper barrel. The upper barrel is still illuminated with unpolarized light - which is why the polarizing filter on the lens did not cut the glare when rotated.
  2. The wood of the pen barrels produces diffuse (not direct) reflection. Because diffuse reflection does depolarize light, the polarizing filter over the light does not change the wood's appearance (other than acting as a neutral density filter). Again, because the diffuse reflection off the wood is unpolarized, rotating the polarizing filter on the camera lens does not cause that part of the image to darken.

In short, cross-polarization removes unpolarized direct reflection from a photo, but leaves diffuse reflection alone.

Additionally, linear polarizing filters act as neutral density filters to unpolarized light. Therefore, cross-polarization typically requires you to increase the exposure by 2 to 3 f/stops (or a 4 to 8 times longer shutter speed).

I hope that helps,
Eric
 

Attachments

  • UnpolarizedGlare_XP.jpg
    UnpolarizedGlare_XP.jpg
    59.3 KB · Views: 585

Sylvanite

Member
Joined
Jul 18, 2006
Messages
3,090
Location
Hillsborough, North Carolina, USA.
Unpolarized glare, part 3: how cross-polarization fails

Ok, thus far I've said that
  1. Glare is a form of direct reflection.
  2. Direct reflection off wood pen barrels can be polarized or unpolarized (or a mix).
  3. Polarized direct reflection can be removed via simple polarization (without affecting diffuse reflection).
  4. Unpolarized direct reflection can be removed via cross-polarization (without affecting diffuse reflection).

And, in post 43, I showed that cross-polarization is an effective technique for reducing or eliminating unpolarized glare on wood pen barrels.

That is not, however, the whole story. To take the best pen photographs, You need to understand that:
  1. Although glare is a form of direct reflection, it is not the only form. Direct reflection does not necessarily present as glare.
  2. Pens are made of more than just finished wood. They usually have at least some polished metal parts. Polished metal typically produces very little diffuse reflection. Like mirrors, they primarily yield direct reflection.
  3. If you use cross-polarization to eliminate glare on wood pen parts by removing direct reflection, you'll also eliminate the direct reflection that illuminates the metal pen parts.
Here are a couple of photographs demonstrating that effect. They show a fountain pen nib lit to show detail on its face.

attachment.php


The top photo was taken without cross-polarization. In the bottom photo, the nib is cross-polarized. You can see that the direct reflection off the nib just about disappeared. If it weren't for some reflection off the background material and a little ambient light in the studio, the nib would have turned completely black.

That is the downfall of cross-polarization in pen photography. If you use it to eliminate glare on wood or plastic parts, it will also turn your polished metal pen components dark.

Don't lose hope though. Polarization is not the only means to control glare. There are ways to light a pen that yield good illumination of wood, plastic, and metal parts and give nice specular highlights without glare. I'll be getting to them in future posts.

I hope that helps,
Eric
 

Attachments

  • DirectReflection_XP.jpg
    DirectReflection_XP.jpg
    49.9 KB · Views: 621

Sylvanite

Member
Joined
Jul 18, 2006
Messages
3,090
Location
Hillsborough, North Carolina, USA.
Eliminating glare by moving lights

Probably the easiest way to eliminate glare on pen barrels is simply to avoid it outright. Remember that in post #38 and post #39 I placed a light at a position that would yield polarized glare, and that in post #41 I placed a light such that it would produce unpolarized glare. Well, in the photo below, I moved the front light (the photos in all four posts were taken with 2 lights) to a location that did not create a glare line at all.

attachment.php


How is this possible? It's simply a matter of positioning the lights, and angling the pen so that the range of angles that exhibit glare are pointing somewhere other than into the camera lens. If you are use strobe lights, that task can require some careful thought, or some trial-and-error, but if you have continuous lighting, it's simply a matter of moving things around until the glare disappears.

Yes, it's that simple. Note, however, that although the pen blank is brightly lit with no harsh glare, the pen hardware is not. I'll present solutions to that problem in future posts.

I hope that helps,
Eric
 

Attachments

  • NoGlareByAngle.jpg
    NoGlareByAngle.jpg
    41.8 KB · Views: 831

Sylvanite

Member
Joined
Jul 18, 2006
Messages
3,090
Location
Hillsborough, North Carolina, USA.
Managing direct reflection part 1: large light

So far, you've seen that you can control glare on wood or plastic pen barrels simply by changing the position of your lights. You may also have noticed, however, that in post 45, there is still glare on the metal parts (the nosecone specifically), and that the metal components are unevenly illuminated (dark patches).

How do you fix that? Well the key is to understand that diffuse reflection (as produced by the pen barrels) scatters light across a wide range of angles, but direct reflection (off the metal components) bounces off only at the complementary angle. Here are a couple of illustrations of how the angles of direct reflection work. The first diagram depicts a point light source reflecting directly off a curved surface (such as a pen nosecone).

attachment.php


Note that the reflections off different locations go in very different directions. Now consider how direct reflection off a curved surface affects what a camera sees.

attachment.php


The reflected light that reaches the camera lens comes from widely different original angles. If you only had one point light source, that spot on the curved surface would be lit, but nothing else would be (just like the photo in post 45). To fully illuminate the curved surface, you need light coming from a very wide range of angles.

Photographers call this a "large" light. Here's an example. I replaced the two 6" diameter lights I used before with a 20"x28" softbox and two reflectors (simply pieces of white mat-board).

attachment.php


The pen is now lit from almost all the way around, either by the softbox, or by reflection off the mat-board. This is the result.

attachment.php


The barrels are still evenly illuminated (mainly diffuse reflection), and now the clip and nosecone (direct reflection) are as well. The small dark patch on the clip is reflection from the front, where the camera is. You can reduce that spot, but you can't eliminate it completely (except by editing the image later).

There still is a small amount of glare (uneven direct reflection), but that's not necessarily a bad thing. It helps give the pen a sense of shape and can show off the surface finish. The glare in this photo is subtle because the direct reflection comes from all around the pen instead of just one angle -- and therefore has much less contrast.

I'll discuss other sources of "large light" and ways to control exactly how much glare you get in a future post.

If this topic is helpful to you, please let me know. Without any feedback, I can't tell if this thread is useful, or just something taking up lots of my time.

Regards,
Eric
 

Attachments

  • CurvedReflection1.gif
    CurvedReflection1.gif
    4.4 KB · Views: 800
  • CurvedReflection2.gif
    CurvedReflection2.gif
    4.4 KB · Views: 778
  • SoftboxSetup.jpg
    SoftboxSetup.jpg
    45.9 KB · Views: 558
  • Softbox.jpg
    Softbox.jpg
    39.3 KB · Views: 502

Ironwood

Member
Joined
May 31, 2010
Messages
1,226
Location
Mackay. Australia
Eric, I appreciate the time you are putting into these posts.
The real technical stuff I am just glossing over, as I know I wont retain the info, and if I do need it later I can come back to it.
The last post ( #46 ) I have found helpful as it addresses one of the issues I have been trying to sort out at the moment.
Thank you.
 

Sylvanite

Member
Joined
Jul 18, 2006
Messages
3,090
Location
Hillsborough, North Carolina, USA.
Managing direct reflection part 2: the largest light

My previous post was about using "large" light. What exactly makes a light "large" or "small"? Well, there are two factors:
  1. the physical size of the light relative to the subject, and
  2. the distance between the light and the subject.
Relative to a pen, a 6 inch diameter studio light about 3 feet away is a relatively small light. A 24 inch softbox 1 foot away is much larger. With the small light, the pen's direct reflection was uneven and exhibited significant glare. With the softbox and a couple of reflectors, the direct reflection was even with very little glare.

That does not, however, mean you need to run out and buy a softbox. I have a couple, but I rarely use them for pen photos. There are other sources of "large light".

The cheapest one, is an overcast sky. The sun is physically very large (relative to a pen, anyway), but it is also very far away. It only illuminates an object from a small range of angles. Therefore direct sunlight is a small light source. If the sky is filled with clouds, however, and you're in a open area then that becomes a very large light indeed. All you need is a few pieces of white cardboard (or even paper) used as reflectors in order for your pen photos to be fully and evenly lit.

I don't have any illustrations for this post - I live in a wooded area and don't have much open sky. If you do, though, don't be afraid to try it out.

Regards,
Eric
 

Sylvanite

Member
Joined
Jul 18, 2006
Messages
3,090
Location
Hillsborough, North Carolina, USA.
Managing direct reflection part 3: the light tent

So far, I've mentioned two sources of "large light". One is a softbox and reflectors; the other is an overcast sky. Neither is ideal for pen photography though. You don't need to go buy expensive photo equipment nor wait for the weather to take nice pen pictures. Instead, you can buy a simple light tent - or even build one yourself quite cheaply.

A light tent is basically just a box made of translucent white material. You put your pen in the box, and point your lights at the walls. The lights illuminate the box, and the box illuminates the pen. That way, you get a "large" light for more complete direct reflection off the metal pen components. For a more complete explanation, see http://www.penturners.org/forum/f24/photography-basics-why-use-light-tent-121808/.

A light tent by itself, however, is not a cure-all. You still need to be careful with the position of your lights. The most common problem I see with photos taken in tents is putting the lights too close. Here is an example:

attachment.php


In the picture above, you can see that I've put the lights right up against the tent walls. This tends to defeat the purpose of the light tent. Remember, the idea is make a large light. When you only light a small spot on the wall, however, you still wind up with small patches of illumination - that is, small lights. You can see the effect in the pen photo below:

attachment.php


Although this may be a little better lit than with no tent at all, there is still a strong glare line and the pen hardware has large, relatively dark areas. To fix that, you need to move the lights farther away from the tent.
 

Attachments

  • LightTent1.jpg
    LightTent1.jpg
    66.6 KB · Views: 674
  • PenInTent1.jpg
    PenInTent1.jpg
    35.2 KB · Views: 748

Sylvanite

Member
Joined
Jul 18, 2006
Messages
3,090
Location
Hillsborough, North Carolina, USA.
Managing direct reflection part 4: the light tent (continued)

So you've seen what happens if you put your lights too close to your light tent walls. Now here is an illustration of placing them farther away:

attachment.php


In this demonstration, I've pulled the lights away from the tent. One is on the left, illuminating the left and rear walls. The other is on the right, illuminating the right and front walls. They're pretty far back, casting fairly even light across the entire tent.

Here is the image that even light all-around produced:

attachment.php


You can see that the pen hardware is nicely lit, and there is no glare off the wood nor metal components. The image, however, looks a little flat. Without any specular highlights, it's tough to see the shape of the pen or the quality of the finish. Remember that I said a little glare is not necessarily a bad thing? Well, this photo could use some.

One solution is to try to strike a happy medium with light placement. You can move one of the lights a little closer, so that it lights the entire tent wall, but does so unevenly. Then the brighter area will yield some shine. If you have a light tent, go ahead and experiment with light placement to see for yourself.
 

Attachments

  • LightTent2.jpg
    LightTent2.jpg
    59.7 KB · Views: 706
  • PenInTent2.jpg
    PenInTent2.jpg
    30.9 KB · Views: 719

Sylvanite

Member
Joined
Jul 18, 2006
Messages
3,090
Location
Hillsborough, North Carolina, USA.
Managing direct reflection part 5: the light tent (concluded)

In my previous post, I said you could vary the distance between the light tent and the lights to control the amount of shine/glare on your pen. This generally works, but you don't have a lot of control over the shape of the highlight. In my opinion, straight, well defined edges in the shine look better than an oblong shape. A simple way to achieve that look is to block some of the light that reaches the tent wall as shown below.

attachment.php


attachment.php


I've taped pieces of mat-board to the light tent to produce a rectangular bright spot on the wall. Photographers call this a "go-between" or "gobo" for short. The mat-board controls the shape of the highlight; the distance of the light controls the highlight's brightness.

This is the result:

attachment.php


You can see that the hardware is still nicely lit, but with better definition of the shape. The wood pen barrel has a highlight that shows off the finish without washing out the detail. It may not be perfect, but I think it's the best pen photo of this series, and I'd be happy posting it in the Show-Off-Your-Pens forum. What do you think?

That completes what I planned to say on the topic of polarization and glare, unless anybody has questions or comments. I hope it helps people improve their pen photography skills.

Regards,
Eric
 

Attachments

  • LightTent3.jpg
    LightTent3.jpg
    61.2 KB · Views: 674
  • LightTent4.jpg
    LightTent4.jpg
    58 KB · Views: 411
  • PenInTent3.jpg
    PenInTent3.jpg
    33.7 KB · Views: 676

Brian G

Member
Joined
Jul 2, 2013
Messages
1,567
Location
Bloomington, MN
Super! Thank you for showing how placement of lights affects the outcome of the photo. This is where I struggle, and now I understand why. Having these photographs of your setup gives me a baseline to start.
 
Top Bottom