DIY Lightbox

Signed-In Members Don't See This Ad

carlmorrell

Member
Joined
May 14, 2013
Messages
691
Location
Cary, NC
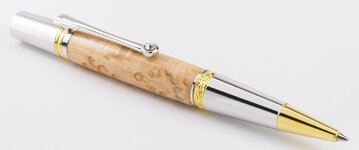
I recently received some of Micheal Shues new PrismFx blanks. This is also my first Zodiac pen. So I decided I needed to try to improve my photography skills with a lightbox. I decided on DIY, since I had a lot of parts to start with.

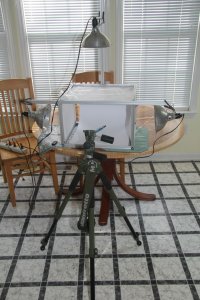
I have these extruded aluminum channels, just waiting for a purpose. I also had the light fixtures and daylight floods (4800K). I had to buy a piece of poster board, and 1/4" clear tubing to wedge the material into the channels.


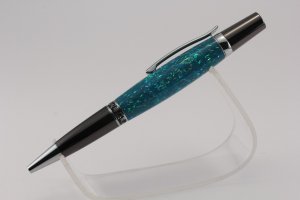
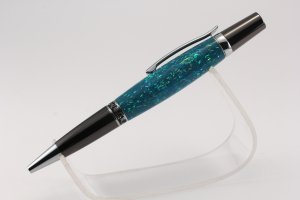
I did set the White balance manually to 4800K. I am a little disappointed that the white seems grey. The bulbs have less than a few hours on them. But they are 20 years old. Maybe I am not leaving them on long enough? The first pic is straight out of the camera. Second one, I tried to tweak on the white, but I really have no idea what I am doing.
 
Signed-In Members Don't See This Ad

plantman

Member
Joined
Jan 2, 2012
Messages
3,437
Location
Green Bay, Wi
I origenaly built a light box out of opaque white plastic myself, but found that it blocked to much light and did not highlight the details of my pens well. I have since gone to a large flat white surface and three tripod mounted lights. They are forward left, forward right, and rear. The tripods are only about a foot tall but give me enough down light that I don't need the overhead light any more. Your white looks about as white as you can get it, but your pen is not lit from the front and therefore gives no detail to your pen. I would keep the setup you have, only change the position of your lites to the front. The rear lighting is there only to take away the shadows caused by the other lites. The unfiltered lites and white card stock should give you all the detail you are looking for. Jim S
 

carlmorrell

Member
Joined
May 14, 2013
Messages
691
Location
Cary, NC
Here's a thought. I was shooting aperture priority, letting the camera determine exposure. This is not an 18% grey shot, since the shot is mostly white, the camera will underexpose. So I switched to manual, and made sure I shot about 2/3f stop over.


yaroslaw

Member
Joined
Sep 1, 2012
Messages
344
Location
Kyiv, Ukraine
Do you have on your camera "custom" white balance? With this, you make a "photo" (it is not saved usually, though) of a "grey card" (in your case - just empty box) and it adjusts WB on all consecutive photos. It is the only way in hard light conditions.

Also, if your camera shoots RAW, then do it! It is much easier to correct color balance of RAW image then JPEG (in later case - sometimes it cannot be done correctly). You should save to JPEG after all image manipulations are final.

Also, make sure you do not have mixed light - only bulbs. In your setup, I see a lot of light from outside, may be other lights? Work in a dark room, only bulbs switched on.
 

JohnGreco

Member
Joined
Dec 9, 2011
Messages
740
Location
Sewell, NJ 08080

Attachments

  • BEM MSQ 1a.jpg
    BEM MSQ 1a.jpg
    63.4 KB · Views: 212
Last edited:

edstreet

Member
Joined
Aug 12, 2007
Messages
3,684
Location
No longer confused....
Grey would be exposure. Keep in mind that that is Zone V, what your camera likes to see. The habit is to take everything and make it look like it's zone V which is very bad and this is perhaps the greatest fallacy of auto mode and the greatest reason why manual mode and center weight metering is so effective.
 

Pitoon

Member
Joined
Oct 27, 2013
Messages
381
Location
Vicenza, Italy
Bump up your EV somewhere between +1-2 that should do the trick.

....and use a remote if you have one.

Pitoon
 
Top Bottom