
edstreet
Member
Since Toni's artwork can be bought here Exotic Blanks :: Guest Artist's Blanks :: Toni's PC Artworks I chose to post them under exotic blanks vendor section as they are an exclusive offer from Exotic Blanks.
I ask Toni to make me some tubes that I can use for testing purposes. In this series we will be doing destructive testing and presentation to show various things like durability, tips, tricks and what not. So when you see damage to the tube don't worry and don't be upset as that is the fate of these tubes. They will get damaged to show various aspects and to tech that these tubes are stronger than you think they are.
This is the first in this 'series'
There are many methods to perform this step and this is just one of them. I find it is fast, easy, efficient and very effective as very little work is needed.
:Lapping:
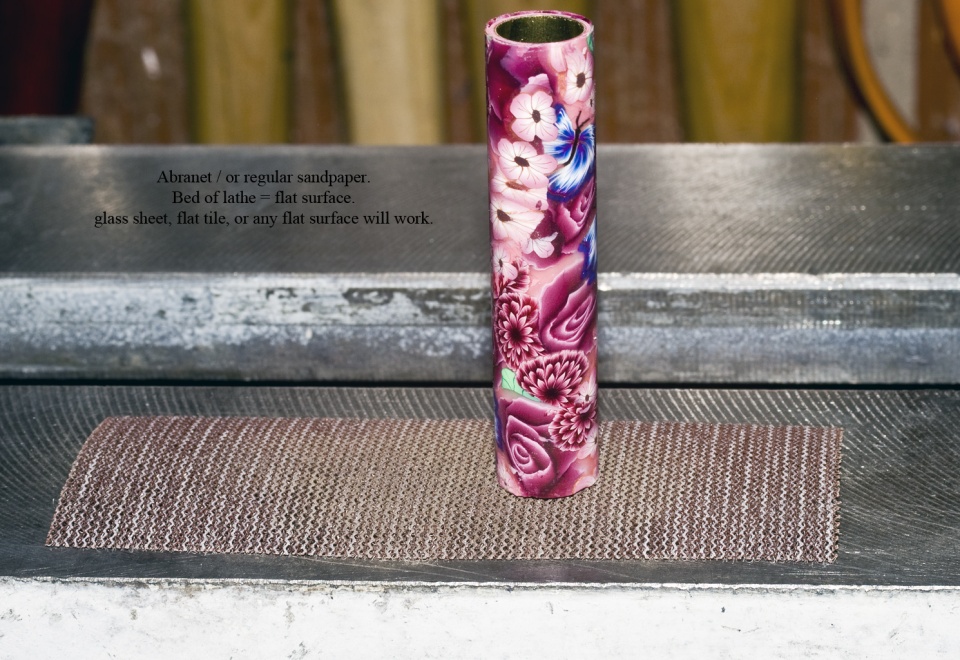
I use the bed of my lathe and abranet for this job. You can use plates of tile, ceramic tile, or any flat hard surface material. This is a reference point as any imperfections will bleed over to the lapped surface on the tube.
-------------------------
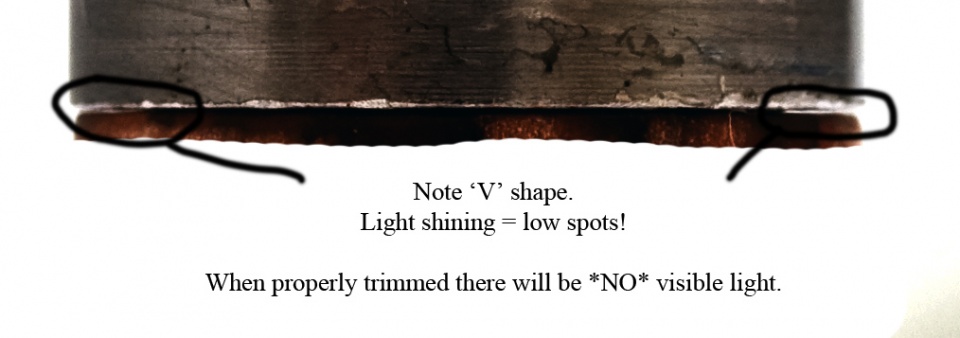
The first thing you do is put the bushing on one end of the tube. Put a light source behind the bushing/tube joint and look for cracks of light.
If you *DO* see light, and you will in most cases, this means there is a low spot. When you hold the bushing and rotate the tube the crack of light will change and you can easily find the high spots. The high spots are areas that does not show light.
-------------------------
smooth GENTLE even stroke is all that is needed. I used 1,200 grit wet/dry sandpaper.
We do not need to be fortune tellers to be able to read the sandpaper to learn what is going on.
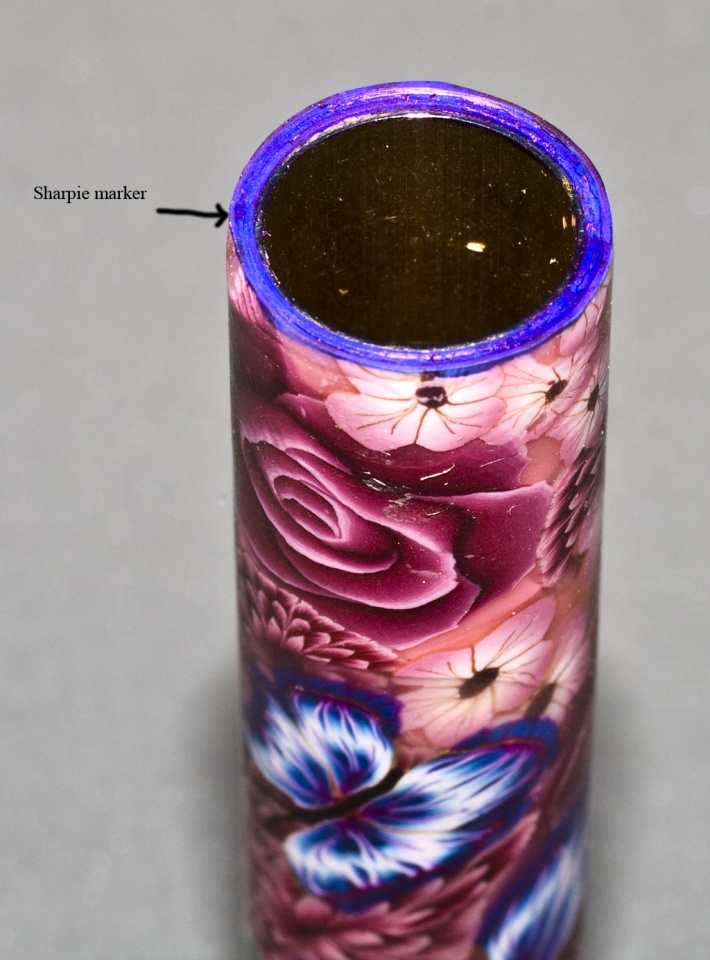
If in doubt you can break out your sharpie maker (permanent marker) and cover the end of the tube, that way you will see very clearly what is going on and where.
-------------------------
Then we do one pass on the paper and read the paper.
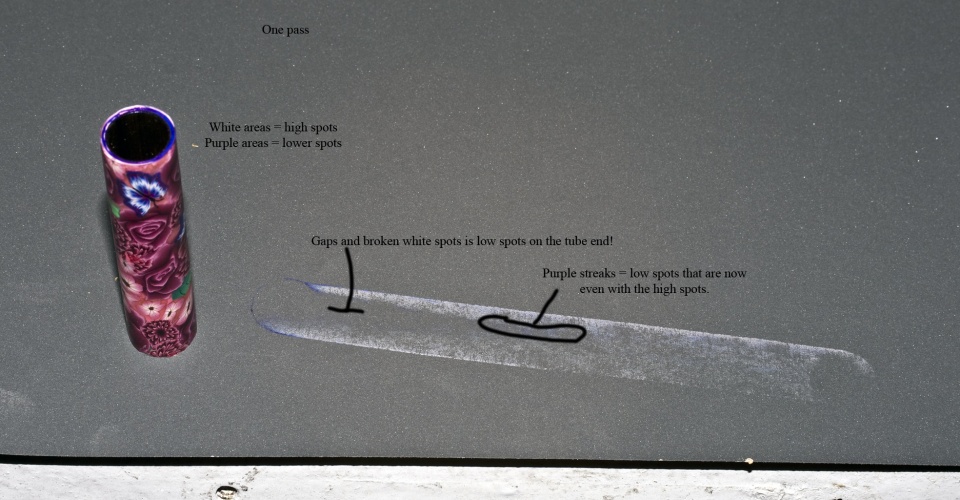
Worth noting, look on the tube, see the purple spots at 3 and 9 o'clock position. Then look at the residue marks on the paper. See the gap in the middle? That is where the purple (low) spots are on the tube.
-------------------------
Two passes.
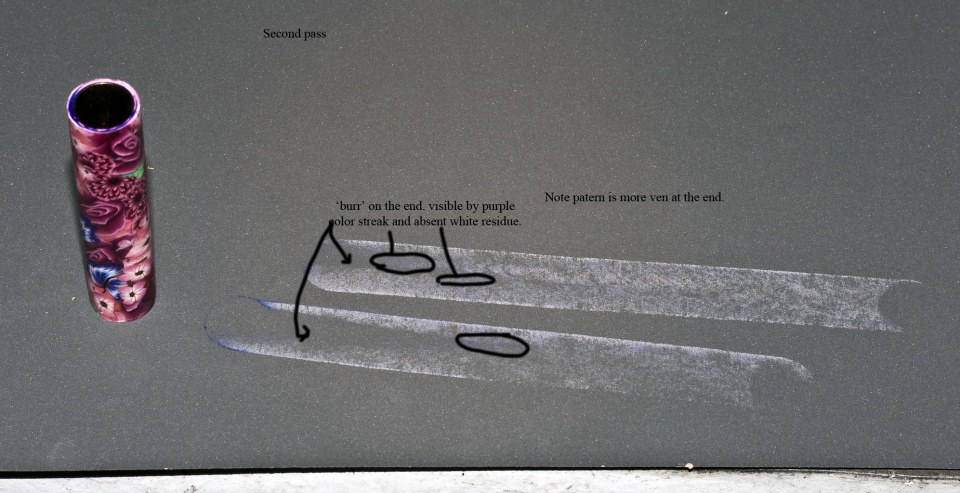
Also worth nothing it took 2 passes to remove the bulk of the low spots. the gaps we saw with 1 pass is mostly gone.
-------------------------
Three passes.
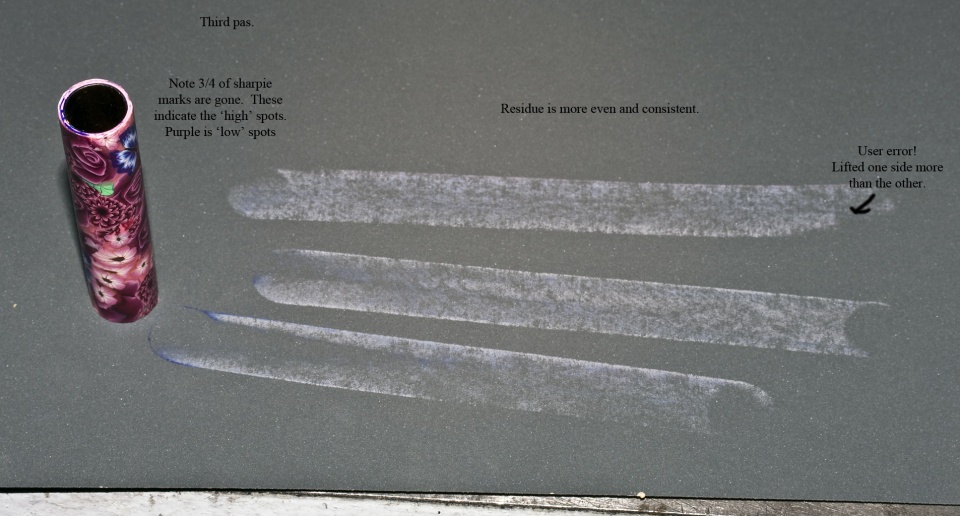
Ok technically I think we could call it at this point but there is some ever so slight low spots. So I am going to continue a few more passes.
-------------------------
........
Six passes.
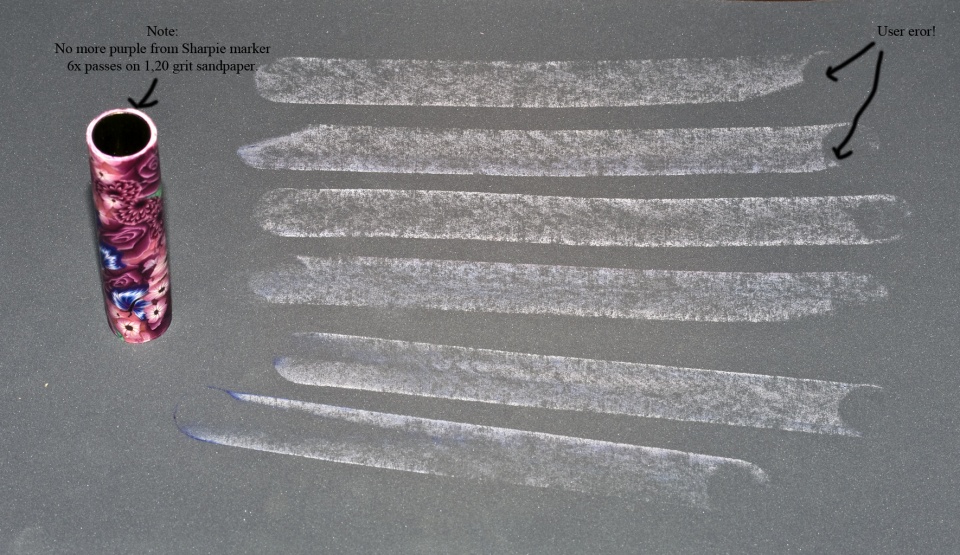
Here we clearly see it took 6 small passes on 1,200 grit sandpaper using a very LIGHT and GENTLE touch and only left to right motion to trim the end. We have NO purple remaining on the tube. The paper tells us we have smooth fluid even residue marks, no purple spots and no gaps. The only remaining thing to do is check step 1 with the bushings again to ensure there are NO low spots.
Note:
The 'user error' that is mentioned in the photo's are from the tube being uneven to the paper. In this case was when I was lifting the tube at the end. Knowing this we can see that I screwed up on pass #1, 3, 5 and 6. Since they are at the very end there is little damage but this damage does increase vastly with the more pressure you apply.
I ask Toni to make me some tubes that I can use for testing purposes. In this series we will be doing destructive testing and presentation to show various things like durability, tips, tricks and what not. So when you see damage to the tube don't worry and don't be upset as that is the fate of these tubes. They will get damaged to show various aspects and to tech that these tubes are stronger than you think they are.
This is the first in this 'series'
There are many methods to perform this step and this is just one of them. I find it is fast, easy, efficient and very effective as very little work is needed.
:Lapping:
Lapping is a method of smoothing an item by working it back and forth over an abrasive medium such as carborundum grit. The technique is used for grinding telescope mirrors, smoothing automotive engine valve faces and can be used to smooth metal parts to just about any desired level of surface finish. A convenient method of lapping in the home shop is to use wet-dry sandpaper supported on a smooth surface such as plate glass or a flat piece of 1/2 aluminum plate.
I use the bed of my lathe and abranet for this job. You can use plates of tile, ceramic tile, or any flat hard surface material. This is a reference point as any imperfections will bleed over to the lapped surface on the tube.
-------------------------
The first thing you do is put the bushing on one end of the tube. Put a light source behind the bushing/tube joint and look for cracks of light.
If you *DO* see light, and you will in most cases, this means there is a low spot. When you hold the bushing and rotate the tube the crack of light will change and you can easily find the high spots. The high spots are areas that does not show light.
-------------------------
smooth GENTLE even stroke is all that is needed. I used 1,200 grit wet/dry sandpaper.
We do not need to be fortune tellers to be able to read the sandpaper to learn what is going on.
If in doubt you can break out your sharpie maker (permanent marker) and cover the end of the tube, that way you will see very clearly what is going on and where.
-------------------------
Then we do one pass on the paper and read the paper.
Worth noting, look on the tube, see the purple spots at 3 and 9 o'clock position. Then look at the residue marks on the paper. See the gap in the middle? That is where the purple (low) spots are on the tube.
-------------------------
Two passes.
Also worth nothing it took 2 passes to remove the bulk of the low spots. the gaps we saw with 1 pass is mostly gone.
-------------------------
Three passes.
Ok technically I think we could call it at this point but there is some ever so slight low spots. So I am going to continue a few more passes.
-------------------------
........
Six passes.
Here we clearly see it took 6 small passes on 1,200 grit sandpaper using a very LIGHT and GENTLE touch and only left to right motion to trim the end. We have NO purple remaining on the tube. The paper tells us we have smooth fluid even residue marks, no purple spots and no gaps. The only remaining thing to do is check step 1 with the bushings again to ensure there are NO low spots.
Note:
The 'user error' that is mentioned in the photo's are from the tube being uneven to the paper. In this case was when I was lifting the tube at the end. Knowing this we can see that I screwed up on pass #1, 3, 5 and 6. Since they are at the very end there is little damage but this damage does increase vastly with the more pressure you apply.


 And thank you for the last tutorial on Tonis' blanks. The first blank of hers I finished there was a major pucker factor involved as I didn't want to chip the ends. Your way makes it so much easier!
")