My CA method

Signed-In Members Don't See This Ad

yorkie

Member
Joined
Mar 2, 2009
Messages
1,116
Location
Charlotte, North Carolina
My CA method

Some of this might sound goofy or silly, but I find this just works the best; for whatever reason.

I do not use bushings of any kind for my CA, just set the blank between centers and prepare to have to scrape CA off the live and dead center.

1. When you're ready to begin, wipe DNA on the blank as it's spinning on the lathe
2. Set lathe speed to around 800 rpm's (get as close to this speed as you can)
3. First coat is with thin CA and NO accelerant. I use the blue shop towels you get from auto parts stores and fold over and over lengthwise until it is about ¾ wide, about 4 foldings. I stream the thin onto the blank right to left while and follow underneath with the tip of the now folded blue shop towel. Be sure to cut it off right after and drop into water before it starts to smoke.
4. 2nd coat is thin CA with accelerant (I know some of you guys don't use accelerant at all so either way, it won't matter)
5. Buildup 7 layers of medium CA (with or without accelerant). I put a pea size drop of medium ca on the end of the folded blue shop towel and wipe this from the bottom of the blank right to left fairly swiftly. I go back and forth several times, changing the speed in which I move my finger along the blank, and removing it, but quickly putting back onto the blank once or twice-all of this action takes about 3-4 seconds. This motion is done in order to ensure the movement pattern is altered, so the CA is not allowed to form a pattern or pool on the blank. Again, right after, cut off that piece and drop it in a bucket or bowl of water before it begins to smoke.
6. Turn up lathe to around 2,000 rpm's (faster is okay but be careful of building up heat)
7. Use Abranet 600 grit and gently (heat is your enemy with CA finishes) but swiftly sand until you don't see any shine. Don't be crazy about getting it perfect, just get it really close and watch the heat build-up. This should take about 10 seconds at the most. If you start to orange peel before 7 coats, just do this step each time until you've gotten to 7 total coats.
8. Wipe off the dust with a little BLO, nothing else! Use BLO!
9. Stream two more layers of medium CA
10. Repeat step 7
11. One more layer of medium CA and then, spin your lathe at high speed for about 5 seconds and then bring it back down to 800 rpms for about 30 seconds (no accelerant at all on this final layer).
12. Remove from the lathe and let the CA cure for a day or overnight
13. Using sandpaper, or whatever method works best for you, remove the CA that has accumulated on the tips of the blank.
14. Put several drops of CA on a piece of wax paper and tap the ends (now bare wood after removing the CA that got on the tips) in the CA and kinda rub around a little, but quickly.
15. Use a cotton bud and fine paper towel (I like the Vista paper towels) to quickly wipe off the CA from inside the tube and from pooling on the ends. It will look a little messy on the ends but that will get sanded away.
16. Use wet sanding to go all the way to 12,000 grit. I sand left to right and in a circular motion, have your lathe running as fast as it will go. Keep it wet and cool.
17. Final step is to use whatever liquid you use for the final polish and apply it once or twice. Remember to not build up heat. Go light and fast.
18. Final step is to sit back and enjoy.

Some of this sounds goofy but I find it works and solves a lot of problems of blistering, cracking, splitting and that annoying bubbling you get once you've pressed the parts together.

Let me know how it turns out, guys! Good luck.
 

Attachments

  • IMG_1484.jpg
    IMG_1484.jpg
    46.8 KB · Views: 292
  • IMG_1483.jpg
    IMG_1483.jpg
    37.1 KB · Views: 242
Signed-In Members Don't See This Ad

Dave Turner

Member
Joined
Jul 23, 2010
Messages
417
Location
Sylvania, Ohio
It's always nice to hear how others do their CA. What brand of CA glue and accelerant do you use? I think this is as important as the technique.

I do my CA similar to yours. I use Bounty paper towels and run the lathe at about 150 rpm during application to prevent splatter. I don't use any BLO at all. After putting about 12 medium coats on, I sand first with 320 then 400 grit sandpaper (Norton 3x) both with the lathe running at 300 rpm (to keep heat down) and again axially with the lathe off. I then use MicroMesh wet. I used to go through all the MicroMesh stages and then polishing compound as you do. Since I got my buffer, I only use the Green 1800 (equivalent to 600 grit ANSI), Black 2400 (about 850 ANSI), and Tan 3200 (1200 ANSI) now before moving to my buffing wheels. They bring it to a higher gloss and much more quickly then I could ever get previously.
 

yorkie

Member
Joined
Mar 2, 2009
Messages
1,116
Location
Charlotte, North Carolina
I use Stick Fast CA, but I find others work just as well. I only ever use the accelerant from PSI as the mist is very fine. I spray it about 8 inches away from the barrel laterally and let the dust collector pull it over the blank.

I've never used a buffer.

It's always nice to hear how others do their CA. What brand of CA glue and accelerant do you use? I think this is as important as the technique.

I do my CA similar to yours. I use Bounty paper towels and run the lathe at about 150 rpm during application to prevent splatter. I don't use any BLO at all. After putting about 12 medium coats on, I sand first with 320 then 400 grit sandpaper (Norton 3x) both with the lathe running at 300 rpm (to keep heat down) and again axially with the lathe off. I then use MicroMesh wet. I used to go through all the MicroMesh stages and then polishing compound as you do. Since I got my buffer, I only use the Green 1800 (equivalent to 600 grit ANSI), Black 2400 (about 850 ANSI), and Tan 3200 (1200 ANSI) now before moving to my buffing wheels. They bring it to a higher gloss and much more quickly then I could ever get previously.
 
Joined
Feb 25, 2010
Messages
1,799
Location
webberville, mi
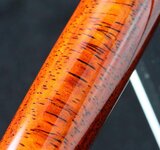
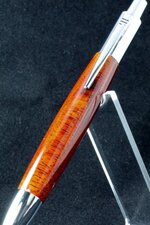
Stephen - Thansk much for sharing. Agree with Dave that it's good to read how others do their CA. Amazing (to me) how every person's way of doing it is different and there are still so many beautiful finishes (including yours - wonderful photos - Padauk?).
 

bobs pens 1

Member
Joined
Dec 24, 2012
Messages
46
Thanks so much now we can begin the tests. Going to be in the shop all week and will see how it turns out. bob
 

joefyffe

Passed Away Aug 19, 2018
In Memoriam
Joined
Mar 29, 2010
Messages
1,316
Location
Indianapolis (almost Zionsville) Indiana
My CA method

Some of this might sound goofy or silly, but I find this just works the best; for whatever reason.

I do not use bushings of any kind for my CA, just set the blank between centers and prepare to have to scrape CA off the live and dead center.

1. When you're ready to begin, wipe DNA on the blank as it's spinning on the lathe
2. Set lathe speed to around 800 rpm's (get as close to this speed as you can)
3. First coat is with thin CA and NO accelerant. I use the blue shop towels you get from auto parts stores and fold over and over lengthwise until it is about ¾ wide, about 4 foldings. I stream the thin onto the blank right to left while and follow underneath with the tip of the now folded blue shop towel. Be sure to cut it off right after and drop into water before it starts to smoke.
4. 2nd coat is thin CA with accelerant (I know some of you guys don't use accelerant at all so either way, it won't matter)
5. Buildup 7 layers of medium CA (with or without accelerant). I put a pea size drop of medium ca on the end of the folded blue shop towel and wipe this from the bottom of the blank right to left fairly swiftly. I go back and forth several times, changing the speed in which I move my finger along the blank, and removing it, but quickly putting back onto the blank once or twice-all of this action takes about 3-4 seconds. This motion is done in order to ensure the movement pattern is altered, so the CA is not allowed to form a pattern or pool on the blank. Again, right after, cut off that piece and drop it in a bucket or bowl of water before it begins to smoke.
6. Turn up lathe to around 2,000 rpm's (faster is okay but be careful of building up heat)
7. Use Abranet 600 grit and gently (heat is your enemy with CA finishes) but swiftly sand until you don't see any shine. Don't be crazy about getting it perfect, just get it really close and watch the heat build-up. This should take about 10 seconds at the most. If you start to orange peel before 7 coats, just do this step each time until you've gotten to 7 total coats.
8. Wipe off the dust with a little BLO, nothing else! Use BLO!
9. Stream two more layers of medium CA
10. Repeat step 7
11. One more layer of medium CA and then, spin your lathe at high speed for about 5 seconds and then bring it back down to 800 rpms for about 30 seconds (no accelerant at all on this final layer).
12. Remove from the lathe and let the CA cure for a day or overnight
13. Using sandpaper, or whatever method works best for you, remove the CA that has accumulated on the tips of the blank.
14. Put several drops of CA on a piece of wax paper and tap the ends (now bare wood after removing the CA that got on the tips) in the CA and kinda rub around a little, but quickly.
15. Use a cotton bud and fine paper towel (I like the Vista paper towels) to quickly wipe off the CA from inside the tube and from pooling on the ends. It will look a little messy on the ends but that will get sanded away.
16. Use wet sanding to go all the way to 12,000 grit. I sand left to right and in a circular motion, have your lathe running as fast as it will go. Keep it wet and cool.
17. Final step is to use whatever liquid you use for the final polish and apply it once or twice. Remember to not build up heat. Go light and fast.
18. Final step is to sit back and enjoy.

Some of this sounds goofy but I find it works and solves a lot of problems of blistering, cracking, splitting and that annoying bubbling you get once you've pressed the parts together.

Let me know how it turns out, guys! Good luck.
My application proceedure varies a bit from yours, but I too finish between centers. To take the ca off the centers I just set them in a little ACETONE for a few minutes and wipe the ca off.

 
Last edited:

yorkie

Member
Joined
Mar 2, 2009
Messages
1,116
Location
Charlotte, North Carolina
Thanks for the tip. I've been scraping them off and that gets messy.


My CA method

Some of this might sound goofy or silly, but I find this just works the best; for whatever reason.

I do not use bushings of any kind for my CA, just set the blank between centers and prepare to have to scrape CA off the live and dead center.

1. When you're ready to begin, wipe DNA on the blank as it's spinning on the lathe
2. Set lathe speed to around 800 rpm's (get as close to this speed as you can)
3. First coat is with thin CA and NO accelerant. I use the blue shop towels you get from auto parts stores and fold over and over lengthwise until it is about ¾ wide, about 4 foldings. I stream the thin onto the blank right to left while and follow underneath with the tip of the now folded blue shop towel. Be sure to cut it off right after and drop into water before it starts to smoke.
4. 2nd coat is thin CA with accelerant (I know some of you guys don't use accelerant at all so either way, it won't matter)
5. Buildup 7 layers of medium CA (with or without accelerant). I put a pea size drop of medium ca on the end of the folded blue shop towel and wipe this from the bottom of the blank right to left fairly swiftly. I go back and forth several times, changing the speed in which I move my finger along the blank, and removing it, but quickly putting back onto the blank once or twice-all of this action takes about 3-4 seconds. This motion is done in order to ensure the movement pattern is altered, so the CA is not allowed to form a pattern or pool on the blank. Again, right after, cut off that piece and drop it in a bucket or bowl of water before it begins to smoke.
6. Turn up lathe to around 2,000 rpm's (faster is okay but be careful of building up heat)
7. Use Abranet 600 grit and gently (heat is your enemy with CA finishes) but swiftly sand until you don't see any shine. Don't be crazy about getting it perfect, just get it really close and watch the heat build-up. This should take about 10 seconds at the most. If you start to orange peel before 7 coats, just do this step each time until you've gotten to 7 total coats.
8. Wipe off the dust with a little BLO, nothing else! Use BLO!
9. Stream two more layers of medium CA
10. Repeat step 7
11. One more layer of medium CA and then, spin your lathe at high speed for about 5 seconds and then bring it back down to 800 rpms for about 30 seconds (no accelerant at all on this final layer).
12. Remove from the lathe and let the CA cure for a day or overnight
13. Using sandpaper, or whatever method works best for you, remove the CA that has accumulated on the tips of the blank.
14. Put several drops of CA on a piece of wax paper and tap the ends (now bare wood after removing the CA that got on the tips) in the CA and kinda rub around a little, but quickly.
15. Use a cotton bud and fine paper towel (I like the Vista paper towels) to quickly wipe off the CA from inside the tube and from pooling on the ends. It will look a little messy on the ends but that will get sanded away.
16. Use wet sanding to go all the way to 12,000 grit. I sand left to right and in a circular motion, have your lathe running as fast as it will go. Keep it wet and cool.
17. Final step is to use whatever liquid you use for the final polish and apply it once or twice. Remember to not build up heat. Go light and fast.
18. Final step is to sit back and enjoy.

Some of this sounds goofy but I find it works and solves a lot of problems of blistering, cracking, splitting and that annoying bubbling you get once you've pressed the parts together.

Let me know how it turns out, guys! Good luck.
My application proceedure varies a bit from yours, but I too finish between centers. To take the ca off the centers I just set them in a little ACETONE for a few minutes and wipe the ca off.


joefyffe

Passed Away Aug 19, 2018
In Memoriam
Joined
Mar 29, 2010
Messages
1,316
Location
Indianapolis (almost Zionsville) Indiana
Steve: Acetone evaporates very quickly, as you know. I keep about 1/2 inch or so in a small can, like a bamboo shoots (I like to cook chinese) can. You could use a different kind, but just make sure it's the right size for the plastic cat food can covers you get at the grocery store. When you're not using it, keep it covered and it will last several days. Another thing I use it for is when I finish a bottle of c/a I toss the tip in the acetone. Next time I have a tip get plugged, I just swap them. Blow out the acetone, put it on the bottle and back in business!! :biggrin: hope this makes life a little simpler!:wink:

Thanks for the tip. I've been scraping them off and that gets messy.


My CA method

Some of this might sound goofy or silly, but I find this just works the best; for whatever reason.

I do not use bushings of any kind for my CA, just set the blank between centers and prepare to have to scrape CA off the live and dead center.

1. When you're ready to begin, wipe DNA on the blank as it's spinning on the lathe
2. Set lathe speed to around 800 rpm's (get as close to this speed as you can)
3. First coat is with thin CA and NO accelerant. I use the blue shop towels you get from auto parts stores and fold over and over lengthwise until it is about ¾ wide, about 4 foldings. I stream the thin onto the blank right to left while and follow underneath with the tip of the now folded blue shop towel. Be sure to cut it off right after and drop into water before it starts to smoke.
4. 2nd coat is thin CA with accelerant (I know some of you guys don't use accelerant at all so either way, it won't matter)
5. Buildup 7 layers of medium CA (with or without accelerant). I put a pea size drop of medium ca on the end of the folded blue shop towel and wipe this from the bottom of the blank right to left fairly swiftly. I go back and forth several times, changing the speed in which I move my finger along the blank, and removing it, but quickly putting back onto the blank once or twice-all of this action takes about 3-4 seconds. This motion is done in order to ensure the movement pattern is altered, so the CA is not allowed to form a pattern or pool on the blank. Again, right after, cut off that piece and drop it in a bucket or bowl of water before it begins to smoke.
6. Turn up lathe to around 2,000 rpm's (faster is okay but be careful of building up heat)
7. Use Abranet 600 grit and gently (heat is your enemy with CA finishes) but swiftly sand until you don't see any shine. Don't be crazy about getting it perfect, just get it really close and watch the heat build-up. This should take about 10 seconds at the most. If you start to orange peel before 7 coats, just do this step each time until you've gotten to 7 total coats.
8. Wipe off the dust with a little BLO, nothing else! Use BLO!
9. Stream two more layers of medium CA
10. Repeat step 7
11. One more layer of medium CA and then, spin your lathe at high speed for about 5 seconds and then bring it back down to 800 rpms for about 30 seconds (no accelerant at all on this final layer).
12. Remove from the lathe and let the CA cure for a day or overnight
13. Using sandpaper, or whatever method works best for you, remove the CA that has accumulated on the tips of the blank.
14. Put several drops of CA on a piece of wax paper and tap the ends (now bare wood after removing the CA that got on the tips) in the CA and kinda rub around a little, but quickly.
15. Use a cotton bud and fine paper towel (I like the Vista paper towels) to quickly wipe off the CA from inside the tube and from pooling on the ends. It will look a little messy on the ends but that will get sanded away.
16. Use wet sanding to go all the way to 12,000 grit. I sand left to right and in a circular motion, have your lathe running as fast as it will go. Keep it wet and cool.
17. Final step is to use whatever liquid you use for the final polish and apply it once or twice. Remember to not build up heat. Go light and fast.
18. Final step is to sit back and enjoy.

Some of this sounds goofy but I find it works and solves a lot of problems of blistering, cracking, splitting and that annoying bubbling you get once you've pressed the parts together.

Let me know how it turns out, guys! Good luck.

My application proceedure varies a bit from yours, but I too finish between centers. To take the ca off the centers I just set them in a little ACETONE for a few minutes and wipe the ca off.


RMayoIII

Member
Joined
Feb 14, 2012
Messages
211
Location
Belmont, NH
Nice write-up! Seems everyone has there own variations on the CA finish, mine too, is different. I enjoy reading all the different methods and adapting then into my own regimen, sometimes it works, other times not so much.
 

Tom T

Member
Joined
May 12, 2012
Messages
1,883
Location
Sanford Florida
Nice finish on that really sleek looking pen.
Thank you for sharing the CA finish, and thank the others for there follow up thoughts.
I hope to try CA soon.
 
Top Bottom