OK .... took the time to mock this up and made a dip pen out of it for the fun of it.
There were several mistakes I made in the making, but I'm happy with the results I got nonetheless.
I realized partway through that my initial thoughts had an error built in, and so when I got to that part I made a ballpark guess that turned out quite nicely, as you'll see.
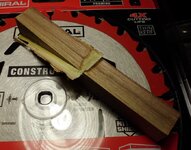
So ... to start, we need to take the solid blank and cut a diagonal from the corner of one end to the midpoint of the blank (or thereabouts)... We don't need to be exact, just reasonably close.
I started off with a squared off chunk of American Walnut, and a strip of veneer I made from this tree that grows in my yard that I still haven't identified, but it's got a light color wood so it works.
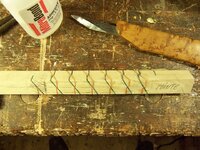
These are images of what I had so far ...
Now I had to wait for the CA to cure, so I played some Diablo 3 (this was last night, I was up all night playing, lol).
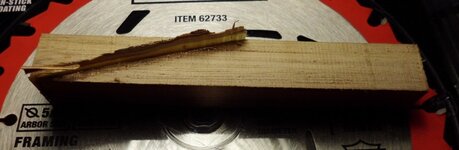
OK, a few hours and several thousand monsters and demons later, I took the blank to the bandsaw and split it right down the middle to produce 2 identical sides. I then FLIPPED one side around so that the curve that would normally have progressed back up to the top of the pen now curved down around the opposite side of the bottom of the pen. Unfortunately, I didn't get a great picture of this step, only one came out reasonably well, but you can also see that mistake I was talking about in the planning .... make sure your initial starting blank is larger than you plan on! In order for the spiral shape to meet in the center of the pen, YOU MUST OFFSET THE SIDES OF THE BLANK IN ORDER FOR THE SPIRAL TO MEET SOMEWHERE INSIDE OF THE PEN BARREL AS YOU TURN IT.

Now .... if you're wanting this part to be near the maximum finished diameter, it doesn't have to be offset by that much ... if you want it down close to the inner barrel, you'ld have to offset by a very large amount, like I did. I literally GUESSED by looking at how the slice of veneer passed through the wood and how thick I'ld like the barrel to be when finished.
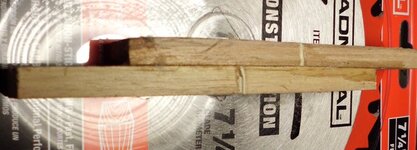
I then cut the protruding ends off both ends with my band saw and glued with CA ... went back to playing Diablo 3, and then wandered off to bed sometime around 5 AM.
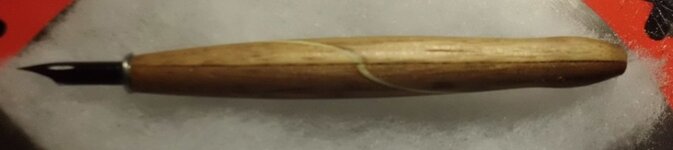
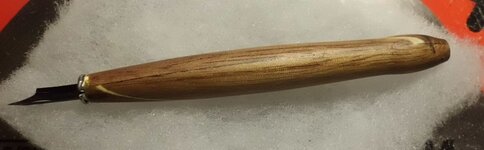
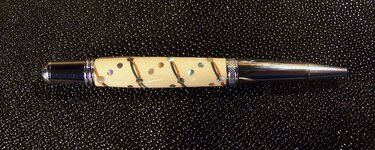
I woke up around noon, and decided to make a dip pen out of my new blank. This is my
second segmented pen. I made this merely as a proof of concept just to see if my idea for segmenting a spiral of veneer into a spindle would even work. There is a little bit of tearout near the nib, and I drilled MUCH too far into it with my 7mm drill bit, and had some tearout near the finial where the drill hole met my shaping efforts, so I filled it with some sawdust and CA.
The glue line running down the center is obvious and unavoidable, as the grain is running in opposing directions ... I think next time round I may add another strip of veneer there, like the ebony I made recently, to accentuate it rather than to hide it.
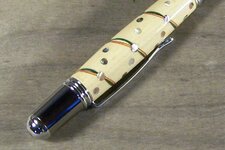
The tearout on the finial is on the reverse side of the pen ... the minor tearout near the nib is not visible in the picture, though it's a little blurry. Both of these defects are on the underside of the pen, in this much clearer picture:
Now ... if you are wanting the spiral to meet at a certain location, you'll have to plan ahead and use an oversized blank to achieve your efforts.
If you are wanting 2 spirals proceeding across from each other going halfway around the blank each, a method could include a single diagonal cut from corner to corner, applying the veneer, and flipping one side after splitting the blank by rolling it 180 degrees.
This process seems to be hit-or-miss with guessing how far to offset where the spirals will meet .... I achieved it by getting close with turning and then sanding till I was happy about how they were meeting up and the shape of the pen barrel.
I used a PSI Big Grabber closed end mandrel (my second use of it, first was also a dip pen). As this isn't really a type or style of pen that I'ld like to sell, I stopped the finishing process with BLO and 2 coats of CA ... no further sanding or polishing at all. The finish appears to be just a tiny bit rough, feeling like wood grain, and has a matte appearance. I plan to add a small cabochon on the finial or some semi-precious stone. It helped a lot to have my live center pressed up against it to keep the mandrel from wobbling out of the headstock and keep my turning true.