seht
Member
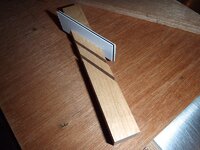
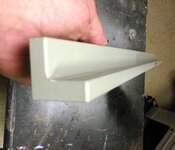
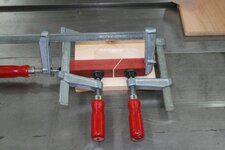
I was wondering if anybody had plans they would be willing to share for clamping and gluing up the blanks.
I have been fighting with the blanks that are cut on an angle. I'm sure I could hack something together, but I was hoping that there might be a tried and true plans out there that would look and function better than my two pieces of wood and assortment of clamps.
Thanks,
Scott
I have been fighting with the blanks that are cut on an angle. I'm sure I could hack something together, but I was hoping that there might be a tried and true plans out there that would look and function better than my two pieces of wood and assortment of clamps.
Thanks,
Scott
")